Bean Recipes
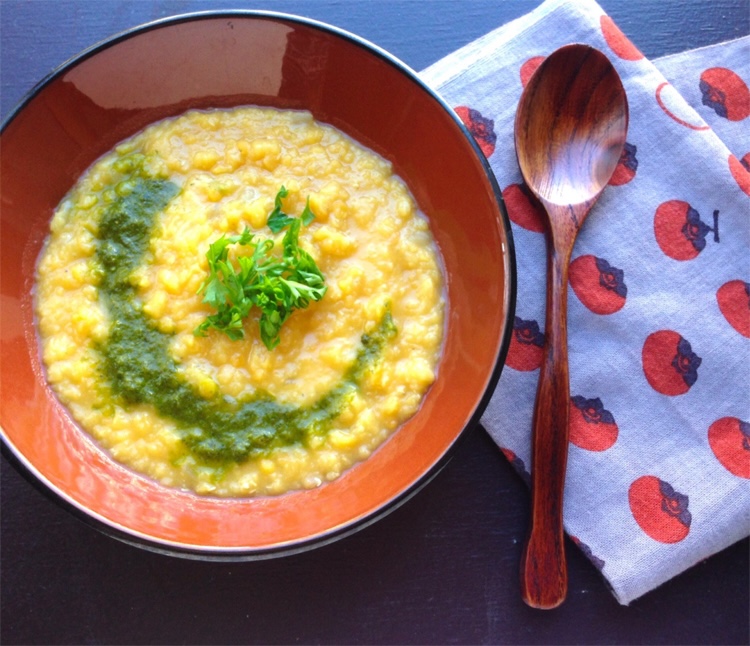
Easy Red Lentils
Easy Red Lentils
Serves 4
Ingredients:
PREP TIME:
5 minutes
COOKING TIME:
30 minutes
INGREDIENTS:
1 ½ cup red lentils
3 ¾ cup water
1 cup diced onions
2 t olive oil
¼ t sea salt
Instructions:
- Rinse and drain the red lentils and set aside.
- Place the olive oil in a pot and sauté the onions until clear.
- Add the lentils to the pot, then the water and salt.
- Bring to a boil over medium heat.
- Give the beans a gentle stir, then cover and then simmer for 25 minutes. You may need to stir occasionally so the beans do not stick to the bottom of the pot.

Ginger Baked Tofu
Ginger Baked Tofu
Serves 12 pieces, serves 4-5
Ingredients:
1 block medium firm tofu (14 ounces)
Marinade:
2-2 1/2 tablespoons tamari
1 tablespoon toasted sesame oil
2 tablespoons rice vinegar
2 tablespoons fresh ginger, minced
1 tablespoon garlic, minced
1/4 cup water
Scallions for garnish
Instructions:
- Slice tofu into 12 pieces, divide into quarters, then divide each quarter into 3 slices. Arrange slices in a single layer on a plate lined with paper towels for at least 15 minutes to get rid of excess water.
- Heat oven to 375 F.
- Make marinade by combining tamari, toasted sesame oil, rice vinegar, fresh ginger, garlic, and water.
- Place tofu slices on an 8” x 6” oven dish, then pour the marinade over.
- Marinate for 10 minutes. Bake for 15 – 20 minutes, then flip tofu slices, bake another 10 – 15 minutes until golden.
- Serve with chopped scallions on top.
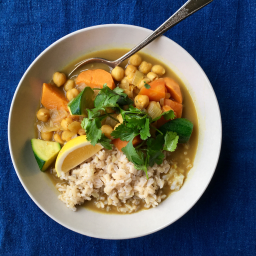
Moroccan Chickpea Stew
Moroccan Chickpea Stew
Serves 4-5
Ingredients:
1 tablespoon olive oil
1 large onion, diced (2 cups)
½ teaspoon sea salt, divided
3 cloves garlic, minced
3 cups vegetable broth or water
1 medium sweet potato, cut into bite-size pieces
1 medium carrot, cut into bite-size pieces
3 cups cooked chickpeas (or 2 15-ounce can beans, drained)
4 tablespoons oat flour
1 tablespoon tamari
1 medium zucchini, cut into bite-size pieces
Parsley or cilantro and lemon wedge for garnish
Spices:
1 teaspoon cumin powder
1 teaspoon cinnamon powder
1 teaspoon coriander powder
½ teaspoon turmeric powder
½ teaspoon ginger powder
Instructions:
- Heat olive oil in a cast iron pot. Add onions and ¼ teaspoon sea salt, and sauté onions until soft. Add garlic and all the spices and continue to sauté for a couple of minutes.
- Add vegetable broth, carrots, sweet potatoes, and bring to a boil. Cover and simmer for 20 – 25 minutes until the vegetables are soft.
- Add chickpeas, and continued to simmer for 15 minutes.
- Sprinkle 5 tablespoons of oat flour little by little and stir gently. Add ¼ teaspoon sea salt, tamari, black pepper. Adjust the flavor by adding more sea salt if needed.
- Add zucchini and simmer for 5 minutes. Garnish and serve warm over rice.
Chef’s note: If you can’t find oat flour, just grind up rolled oats in a food processor or you can substitute with 2 tablespoons of arrowroot flour diluted with 2 tablespoons of water.
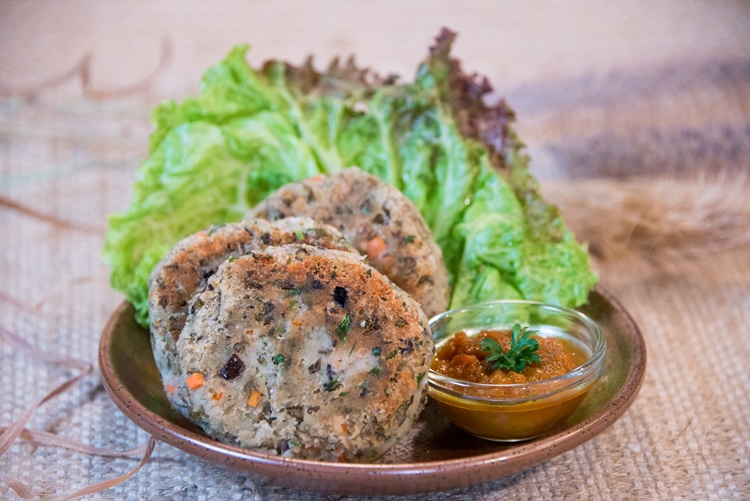
Mung Bean Patties
Mung Bean Patties
Serves 6-8 patties
Ingredients:
1 cup mung beans
3 cups water
1 inch piece kombu
½ sheet nori, torn into small pieces
1 small onion, diced
pinch of sea salt
2 small or one medium carrot, minced
¼ cup finely chopped parsley
¼ cup diced black olives
2-3 T safflower or grapeseed oil for frying the patties
½ t umeboshi paste
Instructions:
- Rinse the mung beans and place in a pot with the water, kombu, nori, onion and a pinch of sea salt.
- Cover and bring to a boil over medium heat.
- Lower heat and simmer for 1 hour.
- Let cool 30 minutes in the refrigerator or ideally overnight.
- Mix in carrots, olives, umeboshi paste and parsley and form into patties.
- Heat oil in a skillet.
- Fry 3-4 minutes on each side until brown.
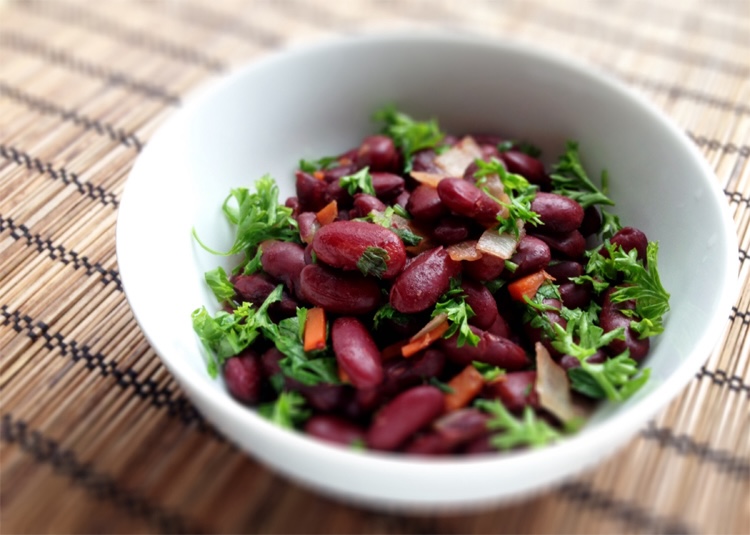
Savory Kidney Beans
Savory Kidney Beans
Serves 4-6
Ingredients:
1 cup dry kidney beans or 2 cups canned beans*
2 ½ cups water
2 inch piece of kombu
1 T sesame or olive oil
1 cup diced onions
½ cup diced carrots
¼ teaspoon sea salt
1 T shoyu or tamari
Instructions:
- If you are using dry beans, soak them overnight with 3 cups water.
- Drain the soaking water. Place the beans, water and kombu in the pressure cooker.
- Bring to a boil, skimming off any foam that arises.
- Place lid, secure it, and bring up to pressure.
- Turn flame to low and cook for 30 – 40 minutes until beans become tender.
- Remove from heat and allow pressure to come down naturally.
- In the meantime, heat oil in a large skillet over medium heat.
- Add onions and sauté until soft, approximately 2-3 minutes.
- Add carrots and sauté for 2 minutes.
- Drain kidney beans, reserving cooking water.
- Add kidney beans to the sautéed vegetables and ½ cup of the water the beans were cooked in (or tap or spring water if using canned beans).
- Bring to a boil, cover and simmer for 20 minutes, stirring occasionally. You may need to add more water if beans start to dry out.
- Add sea salt and shoyu or tamari, cover and simmer for 10 minutes.
* If using 2 cups canned kidney beans- drain the beans from the can, rinse them well, then add the beans to the sautéed
vegetables (step 11).
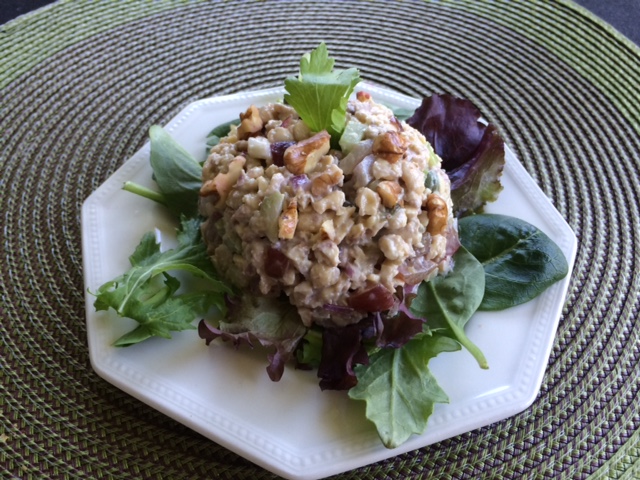
Tempeh “Tuna” Salad
Tempeh “Tuna” Salad
Serves 3 to 4
Ingredients:
This dish is great for summer and is quick, easy and gives you a complete protein when made with soy-based tempeh. I like to eat it over a bed of quinoa and lettuce and then topped with avocado slices.
Tempeh is a traditional fermented soy product originating from Indonesia. The fermentation of the beans allows for easy digestion as well as access to a high content of protein, dietary fiber and B vitamins. It has a firm texture and is usually formed into square or rectangle cakes.
When cooking tempeh it’s always best to boil it with a small piece of kombu prior to adding it to dishes. Boiling ensures that the tempeh is full cooked and will best support our bodies with easily accessible and assimilated minerals. It can then be added to other dishes or sautéed, seasoned and eaten.
Tempeh Tuna Salad
1 8-ounce package tempeh
1 inch piece of kombu
¾ T umeboshi vinegar
⅓ cup tofu mayonnaise* or veganaise
Black pepper to taste
Cumin or paprika to taste (optional)
1 celery stalk, diced
¼ red onion, finely diced
1 T capers (optional)
1-2 T toasted walnuts (optional)
2 T chopped red or green grapes (optional)
Tofu Mayonnaise
8 ounces soft tofu
4 t umeboshi vinegar
¼ t sea salt
Juice of 1 lemon
1 T organic mustard
1 T brown rice vinegar
Instructions:
Tempeh Tuna Salad
- Boil the tempeh with a 1-inch piece of kombu for 20 minutes to make it more digestible.
- Transfer to a bowl and break apart with a fork until you get smaller-than-bite-sized pieces.
- Sprinkle the umeboshi vinegar onto the tempeh, mashing it with a fork.
- Mix mayonnaise/vegainase, pepper and any other spices. Add vegetables, nuts, capers and grapes and mix everything together.
- Serve or refrigerate-it tastes even better the next day.
Tofu Mayonnaise
- Place the tofu in boiling water and let simmer for 5 minutes. Allow it to slightly cool. Place all ingredients in a food processor and blend until very smooth. Chill and use. Will last in the refrigerator in a sealed glass container for approximately 1 week.
Desserts Recipes
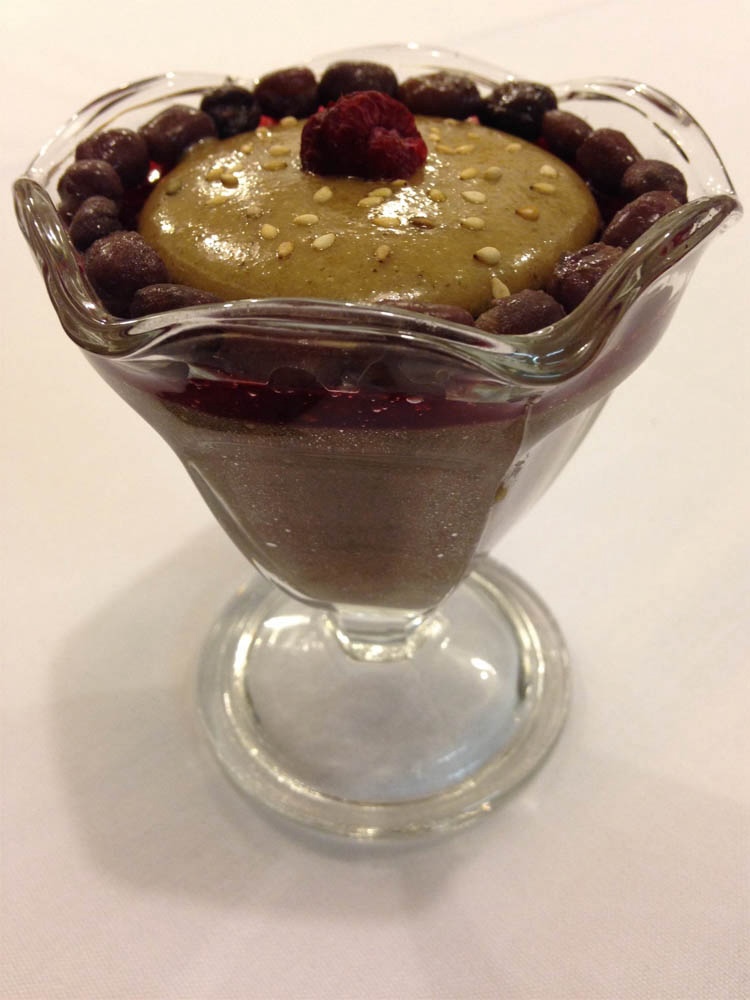
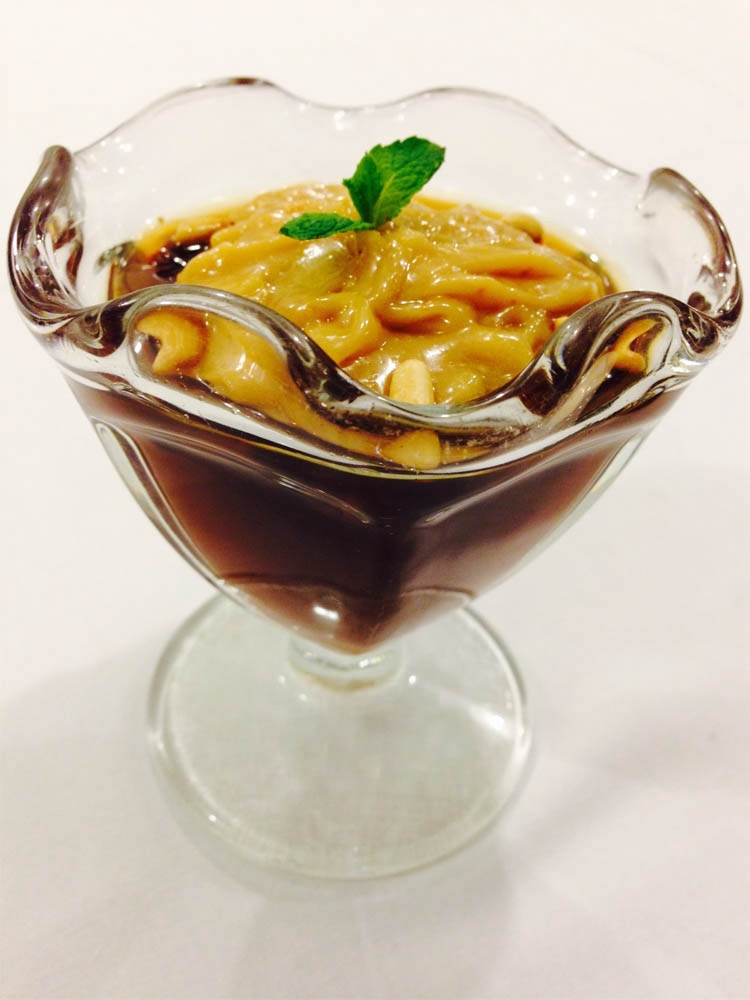
Azuki Mousse with Raspberry Kanten and Sesame Cream
Azuki Mousse with Raspberry Kanten and Sesame Cream
Serves About 6
Ingredients:
Azuki Mousse
¾ c dry azuki beans, 3 c water, 1-by-1 inch piece of kombu
or 2 c cooked azuki beans
½ c rice syrup
3 T maple syrup
1-2 T almond butter – if you like to really taste the almond butter, use 2 T
1 tsp safflower oil
¼ tsp ume vinegar
Raspberry Kanten
1 ¼ c raspberries
½ c rice syrup
⅛ t ume vinegar
1 ½ t agar agar powder
Sesame Cream
1 ¼ c toasted sesame seeds
¾ c rice syrup
¼ t ume vinegar
1-2 T water
Instructions:
Azuki Mousse
- If using dry azuki beans:
- Sort the beans.
- Wash them using a strainer so as not to lose any beans. In the pot you wish to cook the beans in the next day soak the washed beans in the water overnight.
- The next day, place the kombu in the pot and bring to a boil over a medium-high flame.
- Skim off any foam that rises to the top using an oil-skimmer.
- Cover with a lid, place a flame deflector under the pot, and simmer on a low flame for about 1.5 hours.
- When the beans are done, let them sit for five minutes before transferring to the food processor. You should have 2 c of cooked azuki beans. If you have extra beans, reserve these to use for garnish.
- Add the rest of the ingredients to the blender and blend until smooth.
- Pour into individual dessert cups and let sit for at least three hours, but preferably overnight. This allows the dessert to have a firmer consistency and for the flavors to integrate more deeply.
Raspberry Kanten
- Puree 1 c of the raspberries, the rice syrup, and the ume vinegar in a blender until smooth. Set the extra raspberries aside to use for garnish.
- Place the mixture in a small pot and sprinkle in the agar powder. Be sure to sprinkle the agar powder in gradually and while stirring constantly with a whisk, otherwise the powder will lump together and won’t dissolve.
- Bring to a boil over a medium flame while stirring constantly. The bottom burns easily, so take care to stir. Simmer for 1 minute.
- Pour over the azuki mousse.
Sesame Cream
- Wash the sesame seeds using a very fine-mesh strainer to drain them so as not to lose any seeds.
- Heat a cast-iron skillet over a medium flame. The skillet it hot enough to toast the seeds when you sprinkle in water and hear a sizzle. At this point add the seeds. Stir them constantly and evenly with a wooden paddle. To test the seeds for doneness, dip a metal spoon into them and then pull it out. If the seeds fall off the spoon, they’re done; if they stick, continue toasting. Allow the seeds to cool completely before blending them otherwise you risk turning them into sesame butter.
- Blend 1 c of the sesame seeds first before adding your other ingredients. This ensures that the seeds will get finely ground up. Set the extra ¼ c of seeds aside to use for garnish.
- Add the rice syrup, ume vinegar, 1 T of water, and blend again. Add the extra water if the mixture seems too dry. Place in a container and set in the fridge to chill.
- Once the azuki mousse and the raspberry kanten have set, either serve the dessert with a dollop of sesame cream on top or place the sesame cream in a piping bag and pipe over the kanten layer. To garnish, place a fresh raspberry on top of the cream and sprinkle with sesame seeds. If you have extra azuki beans you can also arrange these decoratively. Enjoy.
Chocolate Banana Cake
Chocolate Banana Cake
Serves 4
Ingredients:
Dry:
1 ⅔ cups rice flour
3 tablespoons arrowroot flour
3 tablespoons cocoa powder
2 teaspoons aluminum free baking powder
Wet:
4 ripe bananas, mashed well (1½ cups)
¼ cup safflower oil
1 cup soy milk or other non-dairy milk
¼ teaspoon sea salt
1 teaspoon vanilla extract
Topping
1 tablespoon coconut flakes
1 tablespoon maple syrup
1 tablespoon water
Instructions:
- Preheat oven to 350 F. and prepare a 7×7 baking pan by lining it with parchment paper.
- Place dry ingredients in a large mixing bowl. Mix well by using a whisk.
- Place wet ingredients in a medium mixing bowl. Mix well until all the liquid emulsifies.
- Pour the wet mixture into the bowl of dry ingredients. Combine them using a spatula. Don’t take too long for the mixing process as the baking powder loses its ability to raise the batter.
- Place the mixture into the baking pan. Sprinkle coconut flakes on top.
- Bake for about 30 minutes or until the dough is baked all through. To make sure if the cake is baked through, check with a bamboo skewer by poking into the middle of the cake. If the dough is not sticking the skewer, the cake is cooked through.
- In a small mixing bowl, mix maple syrup with 1 tablespoon water. Using a pastry brush, coat cake with the syrup mixture while hot.
- Place the cake on a cake cooler to let cool completely before serving.

Lemon Kanten
Lemon Kanten
Serves 4
Ingredients:
2 cups apple juice
1 cup water
4 T agar agar flakes or 4 t agar powder
2 pinches sea salt
2 T maple syrup
2 T rice syrup
½ teaspoon vanilla extract
⅓ cup fresh lemon juice
Lemon zest from one lemon (about 1 T)
Instructions:
- Combine apple juice, water and agar agar flakes in a sauce pan and bring to a boil.
- Add a pinch of sea salt and simmer until the agar agar flakes dissolve completely (approximately 5-7 minutes), stirring constantly.
- Add rice syrup and maple syrup, and stir until dissolved.
- Add vanilla extract then simmer for another minute.
- Remove from heat, add lemon juice and the zest, and mix gently.
- Pour the mixture into a Pyrex glass container. Let cool at room temperature or chill in the refrigerator until firm*.
- Serve room temperature or chilled.
* If the consistency is too firm, blend the set kanten in a food processor to make a creamy pudding.
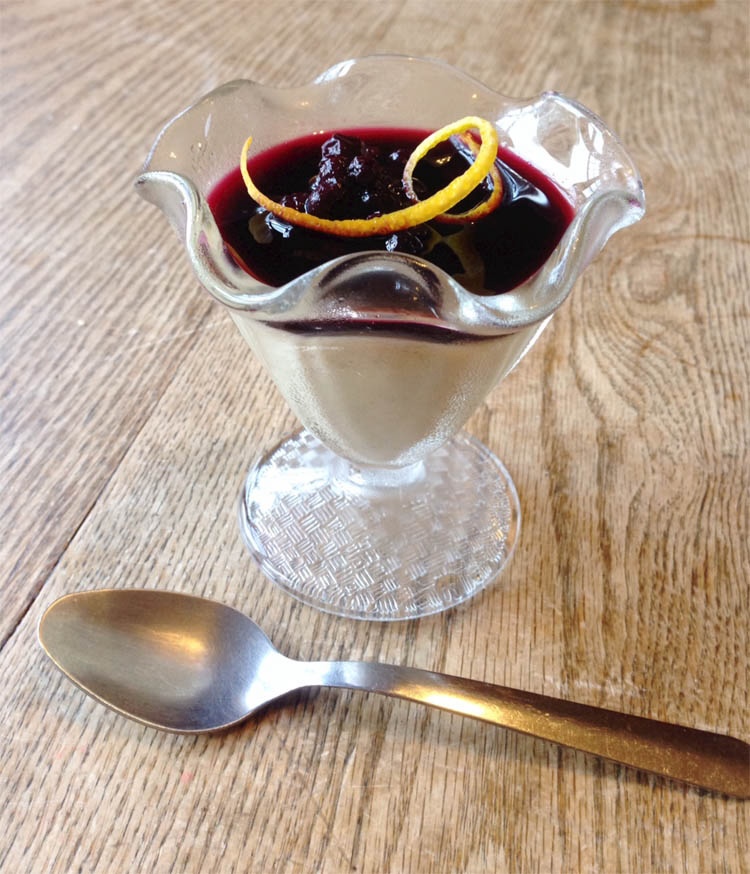
Pumpkin Seed Pudding with Blueberry Sauce
Pumpkin Seed Pudding with Blueberry Sauce
Ingredients:
Pudding
2 cups amazake
1 cup pumpkin seeds, ground fine, then blended with 1 cup of water
1 teaspoon of rice syrup (optional)
1 teaspoon of ume vinegar
2 ½ tablespoons of agar agar, soaked in 1 cup of water for 15 minutes
1 teaspoon of vanilla extract
Blueberry Sauce
1 cup blueberries
1 cup apple juice
1 T of rice syrup
1 T of kudzu, dissolved in 2 T of water
Pinch of sea salt
Dash of vanilla extract
Instructions:
Pudding
- Place agar agar with its soaking water in a saucepan. Bring to a boil and simmer until the agar agar is dissolved, approximately 5-10 minutes.
- Add amazake and ume vinegar and bring to a boil again.
- Add the blended pumpkin seeds and stir until everything becomes harmonized together.
- Place the pudding into serving glass, let it cool and refrigerate until the pudding sets. Serve with blueberry sauce.
Sauce
- Place the blueberries, apple juice, rice syrup and a pinch of sea salt in a saucepan and bring to a boil, stirring frequently to prevent burning.
- Reduce the flame and simmer for 5 minutes.
- Add dissolved kudzu and vanilla extract and continue to simmer until it thickens and continue to cook for 1-2 minutes.
Sour Cherry Kanten with Pine Nut Cream
Sour Cherry Kanten with Pine Nut Cream
Serves About 8
Ingredients:
Sour Cherry Kanten
¾ c sour dried cherries
2 c apple juice
2 c water
2 T agar agar flakes
½ c rice syrup
Pinch of sea salt
Fresh mint for garnish
Pine Nut Cream
¾ c roasted pine nuts
¼ c rice syrup
2 – 4 T soymilk
¼ T chickpea miso
Instructions:
Sour Cherry Kanten
- Place the cherries in a pot. Add the apple juice and water and soak the cherries for at least 30 minutes or even overnight.
- Add a pinch of salt and bring to a boil over a medium-high flame. Cover and simmer for 10-20 minutes, until the cherries are tender.
- Strain the cherries, pouring the liquid into a measuring cup. Set the pot aside, as you will be using it again.
- Place 1 T of cherries in each of the 8 individual dessert cups you’re using. Set the extra cherries aside to use for garnish.
- Add the rice syrup to the remaining liquid. Depending on how long you’ve soaked the cherries, what pot you use, how high the flame is, and how long you simmer them for, the amount of liquid leftover varies. You should have 4 c of liquid total. If you have less, add the balance in half parts apple juice, half parts water.
- Place the liquid back in the pot, stir in the agar agar flakes with a whisk and let soak for 10 minutes. Soaking the flakes isn’t absolutely necessary, but it helps them dissolve more easily.
- Bring the mixture to a boil, stirring occasionally. Stirring prevents the flakes from sticking to the bottom of the pot and burning.
- Simmer for 5 minutes if you’ve soaked the flakes, and 15 minutes if you haven’t soaked them, stirring occasionally. Stirring is important because it prevents the agar flakes from forming a film on the apple juice and helps the flakes dissolve. Be sure to simmer the flakes for the indicated amount of time. If not, the flakes won’t dissolve in the liquid and the kanten won’t set.
- Let the kanten set for 40 minutes inside of or 2 hours outside of the fridge.
Pine Nut Cream
- Wash the pine nuts using a very fine-mesh strainer to drain them so as not to lose any nuts.
- Heat a cast-iron skillet over a low flame. Pine nuts burn very easily, so be careful to keep the flame low. The skillet is hot enough to toast the nuts when you sprinkle in water and hear a sizzle. At this point add the nuts. Stir them constantly and evenly with a wooden paddle. The pine nuts will start to release some of their oils and become shiny. Keep toasting them until they turn a light golden brown. This could take up to 10-20 minutes if you’re working with a low flame. Allow the nuts to cool completely before blending them otherwise you risk turning them into pine nut butter.
- Blend ½ c of the nuts first before adding your other ingredients. This ensures that the nuts will get finely ground up. Set the extra ¼ c of nuts aside to use for garnish.
- Add the rice syrup, chickpea miso, and soymilk, and blend again. Add small amount of soymilk until you achieve the desired consistency. Place the cream in a container and set in the fridge to chill.
- Once the kanten has set, either scoop some pine nut cream using a small ice-cream scooper or simply dollop some cream on top. The cream is very rich and sticky, so a small amount goes a long way. To garnish, place a sprig or a leaf of fresh mint on top of the cream and arrange the extra pine nuts decoratively. Enjoy.
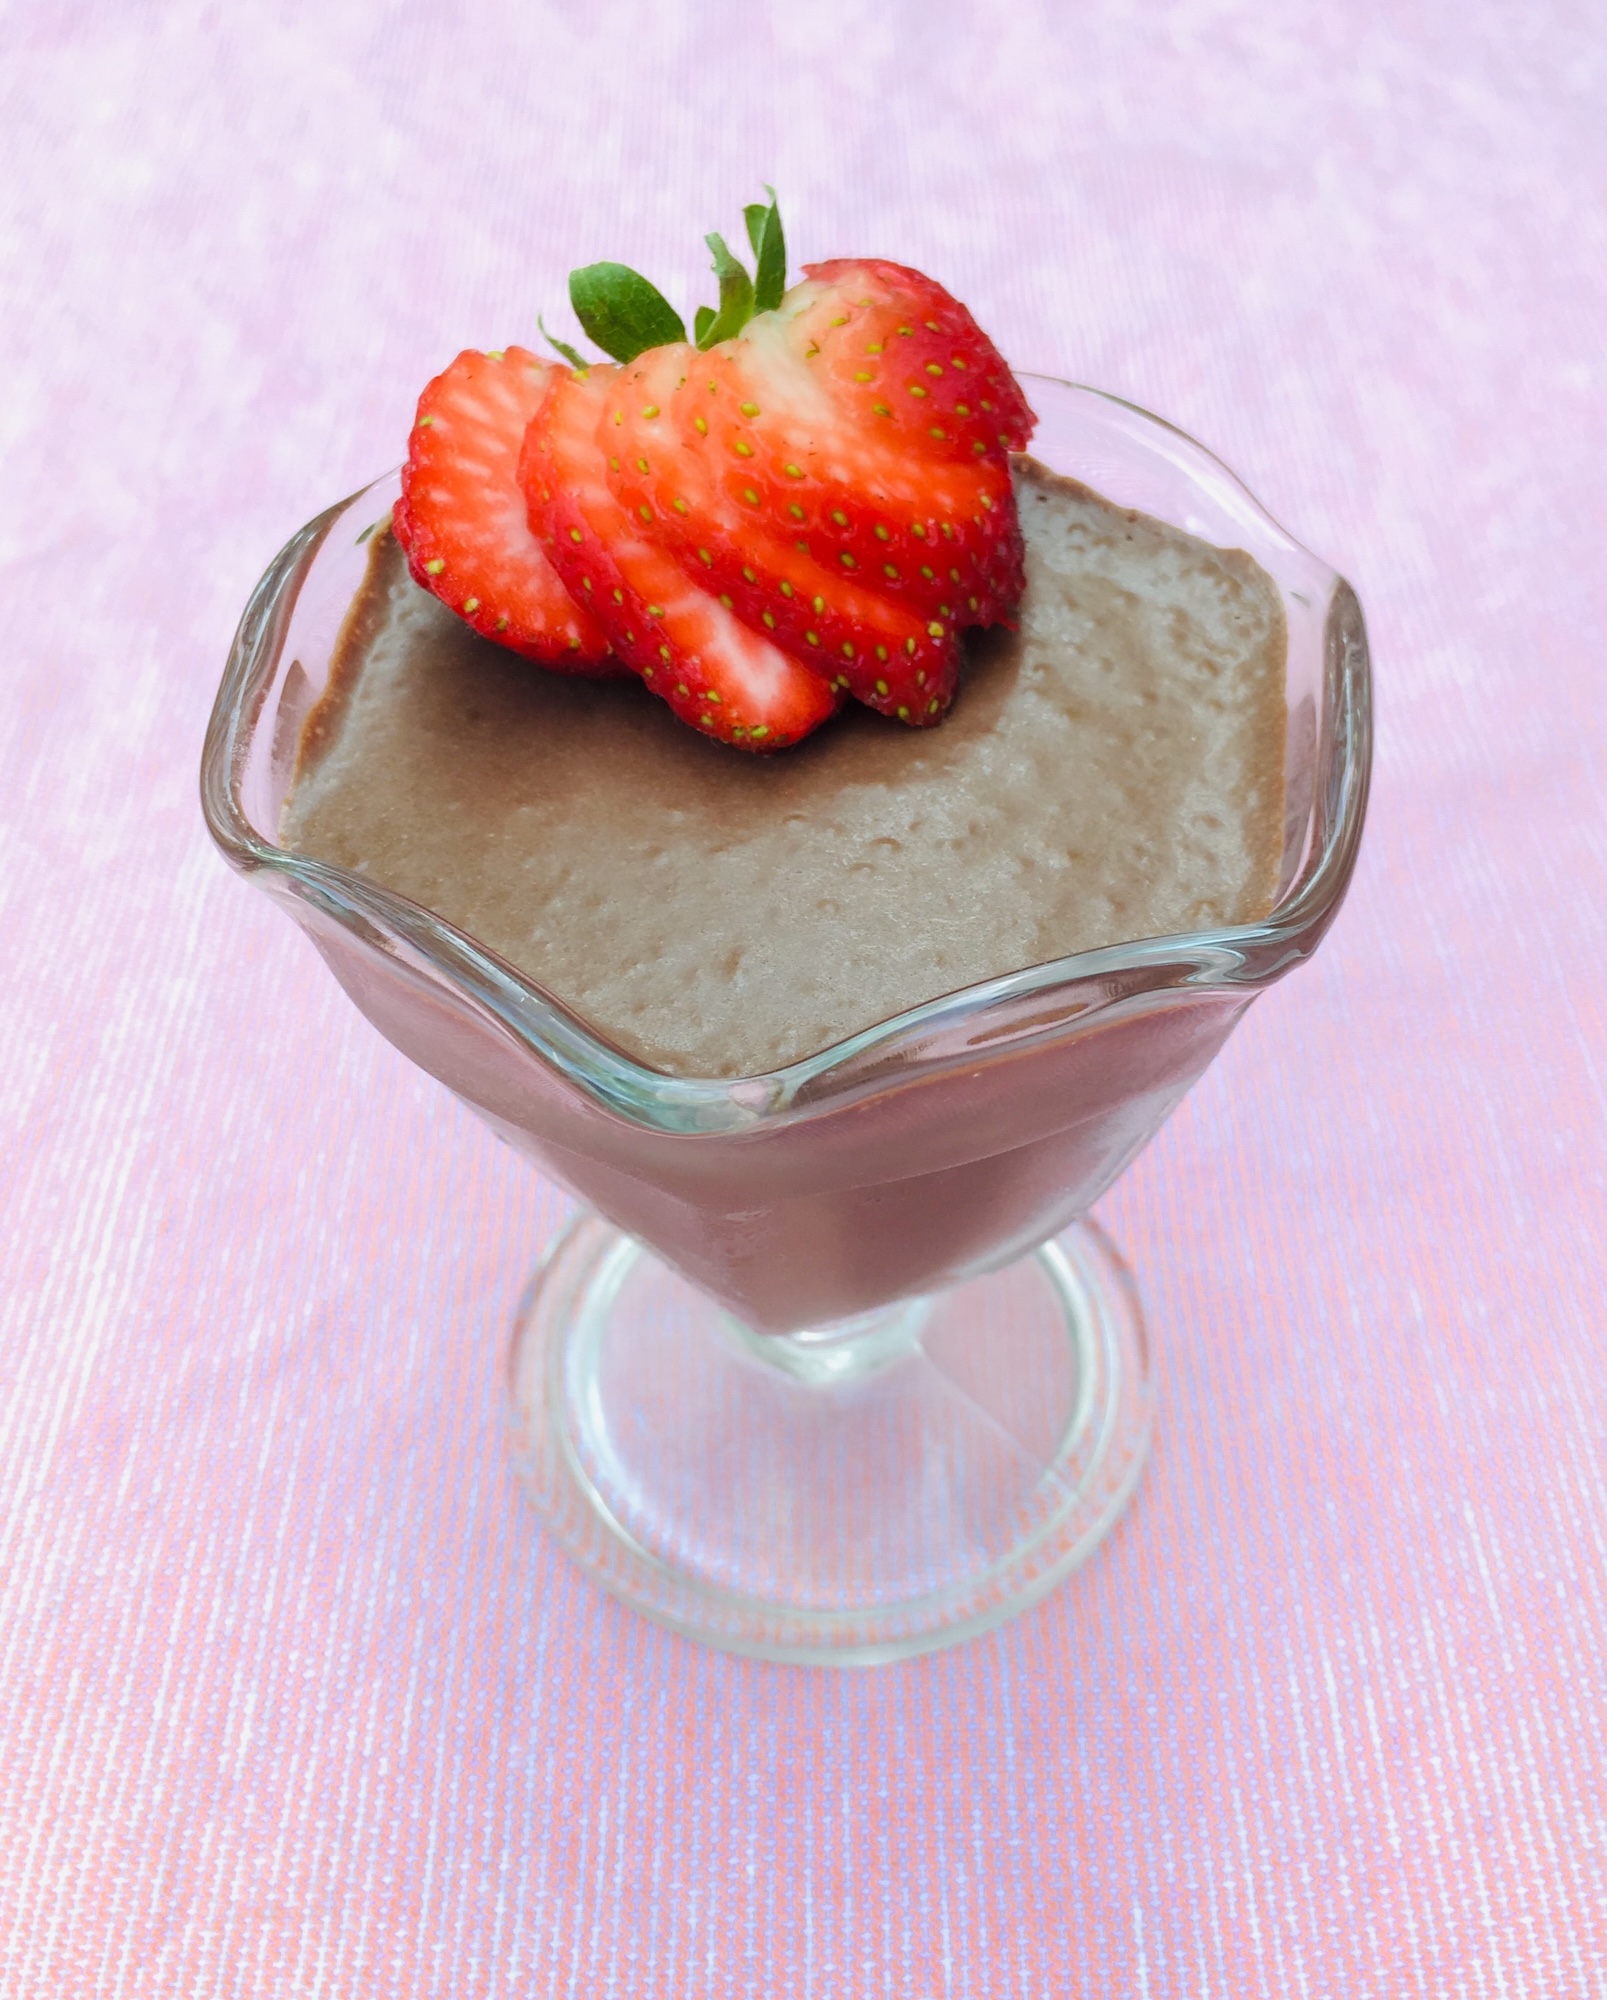
Vegan Chocolate Mousse
Vegan Chocolate Mousse
Serves 4
Ingredients:
4 tablespoons chia seeds
⅔ cup oat milk or other non dairy milk
1 can of coconut cream (13.5 fl oz)
5 tablespoons cocoa powder
3 tablespoons maple syrup, or a little more to taste
⅛ teaspoon sea salt
1 teaspoon vanilla extract
Instructions:
- Place chia seeds and oat milk in mixing bowl. Stir well with a whisk for about 20 seconds to combine. You will see the chia seeds start to swell as you stir.
- Add coconut cream and stir well to combine.
- Add other ingredients and give a nice stir until everything is thoroughly combined.
- Place the mixture into serving containers. Place in the refrigerator to set for at least 3 hours, preferably overnight.
Chef’s note
The chia seeds swell as they set the mousse, and stirring the mixture thoroughly will help this process along. The leftovers keep covered in fridge for 3-4 days, though best when fresh. Serve with desired toppings, such as strawberries, other kind of berries, or granola.
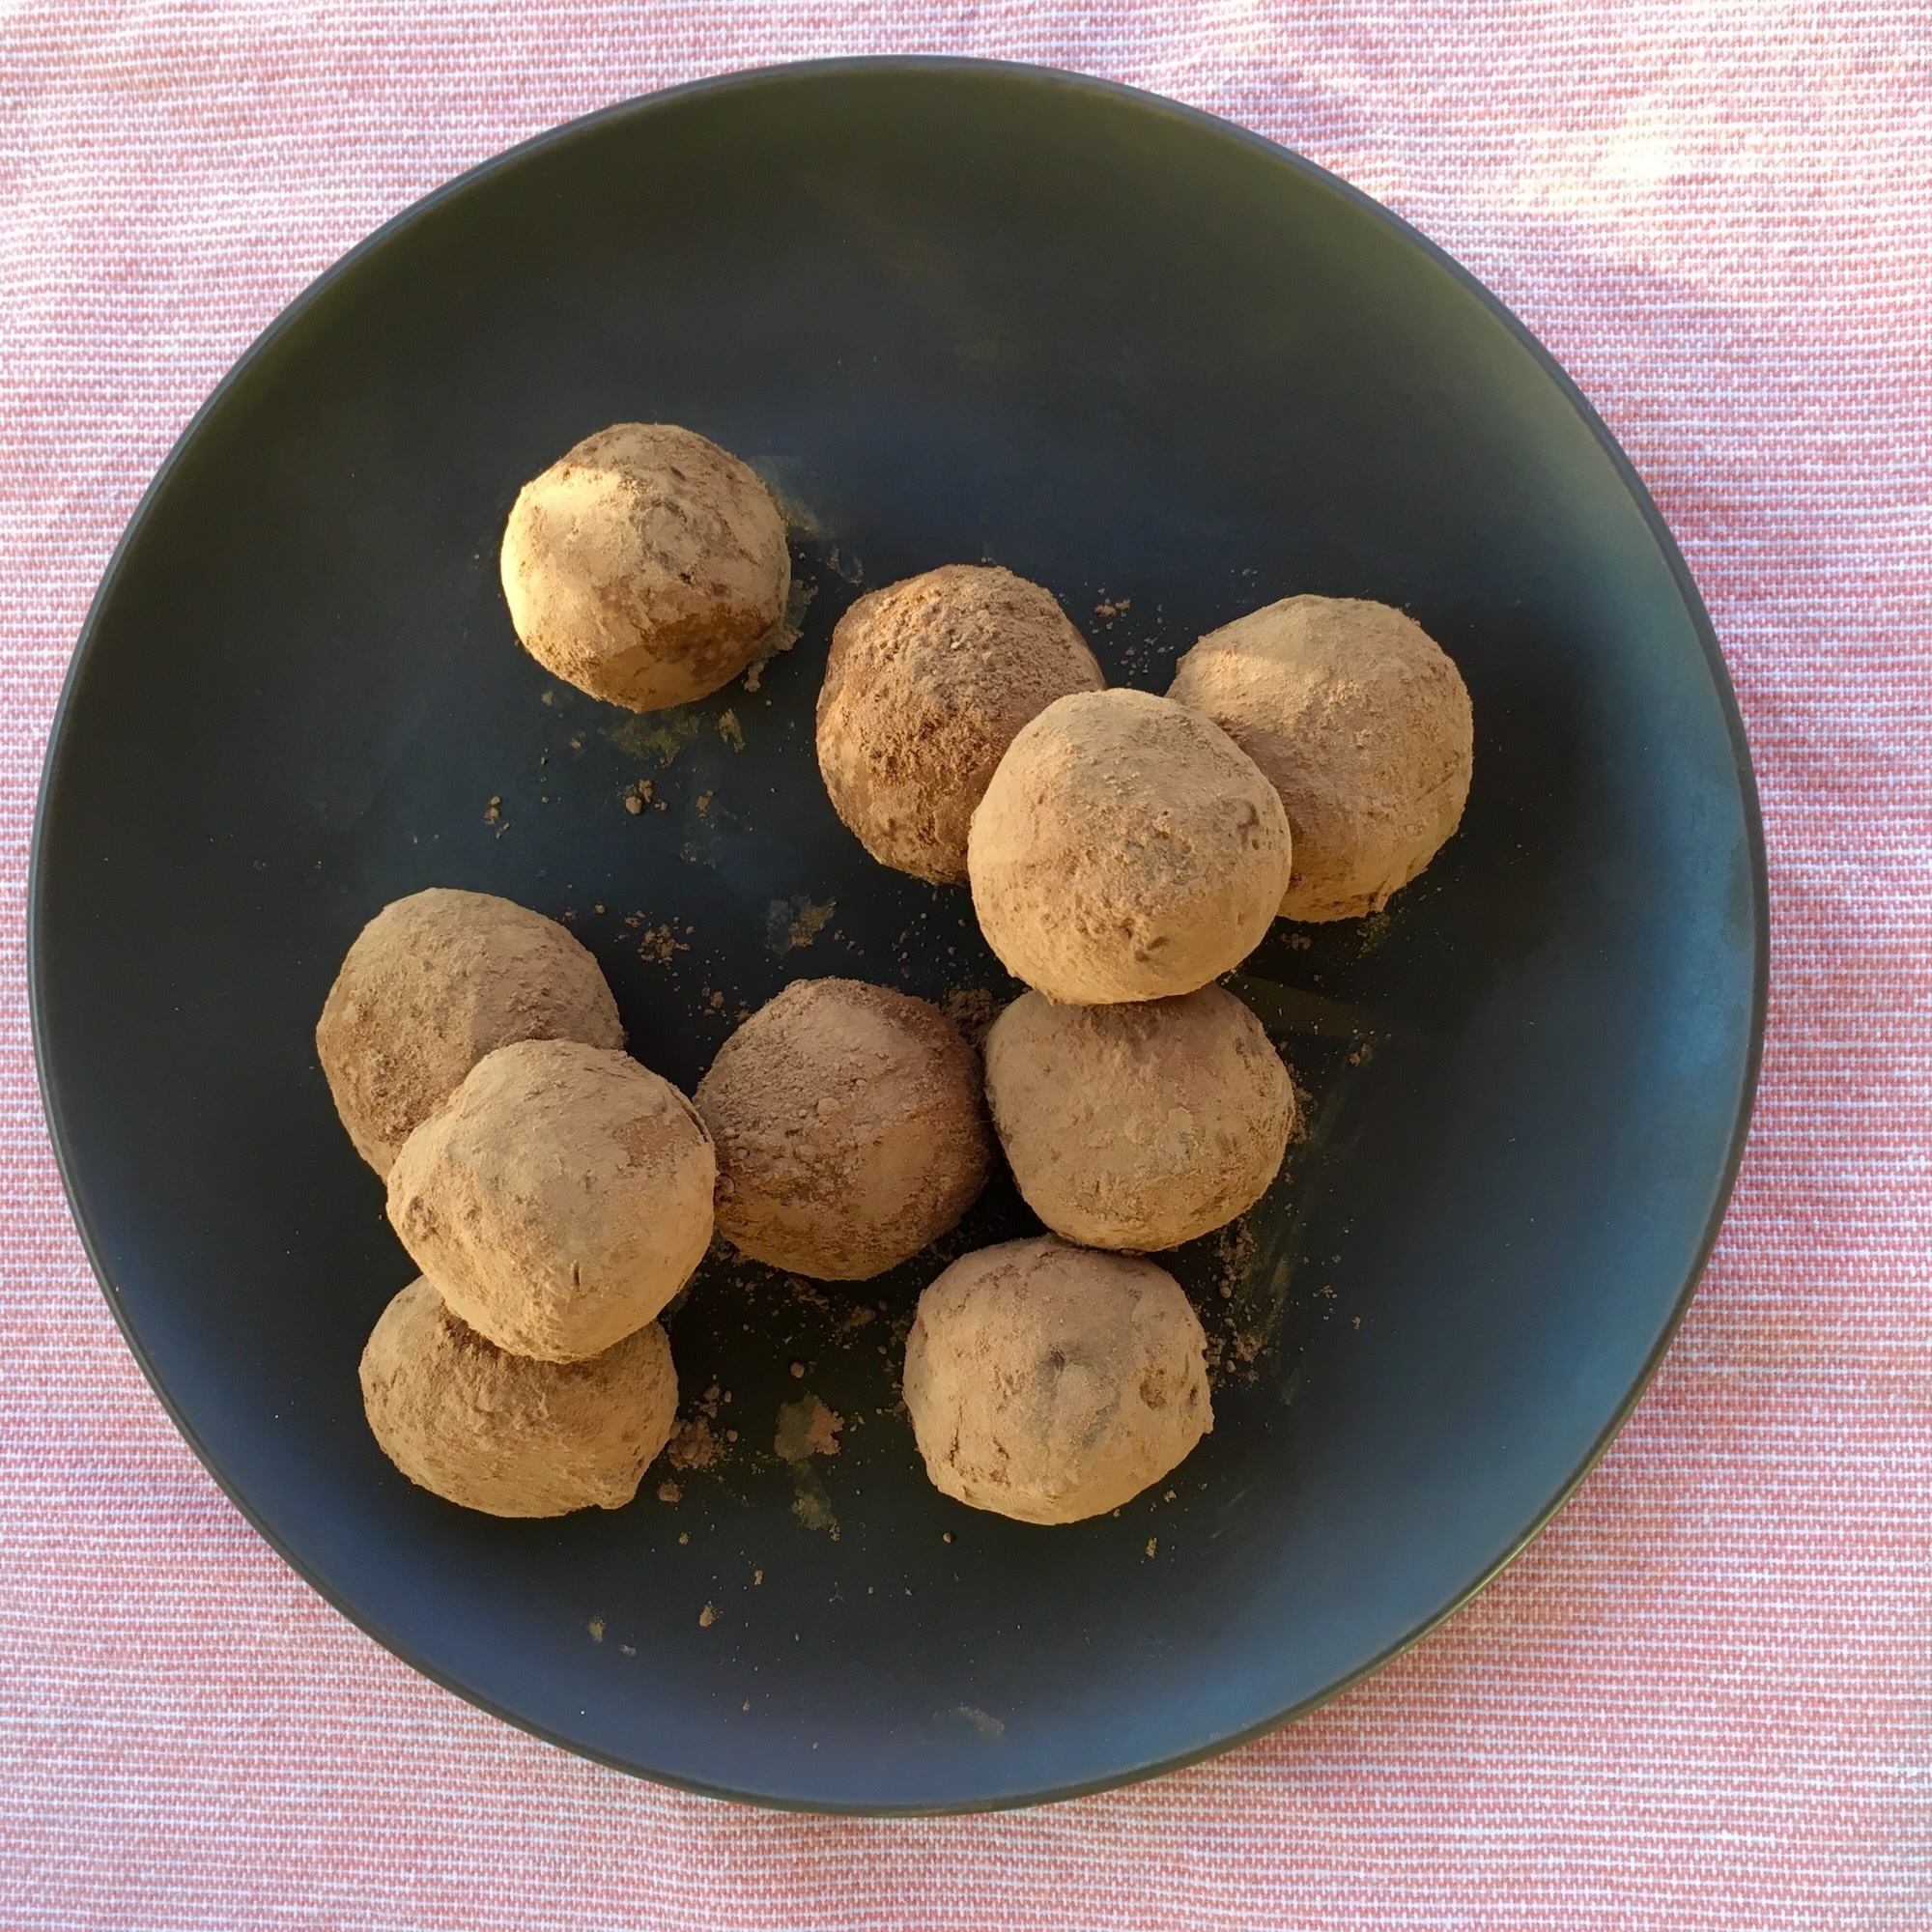
Vegan Chocolate Truffles
Vegan Chocolate Truffles
Serves 4
Ingredients:
4 ounces 100% dark chocolate, very finely chopped (I used Guittard baking chocolate, but you can use your own favorite brand of unsweetened baking chocolate)
3/4 cup or 1 can of 5.4 ounces unsweetened coconut cream
3 pinches sea salt
1/4 cup coconut sugar
1/2 teaspoon vanilla extract or orange extract for orange flavor
1/3 cup unsweetened cocoa powder for coating
Instructions:
- Place finely chopped chocolate in small mixing bowl. Set aside.
- Prepare a few ice cubes in cold water in medium bowl. Set aside.
- Place coconut cream, sea salt and coconut sugar in small saucepan and heat over medium-low heat to a gentle simmer. Stir gently, add vanilla or orange extract.
- Pour the coconut cream mixture into the chocolate bowl and cover with a lid or damp towel so that heat stays in the bowl. Do not stir yet. Let stand for 5 minutes.
- Gently stir until all ingredients meld into a smooth chocolate ganache.
- Place the bowl of chocolate ganache in the ice water bowl. Let it cool for about 20 minutes.
- Place the ganache in refrigerator for 2 to 3 hours until the mixture sets. Check by inserting a knife to see if the ganache is set all the way through.
- Scoop to make tablespoon size balls and roll each of them in cocoa powder to coat.
- Refrigerate truffles for 1 – 2 hours before serving. This will set them up firmly. Store truffles covered in refrigerator.
Chef’s Note:
- Make sure to chop or shave the chocolate into really fine pieces so that it melts easily when it comes in contact with the hot coconut cream mixture.
- Use a good quality coconut cream for the best results. I like Native Forest coconut cream. If you can find it, just use the whole small can of it.
- If you prefer a sweeter truffle, add more coconut sugar to taste.
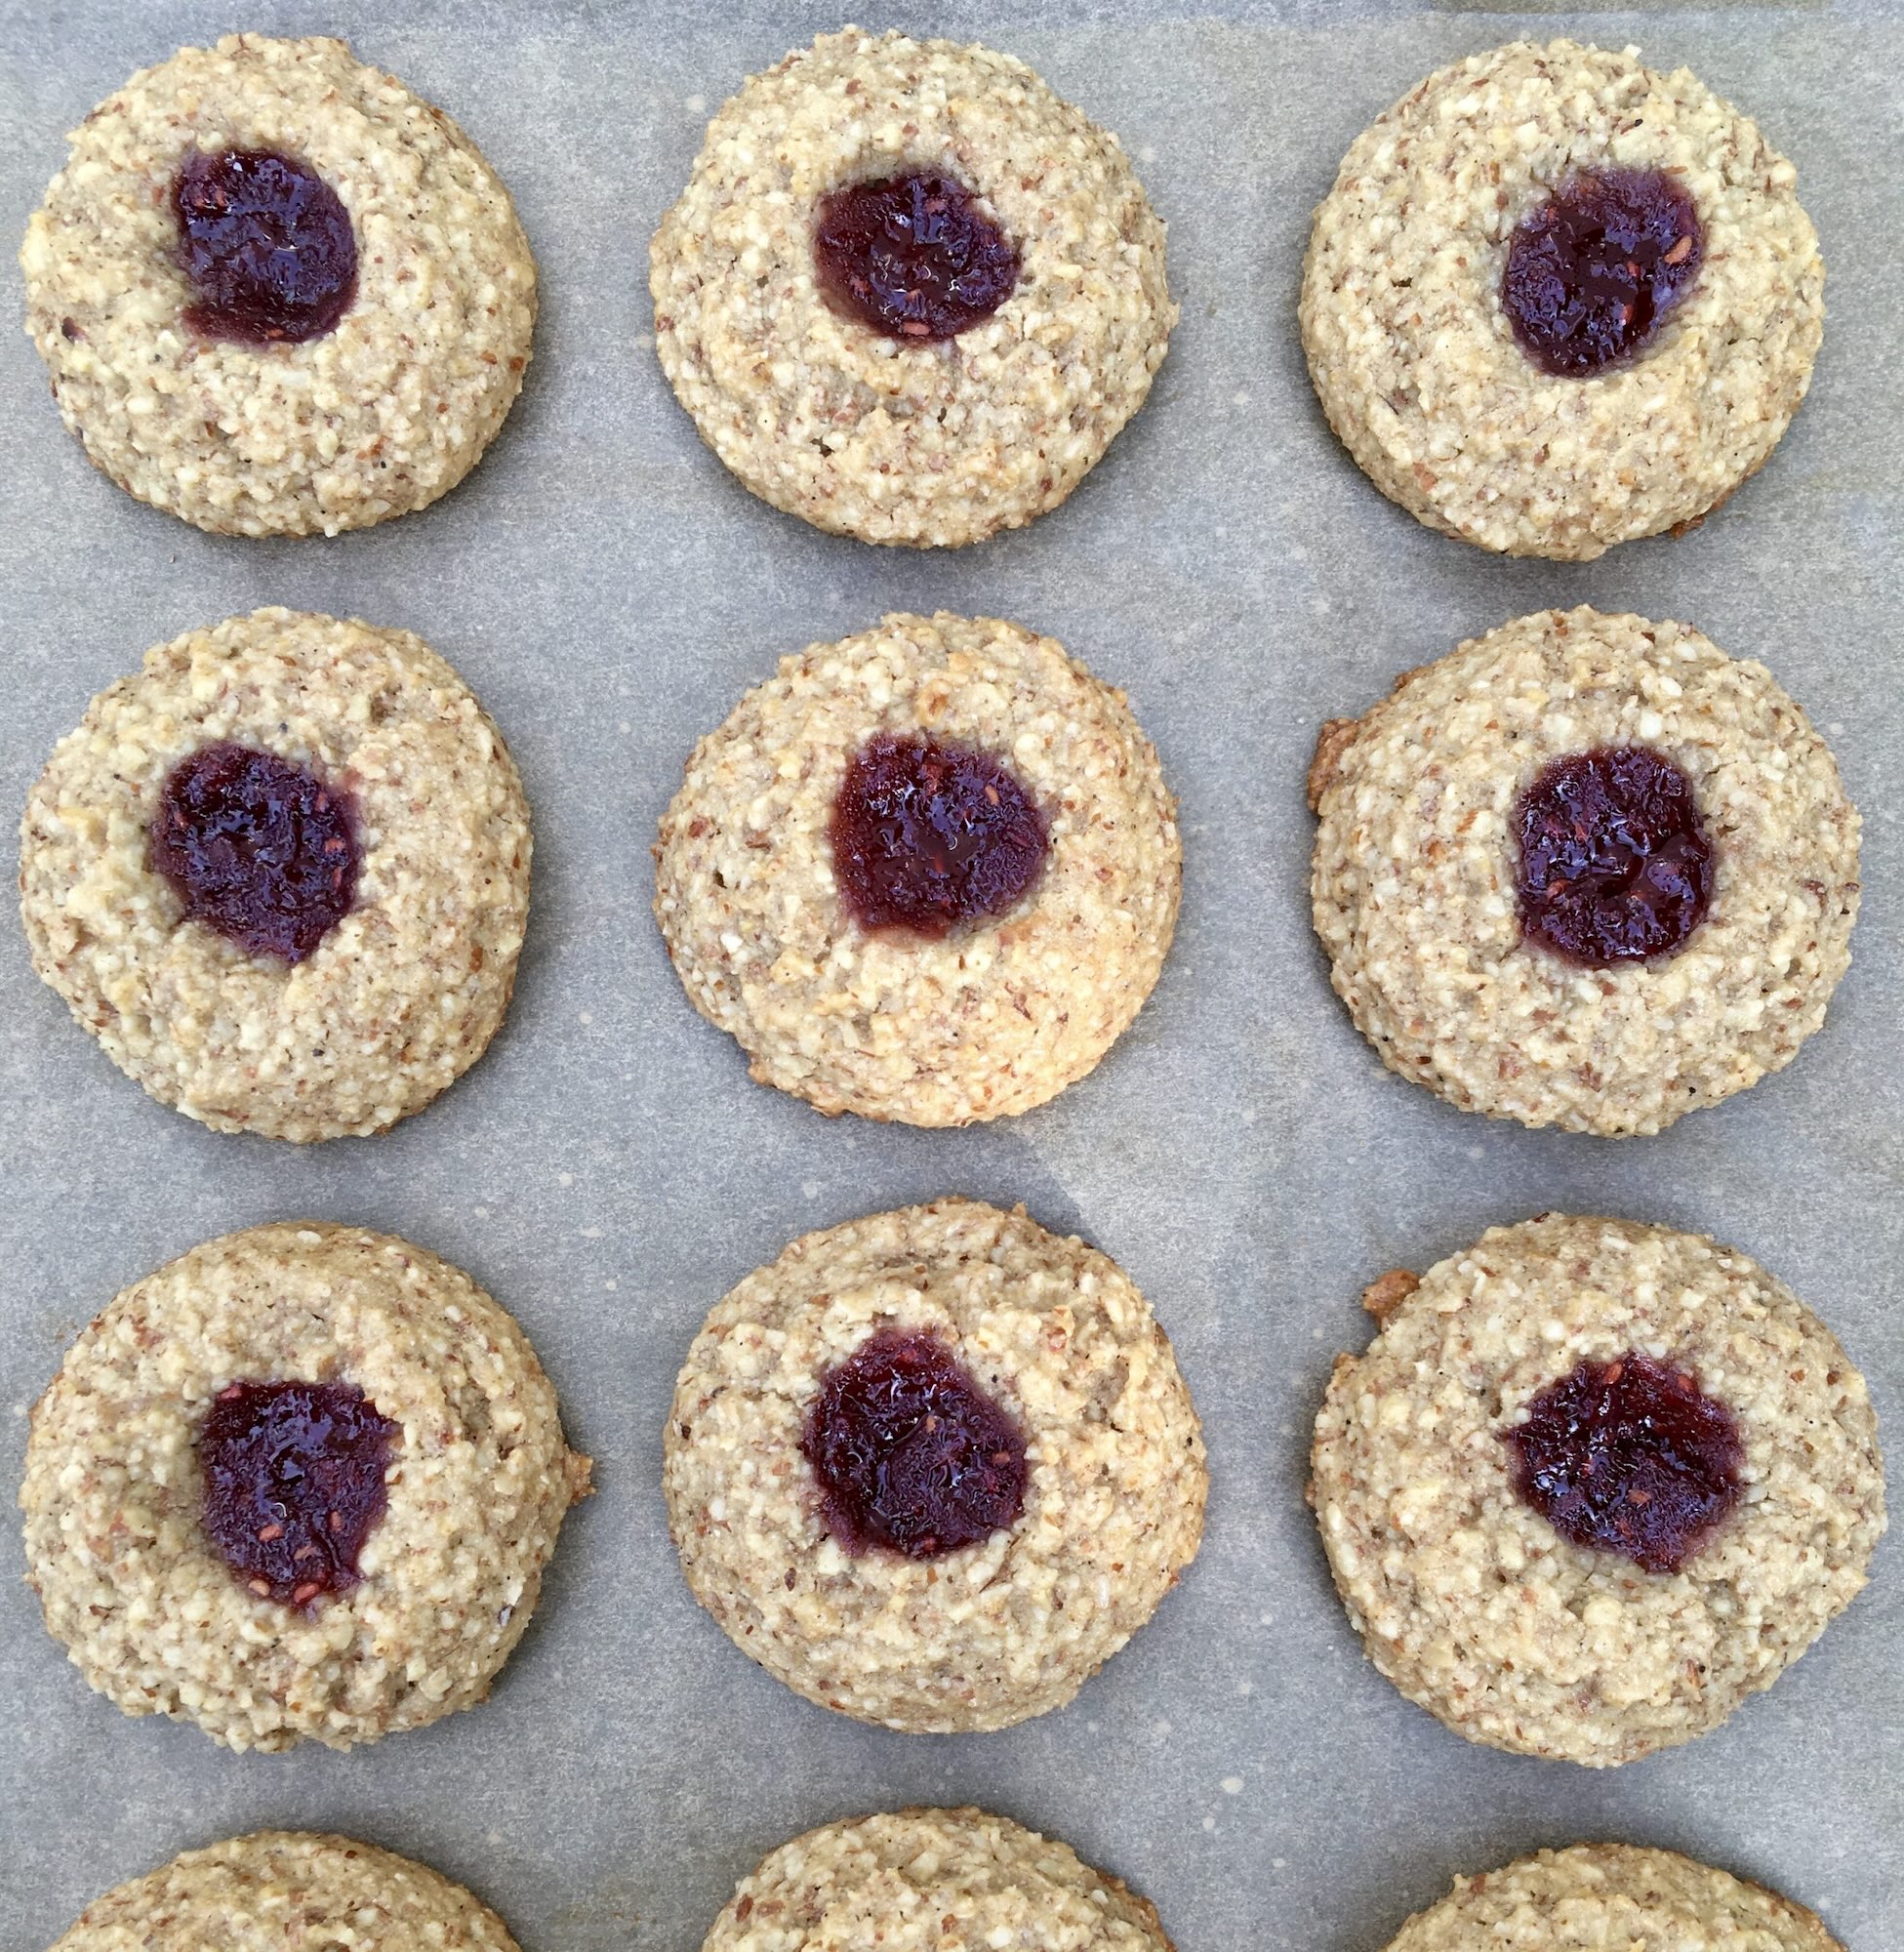
Vegan Gluten Free Jam Thumbprint Cookies
Vegan Gluten Free Jam Thumbprint Cookies
Serves About 20 Cookies
Ingredients:
dry:
1½ cups raw almonds
1 cup rolled oats (gluten free)
⅔ cup brown rice flour
½ teaspoon baking powder
½ teaspoon sea salt
wet:
¼ cup safflower oil
¼ cup gluten free oat milk or other non dairy milk
½ cup maple syrup
1 teaspoon vanilla extract
no-added-sugar, fruit-sweetened jam (such as raspberry or strawberry)
Instructions:
- Preheat oven to 350°F. Line large oven sheet with parchment paper. Set aside.
- Place almonds in food processor and process until their texture is fine, with little nut grains remaining. Remove ground almonds and set aside.
- Place rolled oats in the food processor and process until fine.
- In mixing bowl, combine ground oats with ground almonds. Add flour, baking powder and sea salt. Mix well with spatula.
- In separate mixing bowl, whisk together wet ingredients until liquids emulsify.
- Add wet mixture to dry mixture. Using spatula, mix until dough texture becomes even.
- Scoop about 1 heaping tablespoon of dough and place onto prepared baking sheet.
- Repeat step 7 with the rest of the dough. Make sure to leave 1 ½ inches space between cookies.
- Using the back of ¼ teaspoon measuring spoon, make indentations in the middle of each cookie, press down gently about halfway in.
- With a small spoon, ladle jam into each indentation.
- Bake cookies in the oven for about 15 minutes until light brown. Cookies burn easily, so check often after 10 minutes of baking.
- Set aside to cool at room temperature before serving.
Chef’s note: For step 7 through 9, rubbing the back of the spoons with a little oil makes the process easy, preventing from dough sticking to the spoon. You can also use other nuts, such as pecans, to make this cookies.

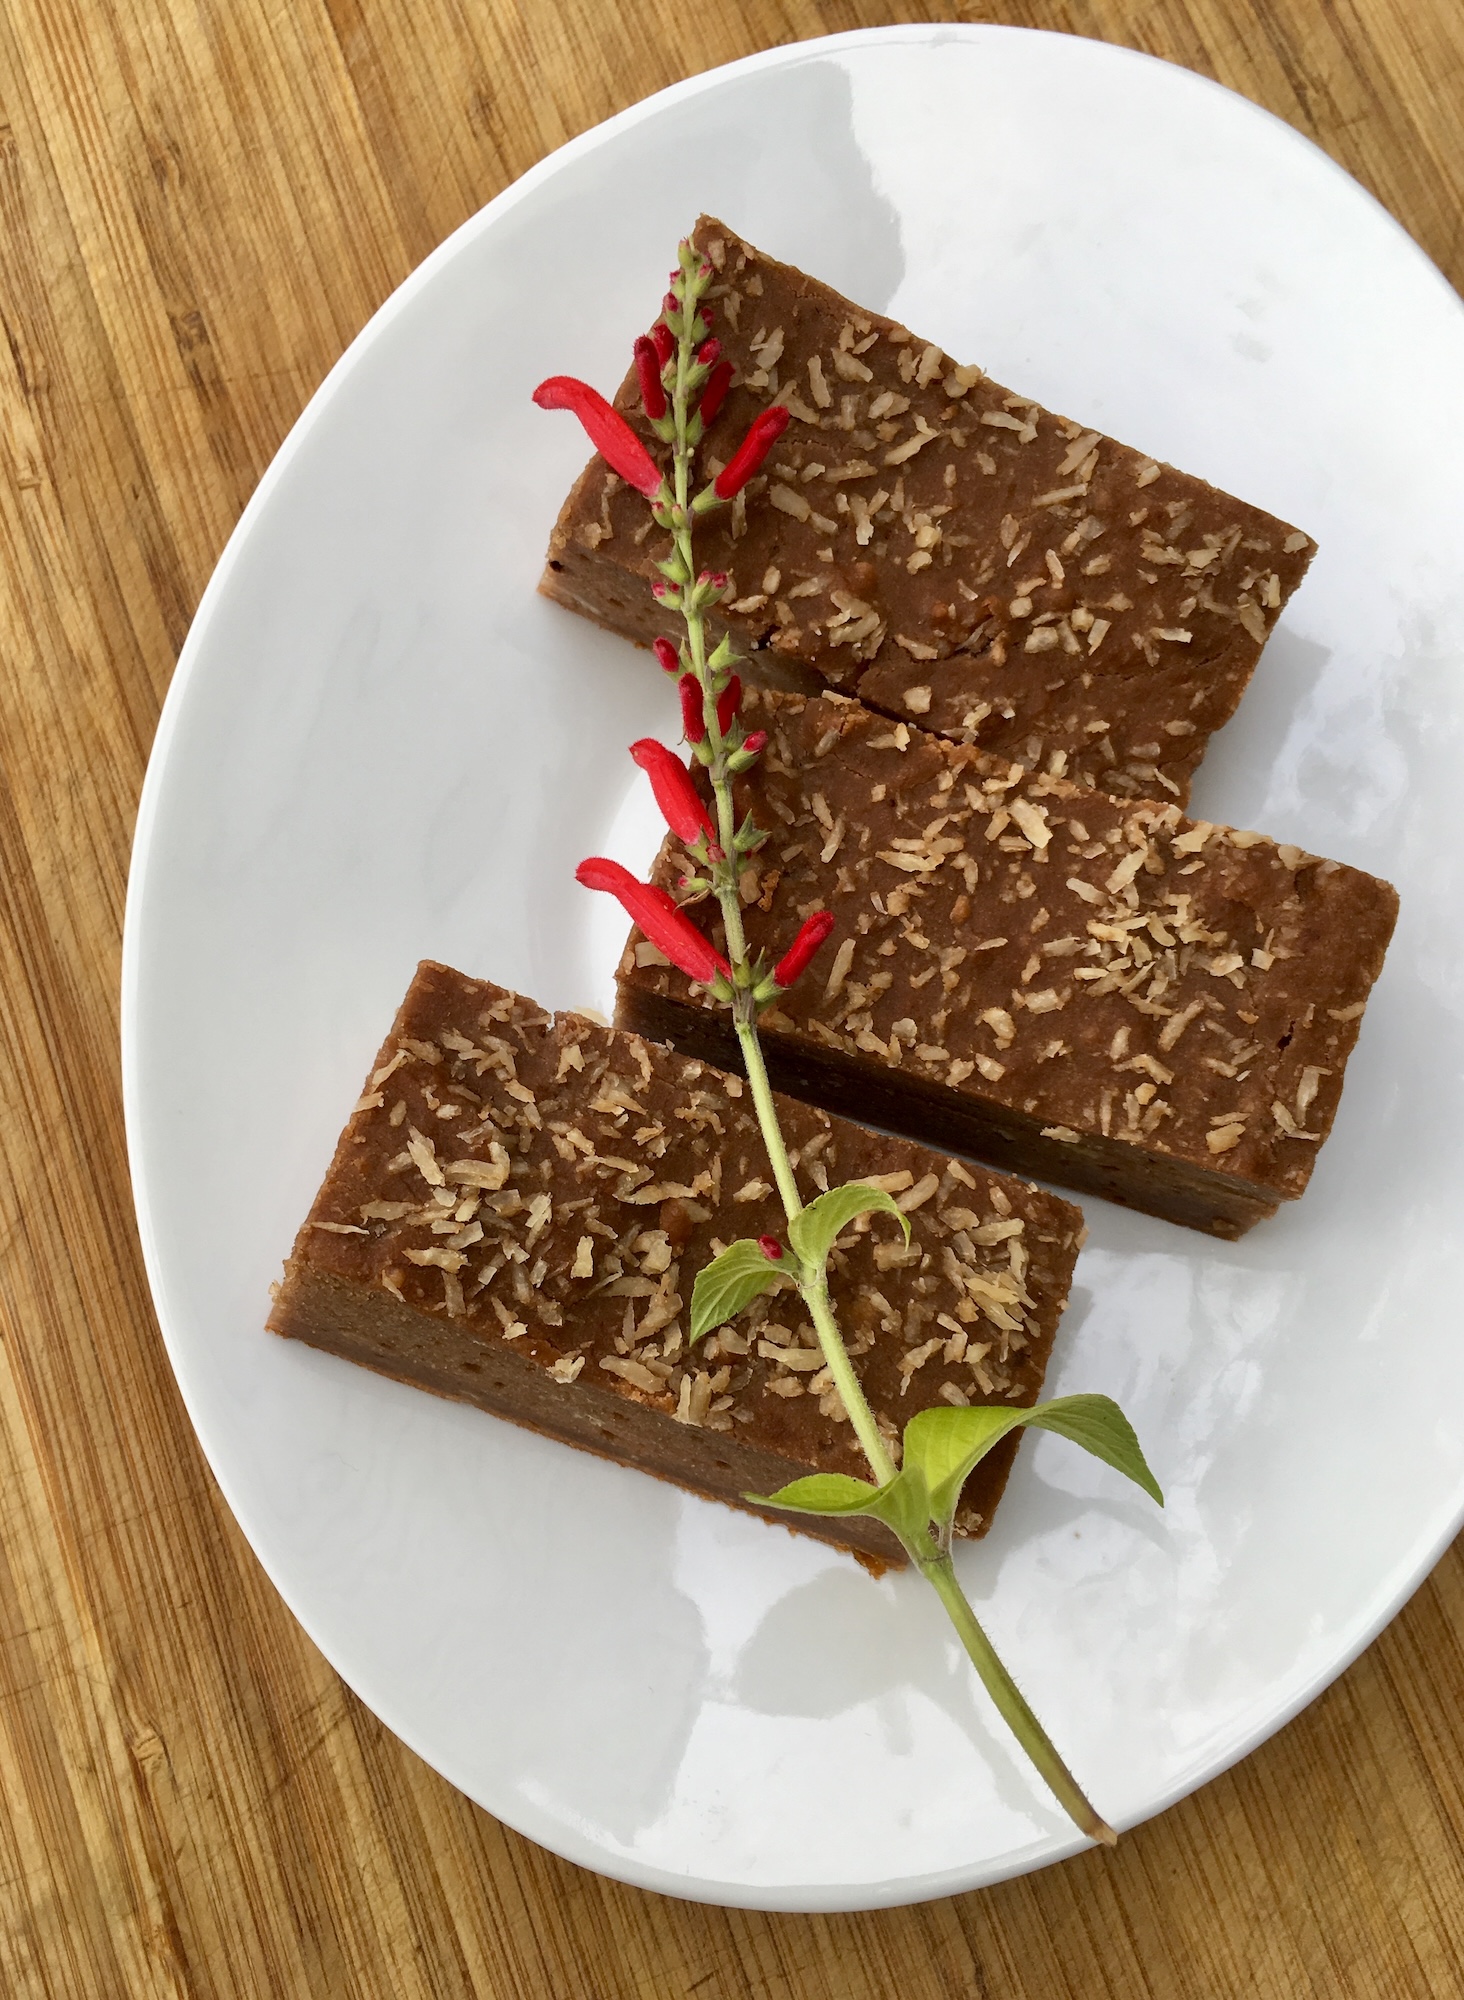
Vegan Gluten Free Pumpkin Oat Bars
Vegan Gluten Free Pumpkin Oat Bars
Serves 6
Ingredients:
Crust:
1½ cups rolled oats (gluten free)
½ cup oat flour (gluten free), plus more if needed
¼ teaspoon sea salt
¼ cup safflower oil
¼ cup maple syrup
¼ cup oat milk or other non dairy milk
Pumpkin Layer:
½ cup oat milk or other non dairy milk
2 tablespoons agar agar flakes
¼ cup agave or rice syrup
2 pinches sea salt
1 (15 ounce can) pumpkin puree
¼ teaspoon ginger powder
¼ teaspoon ground cinnamon
a pinch of ground nutmeg
½ teaspoon umeboshi vinegar
1 teaspoon vanilla extract
2 tablespoons arrowroot powder, diluted in ¼ cup water
Candied Pecans (optional)
2 tablespoons maple syrup
2 pinches sea salt
¼ teaspoon ground cinnamon
½ cup pecans
Instructions:
- Preheat oven to 350°F. Line an 8 x 8 oven-safe pan (or any square or rectangular pan that holds about six cups) with parchment paper. Set aside.
- To make crust, in a medium mixing bowl place dry ingredients: rolled oats, oat flour, sea salt Mix well using whisk.
- In a separate medium bowl, place wet ingredients: safflower oil, maple syrup, and oat milk. Mix well using whisk.
- Add wet ingredients to dry mixture. Using spatula, mix very well until thoroughly combined. If still liquid-y, add more flour until the dough has soft cookie dough texture.
- Spread the dough evenly into the oven pan, bake for 10 minutes. Set aside.
- To make pumpkin layer, put oat milk, agar agar flakes, agave or rice syrup, and sea salt into saucepan. Over low heat, bring to a gentle boil, and keep simmering until agar agar flakes dissolve, stirring constantly for about 10 – 15 minutes.
- Pour in pumpkin puree, spices, umeboshi vinegar, and vanilla extract. Mix well over medium low heat and bring back to a gentle boil.
- Pour in arrowroot mixture little by little, and stir well until white color turns clear. Keep simmering on low heat for about 2 minutes. Pour over the crust.
- Bake for about 30 minutes until the edges are brown. It will set completely as it cools.
- After it cools and sets, cut into bars and serve with candied pecans, if desired.
Candied Pecans
In saucepan, add maple syrup, sea salt and ground cinnamon, over medium low heat, heat until it bubbles. Add pecans, stir well until liquid is almost evaporated for about 3-5 minutes. Set aside until cool.
Chef’s Note
Oat flour is packed differently depending on the package. It can be crumbly or it can settle to be very dense. Adjust the crust mixture if it’s still watery by adding some more flour. For the choice of sweetener for the pumpkin layer, rice syrup will result in a lower level of sweetness, and might be suitable for children and those who like more mildly sweetened desserts.

Almond Coconut Bliss Balls
Almond Coconut Bliss Balls
Serves 10 to 12
Ingredients:
These vegan energy balls are packed full of energy. There are literally unlimited flavors you can create with these basic recipes. Here I made 2 kinds of balls: one is made with almonds, dates and coconut, the other is a variation with nut butter and a snowy white dusting of coconut. One I named “Almond Coconut Bliss Balls” and the other, “Snow White Bliss Balls.” Enjoy!
Almonds Coconut Bliss Balls (makes about 10 balls)
1⁄2 cup roasted almonds, roughly chopped
1⁄2 cup pitted Medjool dates (about 5 dates), pitted and roughly chopped
1 tablespoon shredded coconut
1⁄2 teaspoon umeboshi vinegar
1⁄2 teaspoon vanilla extract
Snow White Bliss Balls (makes about 12 balls)
1⁄2 cup roasted almonds, roughly chopped
1⁄2 cup Medjool dates (about 5 dates), pitted and roughly chopped
1⁄4 cup shredded coconut
2 tablespoons almond butter or other nut or seed butter
1⁄2 teaspoon umeboshi vinegar
coconut powder or shredded coconut for dressing up, optional
Instructions:
Making Almond Coconut Bliss Balls:
- Place almonds in food processor, process until almonds are coarsely fine.
- Add dates and the rest of ingredients and process until mixture is well blended and moisten enough to stick together to make balls.
- Place mixture into a mixing bowl. Take out about 1 tablespoon mixture a time, roll into a ball.
- Keep in refrigerator up to 1 week or in freezer up to 1 month.
Making Snow White Bliss Balls:
- Place almonds in food processor, process until almonds are coarsely fine.
- Add dates and the rest of ingredients and process until mixture is well blended and starts to stick together.
- Place mixture into a mixing bowl. Take out about 1 tablespoon mixture a time, roll into a ball.
- Dress up the balls by rolling in coconut powder or shredded coconut if desired.
- Keep in refrigerator up to 1 week or in freezer up to 1 month.
Chef’s note:
You can use other variety of dates, however Medjool dates are the best since they are much softer and easier to handle. If dates are old or dry, the mixture can come out a bit dry. If mixture is still dry and not sticky enough to roll into balls, add just a little water, 1⁄2 teaspoon water at time (You don’t want to make it too moist) and process more until mixture starts to come together.
Variations:
- You can make a variety of energy balls. For example, you can also substitute peanuts for almonds, and adding a little cocoa powder makes a nice mocha flavor.
- If you like to make dried fruits nut balls, try 2 tablespoons dried fruit such as raisins, blueberries, and apricots and 1⁄3 cup dates (about 4 dates) instead of 1⁄2 cup dates.
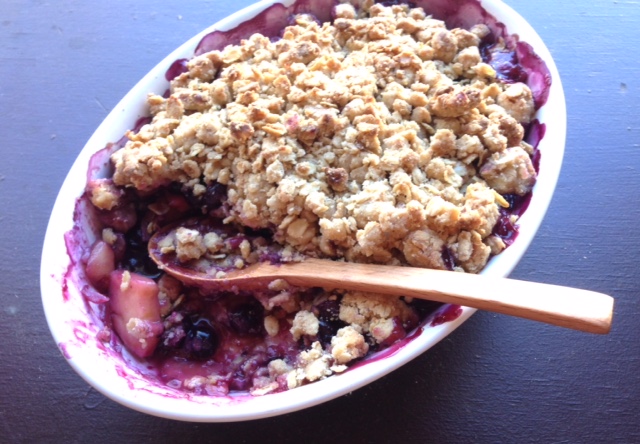
Apple Blueberry Crisp
Apple Blueberry Crisp
Ingredients:
Crisp Crumble:
½ cup rolled oats
½ cup unbleached white pastry flour*
½ cup brown rice flour
½ cup walnuts, chopped coarsely
⅛ teaspoon sea salt
5 T safflower oil
3 T maple syrup
*If you are gluten-free, substitute with brown rice flour.
Fruit filling:
3 apples, cored and cut into slices
1 cup blueberries
¾ cup apple juice
1 T kuzu
1 t vanilla extract
Pinch of sea salt
Instructions:
- Heat oven to 350°F.
- Mix all the dry ingredients including walnuts in a mixing bowl.
- Add safflower oil and mix using a fork, then mix in maple syrup. Continue mixing with your hands until the mixture crumbles.
- In a separate bowl, pour the apple juice. Then add kuzu, a pinch of salt and vanilla extract. Mix thoroughly until kuzu has dissolved completely.
- Core the apples and cut into thin slices. Place the apple slices in a Pyrex glass casserole dish, then layer the blueberries on top.
- Pour the apple juice mixture over the top of the apples and blueberries, then place the crumbles evenly on top of that.
- Cover with aluminum foil and bake for 30-40 minutes at 350°F.
- Remove foil and bake until surface becomes golden–about 10 more minutes.
Recipe provided by Chef Sachi Kato. For more of Chef Sachi’s recipes visit www.macrobiotic.sachikato.com

Gluten Free Vegan Ginger Cookies
Gluten Free Vegan Ginger Cookies
Serves Makes about 30 thin cookies
Ingredients:
These gluten-free, vegan ginger cookies will spice up your Holiday season! This recipe counts about 30 thin, star shaped cookies. You can make all kinds of elaborate shapes by rolling out dough and using a cookie cutter or simply make round cookies.
Dry:
1 cup super-fine brown rice flour*
1⁄2 cup almond flour
1⁄4 cup arrowroot flour
1⁄4 cup coconut sugar
1 teaspoon ginger powder
1⁄2 teaspoon cinnamon powder
1⁄8 teaspoon ground nutmeg
1⁄4 teaspoon sea salt
Wet:
1⁄3 cup melted coconut oil
1⁄4 cup non dairy milk
*It is best to use super fine brown rice flour to achieve the nice cookie texture. You can find superfine brown rice flour online or in Asian grocery stores in the baking section.
Instructions:
- Preheat the oven to 350°F. Prepare baking sheets by lining with parchment paper.
- Combine dry ingredients in medium mixing bowl.
- Stir together wet ingredients in small mixing bowl. Using a whisk, mix well.
- Pour wet ingredients into dry mixture, combine well into cookie dough. If still dry, add a little non dairy milk.
- Place parchment paper on top of the working surface, make thin dough by rolling out the dough to about 1⁄8 inch thickness.
- Cut out cookies using your cookie cutters and place them onto baking sheets.
- Bake 8 – 10 minutes, until cookies are solid on the bottom and light brown on the edges.
- Cool cookies to room temperature and serve.

Gluten-Free Peanut Butter Cookies
Gluten-Free Peanut Butter Cookies
Ingredients:
These Peanut Butter cookies will be a smash hit for families, vegan and non vegan alike. Containing neither eggs nor butter, the rich peanut butter flavor of these yummy cookies will bring you back to your childhood snack time, while they satisfy your sweet tooth.
1⁄2 cup gluten free oat flour (you can substitute brown rice flour)
1⁄2 teaspoon baking soda
1⁄4 teaspoon sea salt
1⁄2 cup peanut butter
1⁄2 cup coconut sugar (1⁄3 cup for less sweet version)
2 tablespoons melted coconut oil
1 tablespoon water
1 teaspoon vanilla extract
Instructions:
- Whisk flour, baking soda and sea salt in a bowl. Mix peanut butter, coconut sugar, melted coconut oil, water and vanilla extract in a medium bowl until well combined.
- Using rubber spatula, stir flour mixture into peanut butter mixture until well combined.\
- Cover bowl with plastic wrap and refrigerate until firm, for 1-2 hours or up to 24 hours. You can also freeze the cookie dough balls to bake at another time, for up to 2 weeks.
- Adjust oven rack to middle position and heat oven to 350 degrees. Prepare a baking sheet by lining it with parchment paper.
- Working with about 1 heaping tablespoon of dough at a time, roll into cookie balls, and space 3 inches apart on prepared sheet. Using the bottom of a greased jar or drinking glass, press balls to about 1⁄3 inch thickness.
- Press lightly with fork to make patterns.
- Bake cookies until puffed and edges of bottom have started to become golden, about 8 – 10 minutes, rotating tray halfway through baking. Stay close to the oven and check often towards the end of baking. It is very easy to burn the cookies.
- The cookies will look quite soft when you take them out. Let cool for at least 10 minutes before removing from tray. They will firm up as they cool.
- Let cookies cool completely before serving. Cookies can be stored at room temperature for up to 3 days.
Chef’s Tip: This recipe makes an easy-to-handle portion. If you desire, go ahead and make a double portion for a potluck or family and friends.
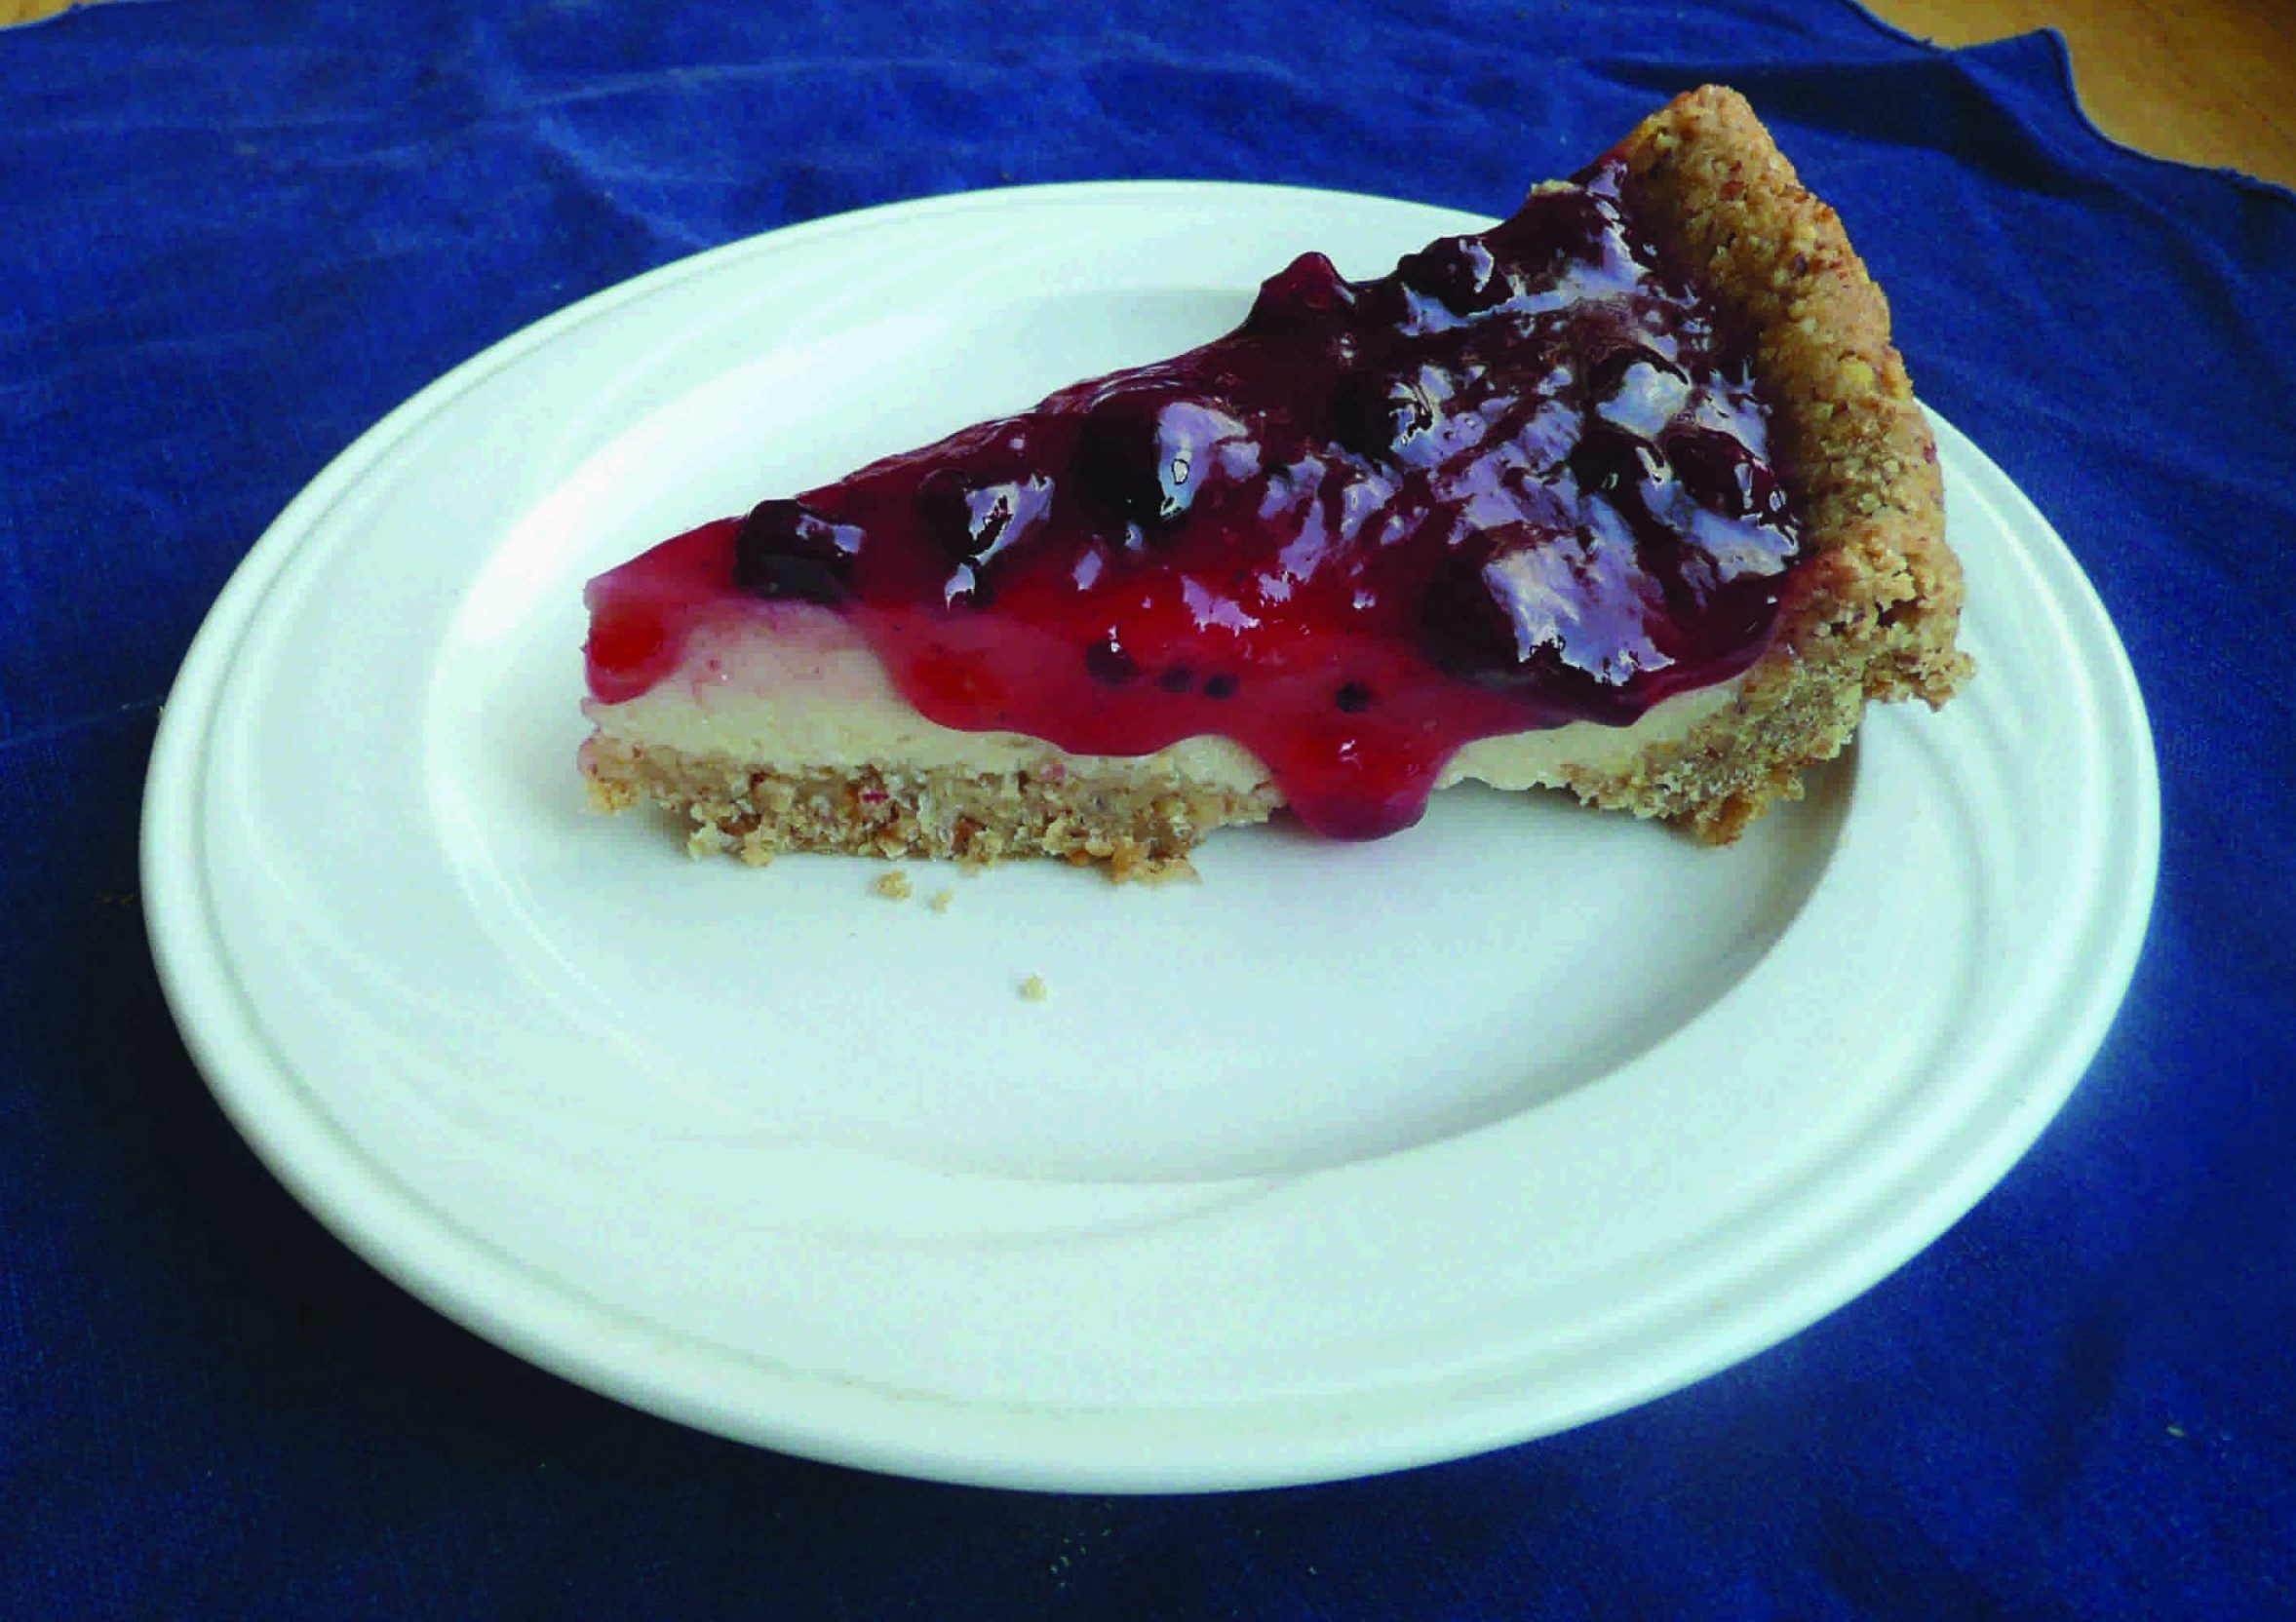
Lemon Tart with Blackberry Topping
Lemon Tart with Blackberry Topping
Serves 20 to 27
Ingredients:
from Lewis Freedman’s The Great Life Cookbook: Whole Food, Gluten-Free Meals for Large Gatherings
Prep Notes: This recipe makes 3 (9-inch) pies, which serves 20 to 27 people. To make this oil-free, simply omit the crust, gel the bottom in parfait glasses, and layer on the cooled topping. Agar powder can be substituted for the flakes, at ¼ the volume. If using powder, whisk longer and thoroughly to avoid clumping. When putting together a shopping list, look at both parts of this recipe as the following ingredients are used more than once: almonds, maple syrup, rice syrup, almond extract, vanilla extract, lemons, and agar-agar.
Crust
1½ cups raw almonds
2¼ cups gluten-free or regular rolled oats
2¼ cups brown rice flour
½ teaspoon sea salt
¾ cup safflower oil
½ cup pure maple syrup
½ cup brown rice syrup
½ teaspoon almond extract
¾ cup water
Lemon Filling
1½ cups raw almonds
4 lemons
6 cups unsweetened almond milk
1½ cups brown rice syrup
1½ cups pure maple syrup
1 teaspoon sea salt
9 tablespoons agar-agar flakes
1½ teaspoons almond extract
1½ teaspoons vanilla extract
Blackberry Topping
2 lemons
5 cups blackberries (fresh or frozen)
2¼ cups apple juice
Pinch of sea salt
1½ cups brown rice syrup
6 tablespoons pure maple syrup
6 tablespoons agar-agar flakes
1½ teaspoons vanilla extract
6 tablespoons arrowroot stirred into and dissolved in ½ cup water
Instructions:
Crust
- Place almonds on a baking sheet and toast in oven at 350 degrees for 8 to 10 minutes, until lightly browned all through. Do the same with the oats, toasting them for about 5 to 7 minutes.
- Blend toasted oats into flour with food processor or blender.
- Blend almonds until the texture is as fine as flour.
- In a large bowl, stir almonds, oat flour, rice flour and salt together.
- In a separate bowl, add remaining ingredients, and then stir into the dry ingredients, mixing it all with a large spoon.
- Press mixture into 3 oiled pie pans.
- Bake crusts at 350 degrees until browned, about 25 to 30 minutes.
Lemon Filling
- Blanch and remove the skins from the almonds. Bring 1 quart of water to boil. Add almonds and let boil for 5 minutes. Replace the hot water with cold water. Squeeze the almonds between your fingers to remove the skins. Discard skins.
- Remove zest from lemons with a zester or fine grater. Set aside.
- Squeeze juice from lemons (~¾ cup).
- In blender, mix together almonds, almond milk, syrups, salt and lemon juice until smooth.
- Heat blended mixture in a pot. Add agar-agar and bring to a boil.
- Remove from heat. Add extracts and lemon zest.
- Pour into prepared crusts.
- Set aside until firm.
Blackberry Topping
- Remove the zest from the lemons and squeeze juice from lemons (~¹/³ cup).
- Place all ingredients in a pot except arrowroot mixture and lemon zest. Start cooking at medium heat.
- When the mixture begins to boil, add the dissolved arrowroot, stirring constantly for a minute.
- Reduce heat, add lemon zest, and stir for a few more minutes. Remove from heat when the fruit mixture starts to thicken.
- Let cool until thickened, 1 hour or longer. Top the firm pies with this blackberry topping.
- Refrigerate until ready to serve.
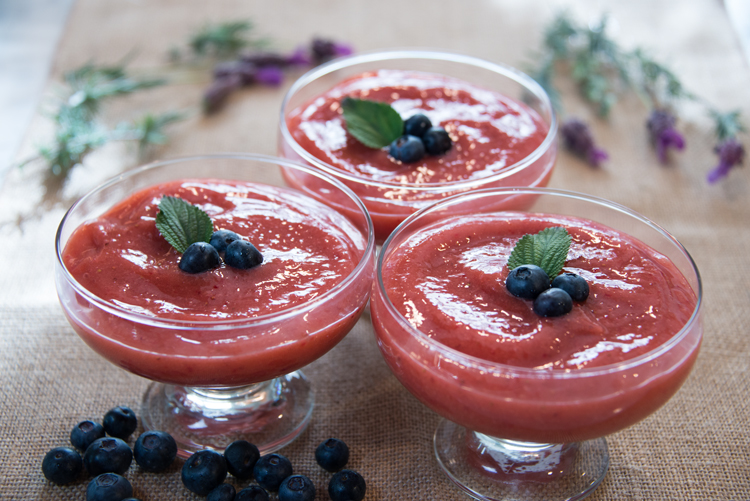
Strawberry Cardamom Pudding
Strawberry Cardamom Pudding
Serves 4-6
Ingredients:
4 cups sliced strawberries
3 cups apple juice
3 T agar agar
Pinch of sea salt
¾ t cardamom
Blueberries and mint for garnish (optional)
Instructions:
- Place 3 cups sliced strawberries (reserve 1 cup for the end) in the bottom of a 9×12 glass dish.
- Place apple juice, agar agar, cardamom, and a pinch of salt in a pot and bring to a boil over medium flame, stirring frequently.
- When the mixture boils, lower the flame and simmer 5-7 minutes until the agar has dissolved.
- Pour liquid over the fruit and let it sit until firm (approximately 1 hour at room temperature, quicker if placed in the refrigerator).
- Place mixture in a blender with the remaining strawberries and blend until smooth.
- Place is serving bowls and garnish with fresh blueberries and mint.
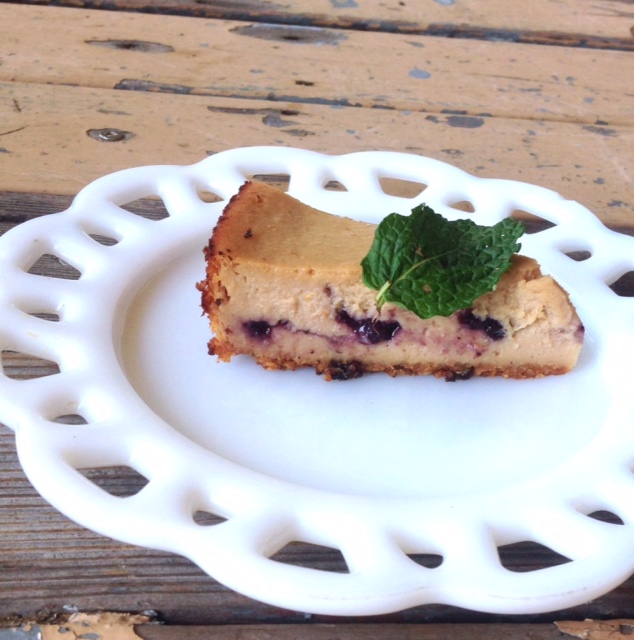
Tofu Cheesecake
Tofu Cheesecake
Serves Makes one 9-inch cake
Ingredients:
This tofu cheesecake is a wonderful example of how desserts can be made in a healthy way. I hope you enjoy!
CRUST
10 good quality, sugar-free plain cookies
TOFU CHEESE FILLING
1 ½ cups (about 5oz) raw or very lightly roasted cashews
20 oz silken or soft tofu, pressed for 1 hour to remove the water*
¾ cup maple syrup
½ cup rice syrup
3 T raw sesame oil
3 tbsp. arrowroot powder
4 tbsp. fresh lemon juice
Grated skin from 1 ½ lemons
1 ½ T white miso
2 t vanilla essence (optional)
¼ cup sugar-free blueberry jam
*To press the tofu place it between two plates with a 3-4 lb weight on top. I like to use a large jar or tea kettle filled with water.
Instructions:
- Preheat oven to 350°F.
- Place the cookies in the food processor and process until finely ground. Oil a 9-inch cake pan, transfer mixture and spread evenly over the bottom of the cake pan.
- Place cashews in the food processor or blender and process until it starts to become like a paste. Stop once or twice to mix.
- Place remaining filling ingredients in the food processor or blender and process until smooth and creamy. Stop once or twice to scrape down the sides and mix all the ingredients.
- Transfer about ⅓ of the filling mixture to the cake pan.
- Spoon the blueberry jam over the filling, then pour the remaining filling and smooth the top.
- Bake in a preheated oven at 350°F for 35 to 40 minutes or until it puffs up a little. Set aside to cool and then refrigerate before serving.
Recipe provided by Patricio Garcia de Paredes. Photo by Sachi Kato.
Dressing Recipes
Creamy Parsley Mint Sauce
Creamy Parsley Mint Sauce
Serves 2 cups
Ingredients:
¼ cup toasted and chopped almonds
1 cup packed parsley, chopped
½ cup packed spearmint, chopped
2 garlic cloves, minced
¼ cup lemon juice (juice of 1 medium lemon)
1 tablespoon brown rice syrup
½ teaspoon sea salt or more to taste
1 teaspoon umeboshi vinegar
¼ cup olive oil
Instructions:
- Place almonds in food processor, process until finely ground.
- Add rest of the ingredients and process until smooth.
- Adjust seasoning if necessary.
- Keep in refrigerator for 3-5 days.
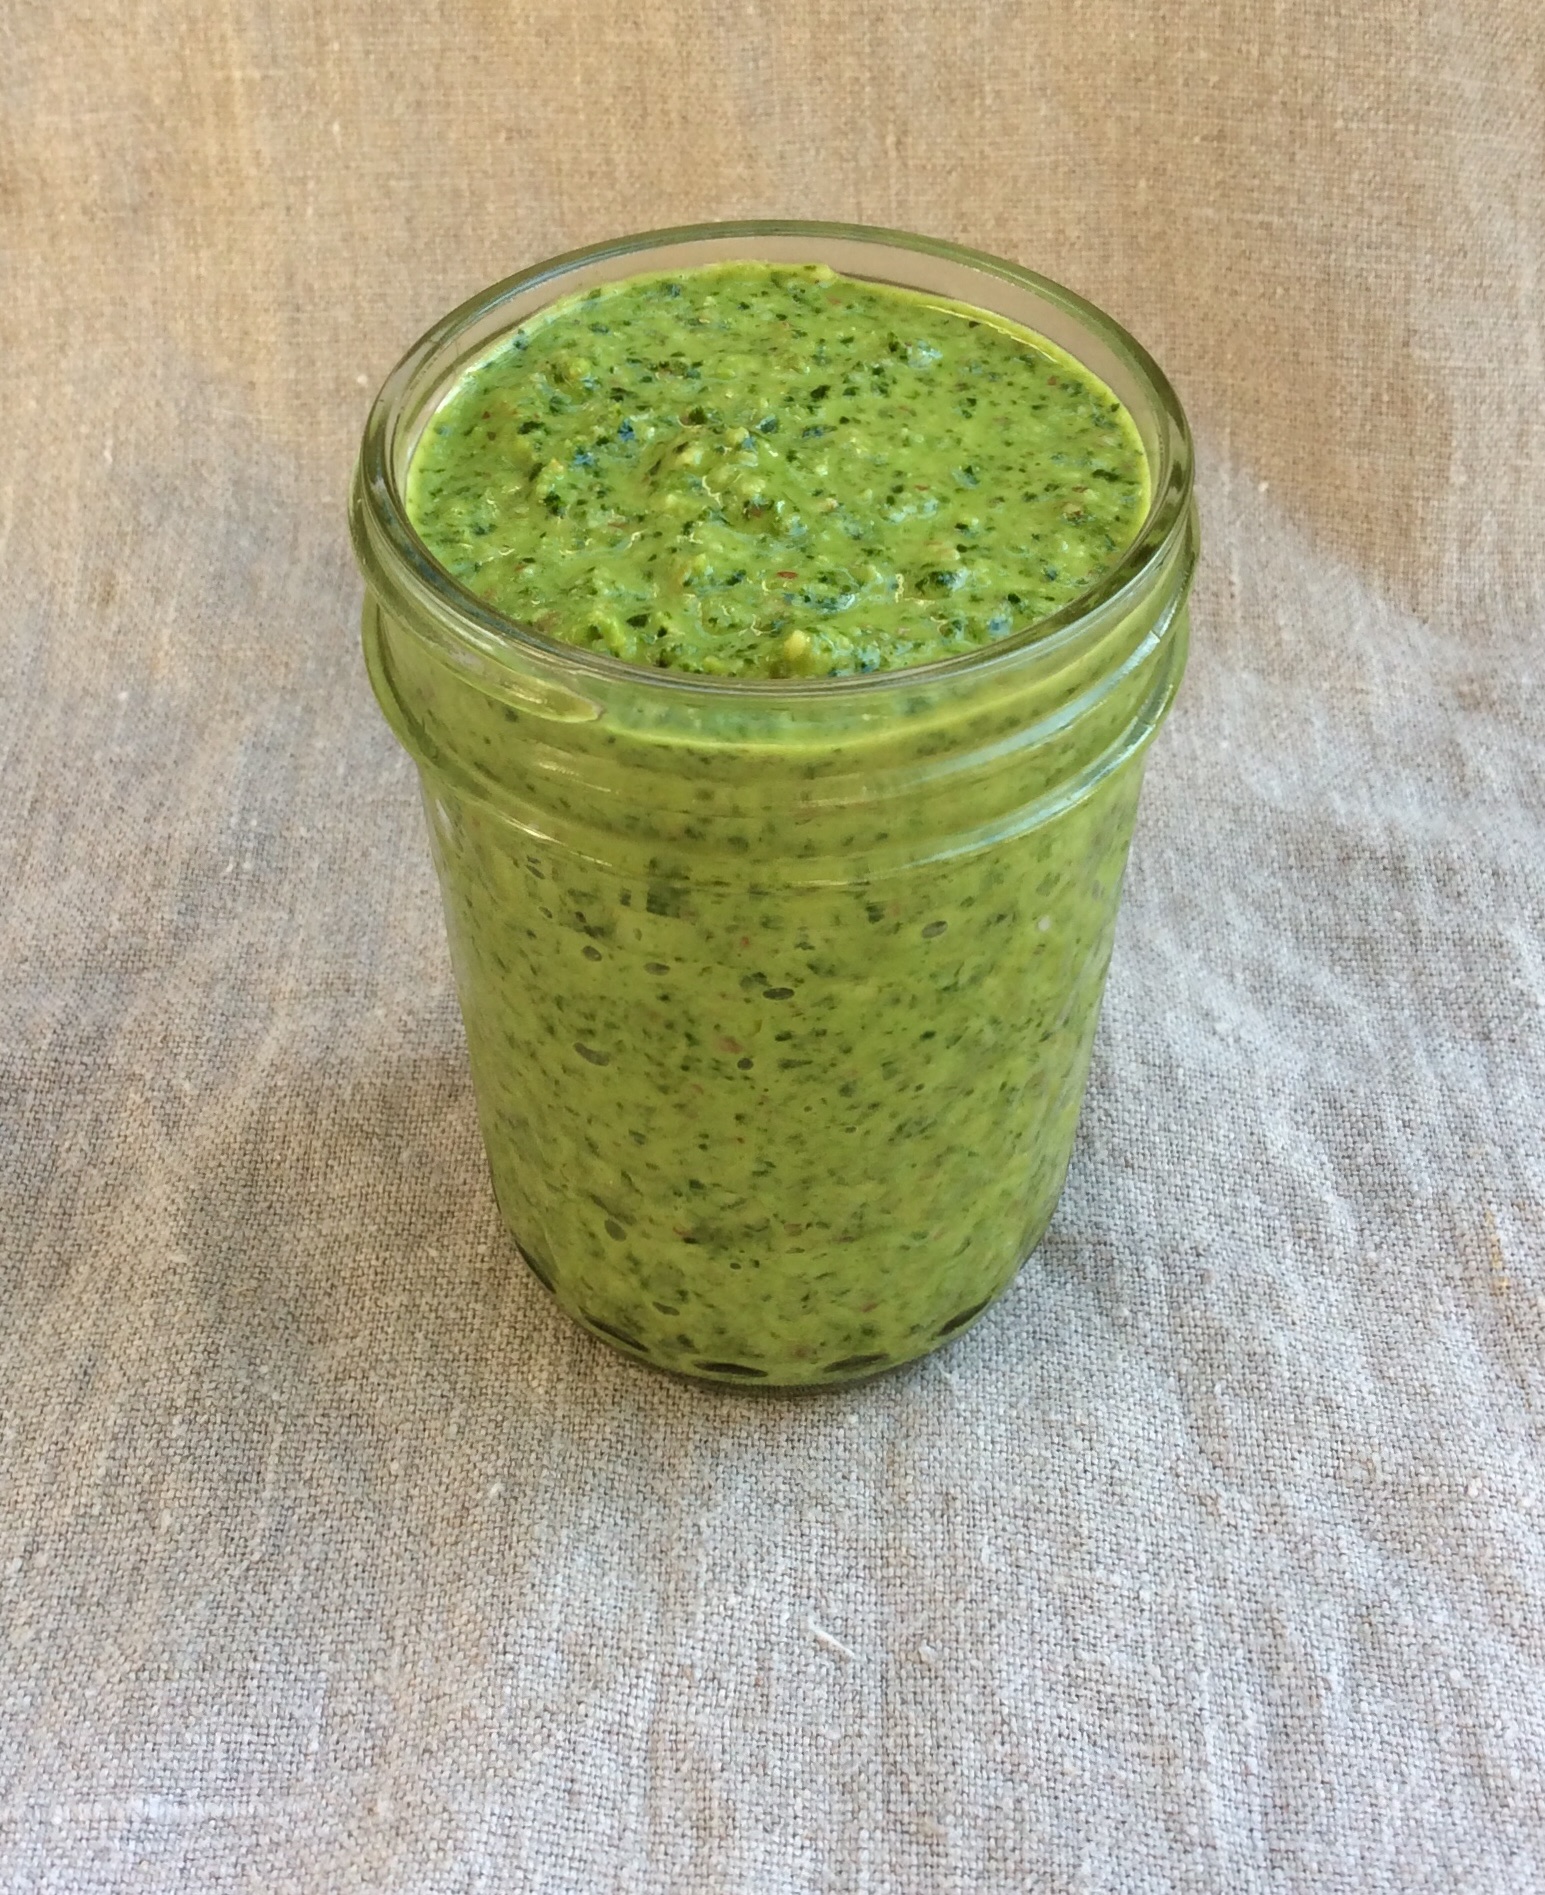
Kale-sunflower Seed Pesto
Kale-sunflower Seed Pesto
Ingredients:
2 garlic cloves, not peeled
3 cups kale, chopped
1/2 cup toasted sunflower seeds
2 teaspoons chickpea or white miso
1/2 teaspoon umeboshi vinegar
1/4 teaspoon sea salt or to taste
Black pepper to taste
1/4 cup extra-virgin olive oil
Instructions:
- Toast garlic cloves in skillet over medium flame, shaking skillet occasionally, until softened and spotty brown, about 8 minutes. When garlic is cool enough to handle, remove and discard the skins and chop coarsely.
- Meanwhile, toast sunflower seeds in now empty skillet over medium flame, stirring often, until golden and fragrant for about 4-5 minutes.
- Bring water to a boil in a pot, add a few pinches sea salt. Blanch kale for a couple of minutes until colors brighten and kale is tender. Set aside to cool.
- In food processor, place garlic, toasted sunflower seeds, blanched kale, chickpea miso, umeboshi vinegar, sea salt, and black pepper if using.
- Process until finely chopped, about 1 minute, scraping down sides of the bowl as needed.
- With processor running, slowly add olive oil until well-incorporated. Transfer pesto to jar for storage. To prevent browning, make the surface of the pesto flat and cover it with thin layer of olive oil.
Chef’s note: It is better to toast garlic cloves in order to tame its sharp flavor and to bring up its sweetness. The pesto can be refrigerated for up to 3 days or frozen for up to 3 months. Before using, bring to room temperature. As a variation, use 2 cups chopped kale and 1 cup fresh basil leaves for a more herby Mediterranean flavor.
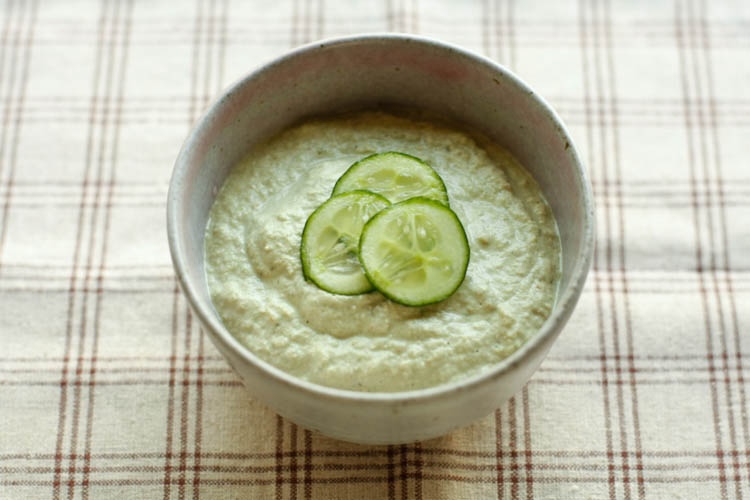
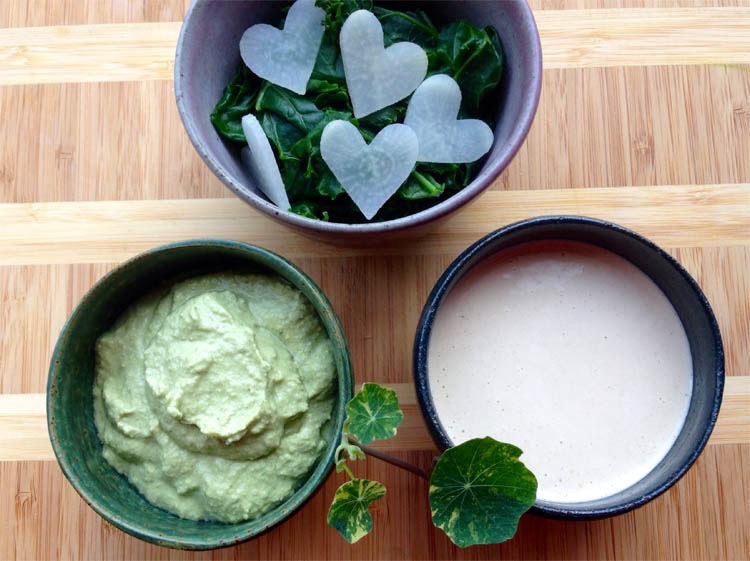
Pumpkin Seed Dressing
Pumpkin Seed Dressing
Serves 6-8
Ingredients:
¾ cup seeds, lightly roasted
2 t umeboshi paste
⅛ cup parsley, coarsely chopped
⅛ cup chopped green onions
Juice from ½ lemon
Water for desired consistency, approximately ¾ cup
Instructions:
- Wash seeds, and lightly roast in a cast iron skillet. When roasted seeds should be slightly brown, puffy and should break easily between your fingers.
- Add the roasted seeds to a blender or food processor and blend briefly.
- Add the rest of the ingredients and blend until smooth. Dressing should be thick.
- Served over pressed salad, blanched vegetables or steamed greens.
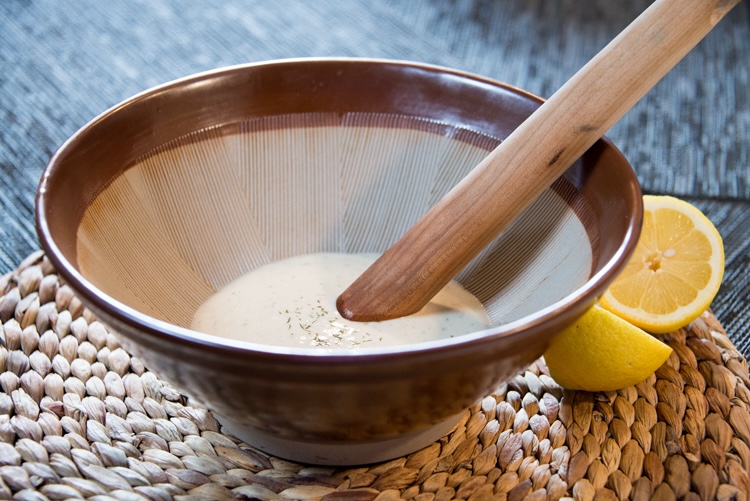
Tahini Garlic Dressing
Tahini Garlic Dressing
Ingredients:
1 T olive oil 1-2 cloves garlic, minced
3 T tahini
2 T lemon juice
1 t umeboshi vinegar Dash of shoyu or tamari
¼ – ⅓ cup water
Instructions:
- Lightly sauté the garlic in 1 T olive oil.
- Place all ingredients and ¼ cup water in a blender and blend until smooth.
- Add water to reach desired consistency.
- Adjust the flavor with shoyu or tamari.
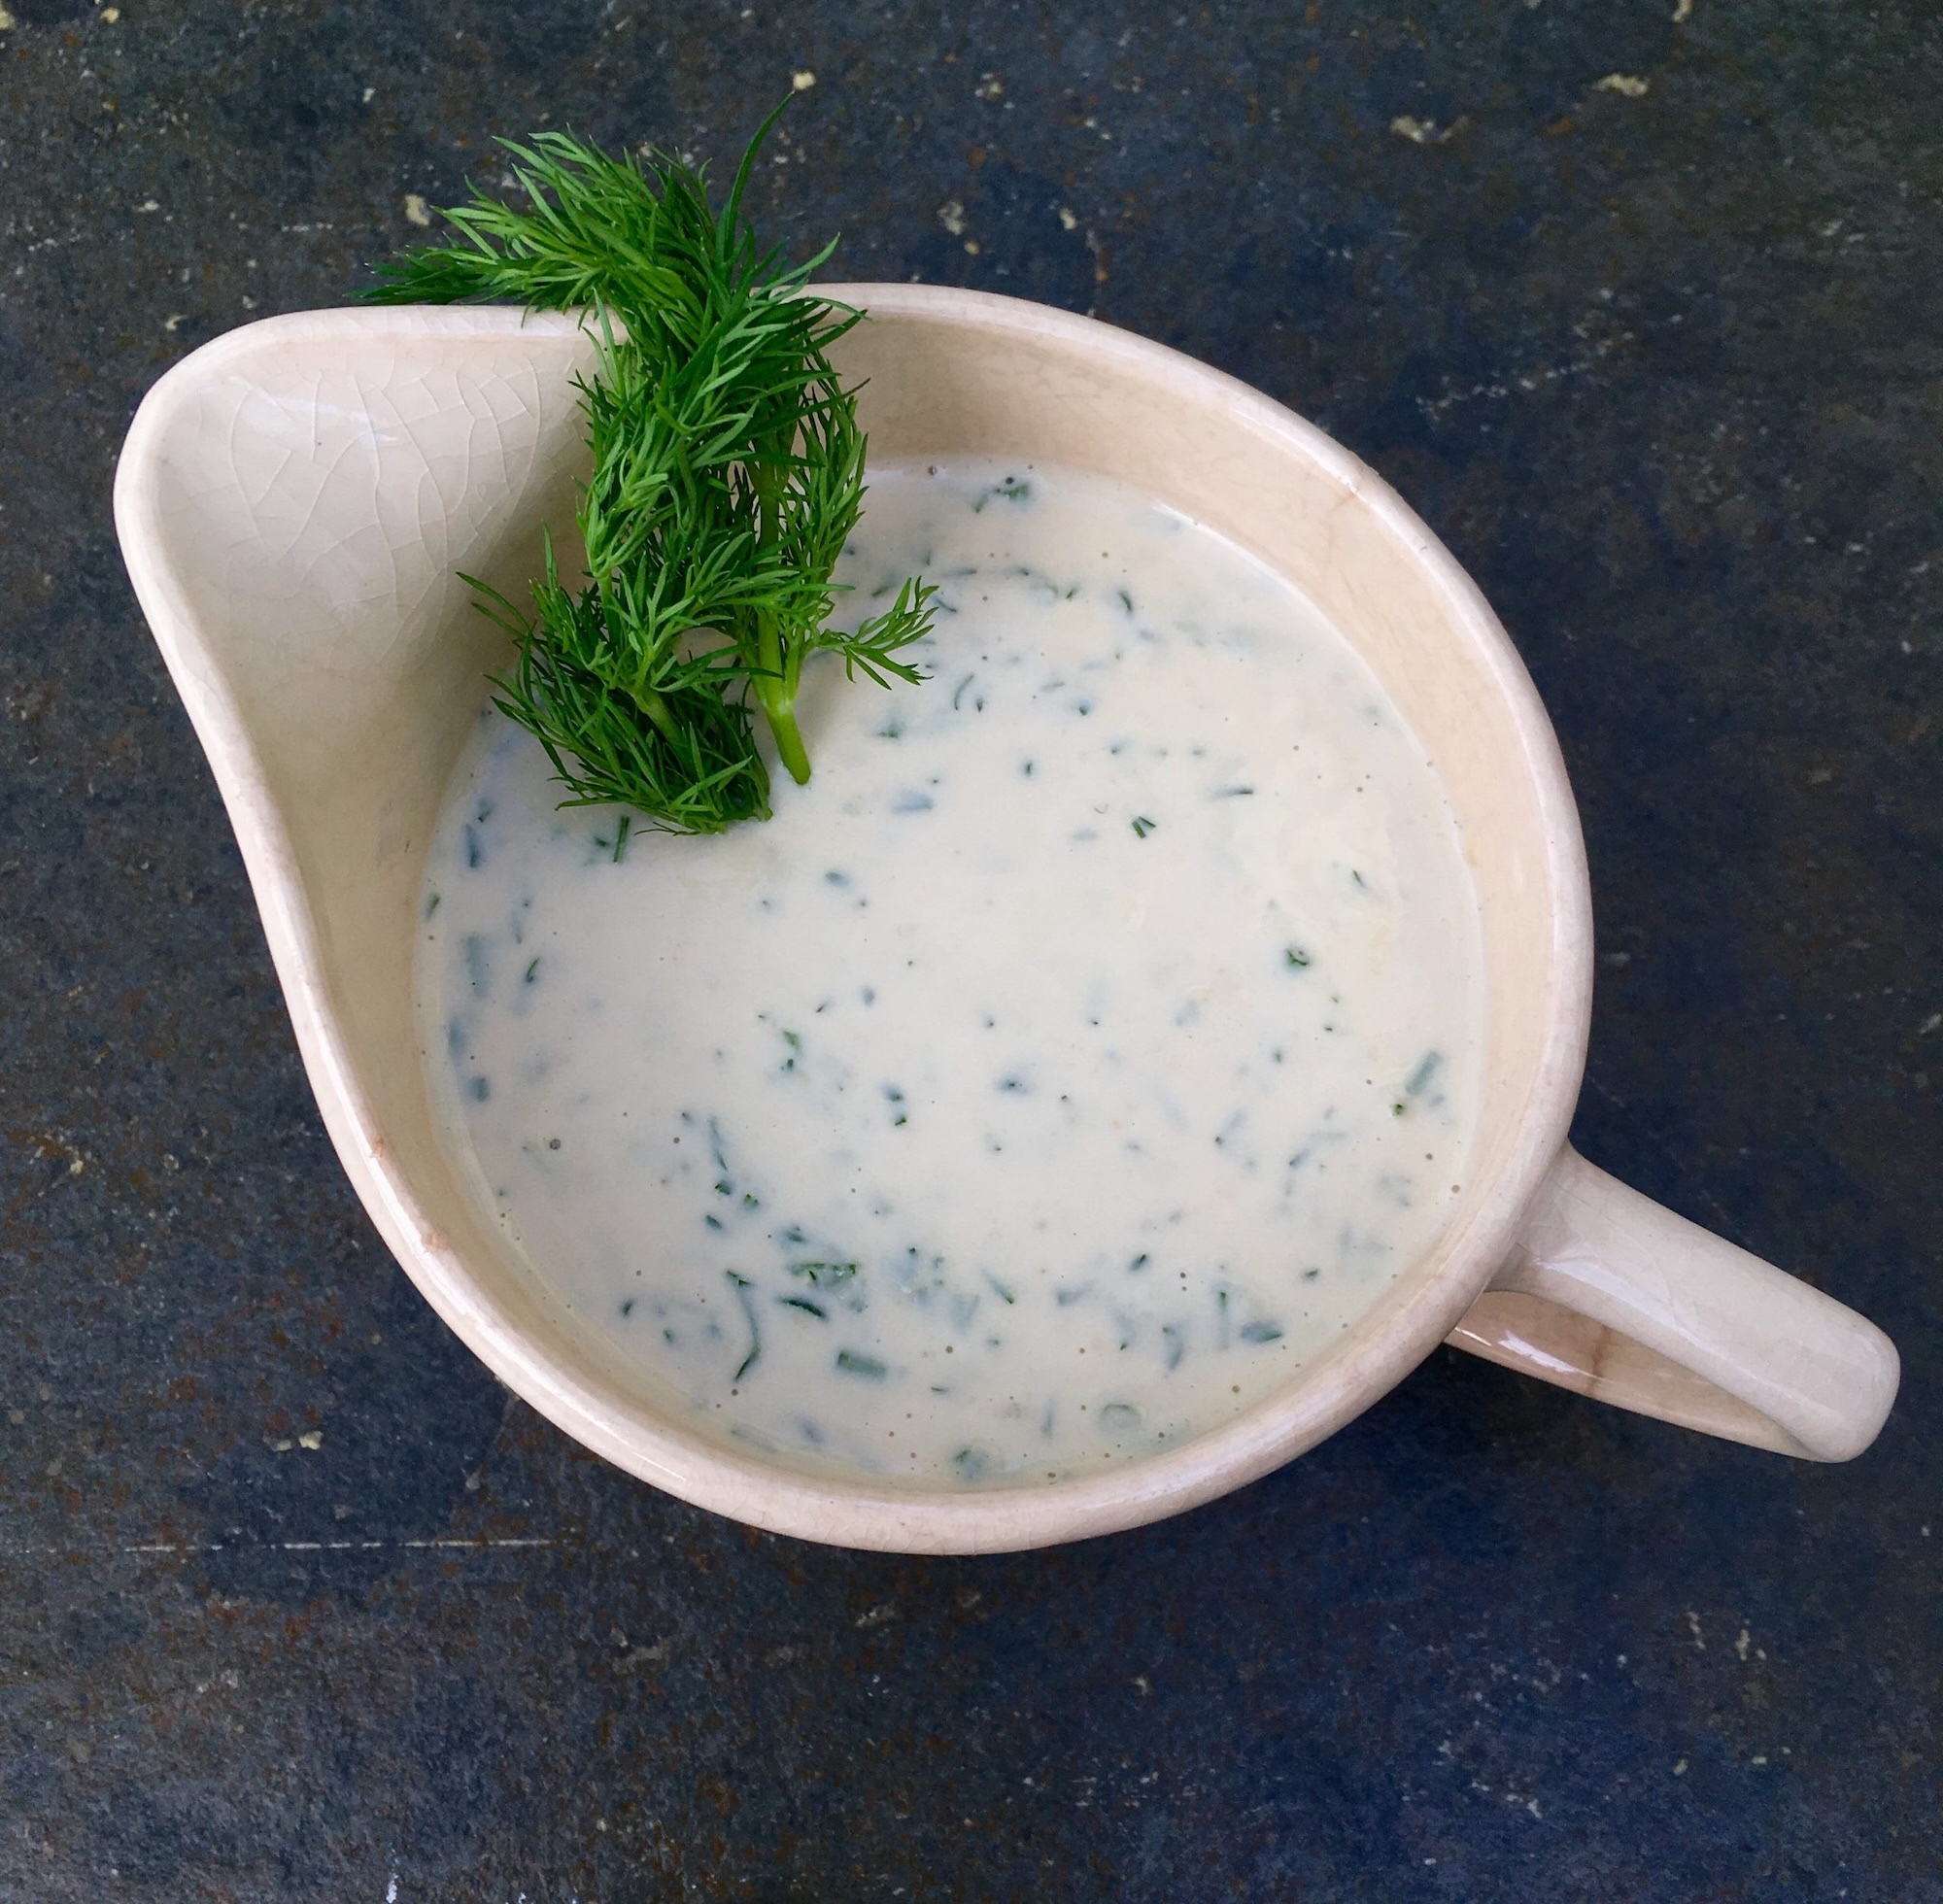
Tahini Miso Dill Dressing
Tahini Miso Dill Dressing
Ingredients:
¼ cup toasted tahini butter
2 tablespoons sweet white miso
¼ cup lemon juice (juice of 1 medium lemon)
¼ cup (or a little more) filtered water
¼ cup fresh dill, finely chopped
Instructions:
- Place tahini, miso, and lemon juice in suribachi or mixing bowl. Using surikogi or pestle to mix until well combined.
- Add water and mix until smooth. You may need to add more or less water to reach a desired consistency.
- Stir in dill.
- Use on any salad dish from noodle salad to bean or grain salads, and more.
- Will keep in refrigerator for 3-5 days.
Toasted Sunflower Seed Dressing
Toasted Sunflower Seed Dressing
Serves 6-8
Ingredients:
1 cup sunflower seeds
1 T umeboshi paste
1 cup coarsely chopped parsley
Juice of 1 lemon
½ -3/4 cup water
Instructions:
- Rinse the sunflower seeds and lightly toast in a cast iron skillet. You know the sunflower seeds are done when they break easily.
- Place sunflower seeds in a blender or food processor and blend until finely chopped.
- Add umeboshi paste, lemon juice, parsley and ½ cup water.
- Blend until smooth. You may need to add more water until you reach the desired consistency. Dressing should be thick.
- Served over pressed salad, blanched vegetables or steamed greens.
Drink Recipes
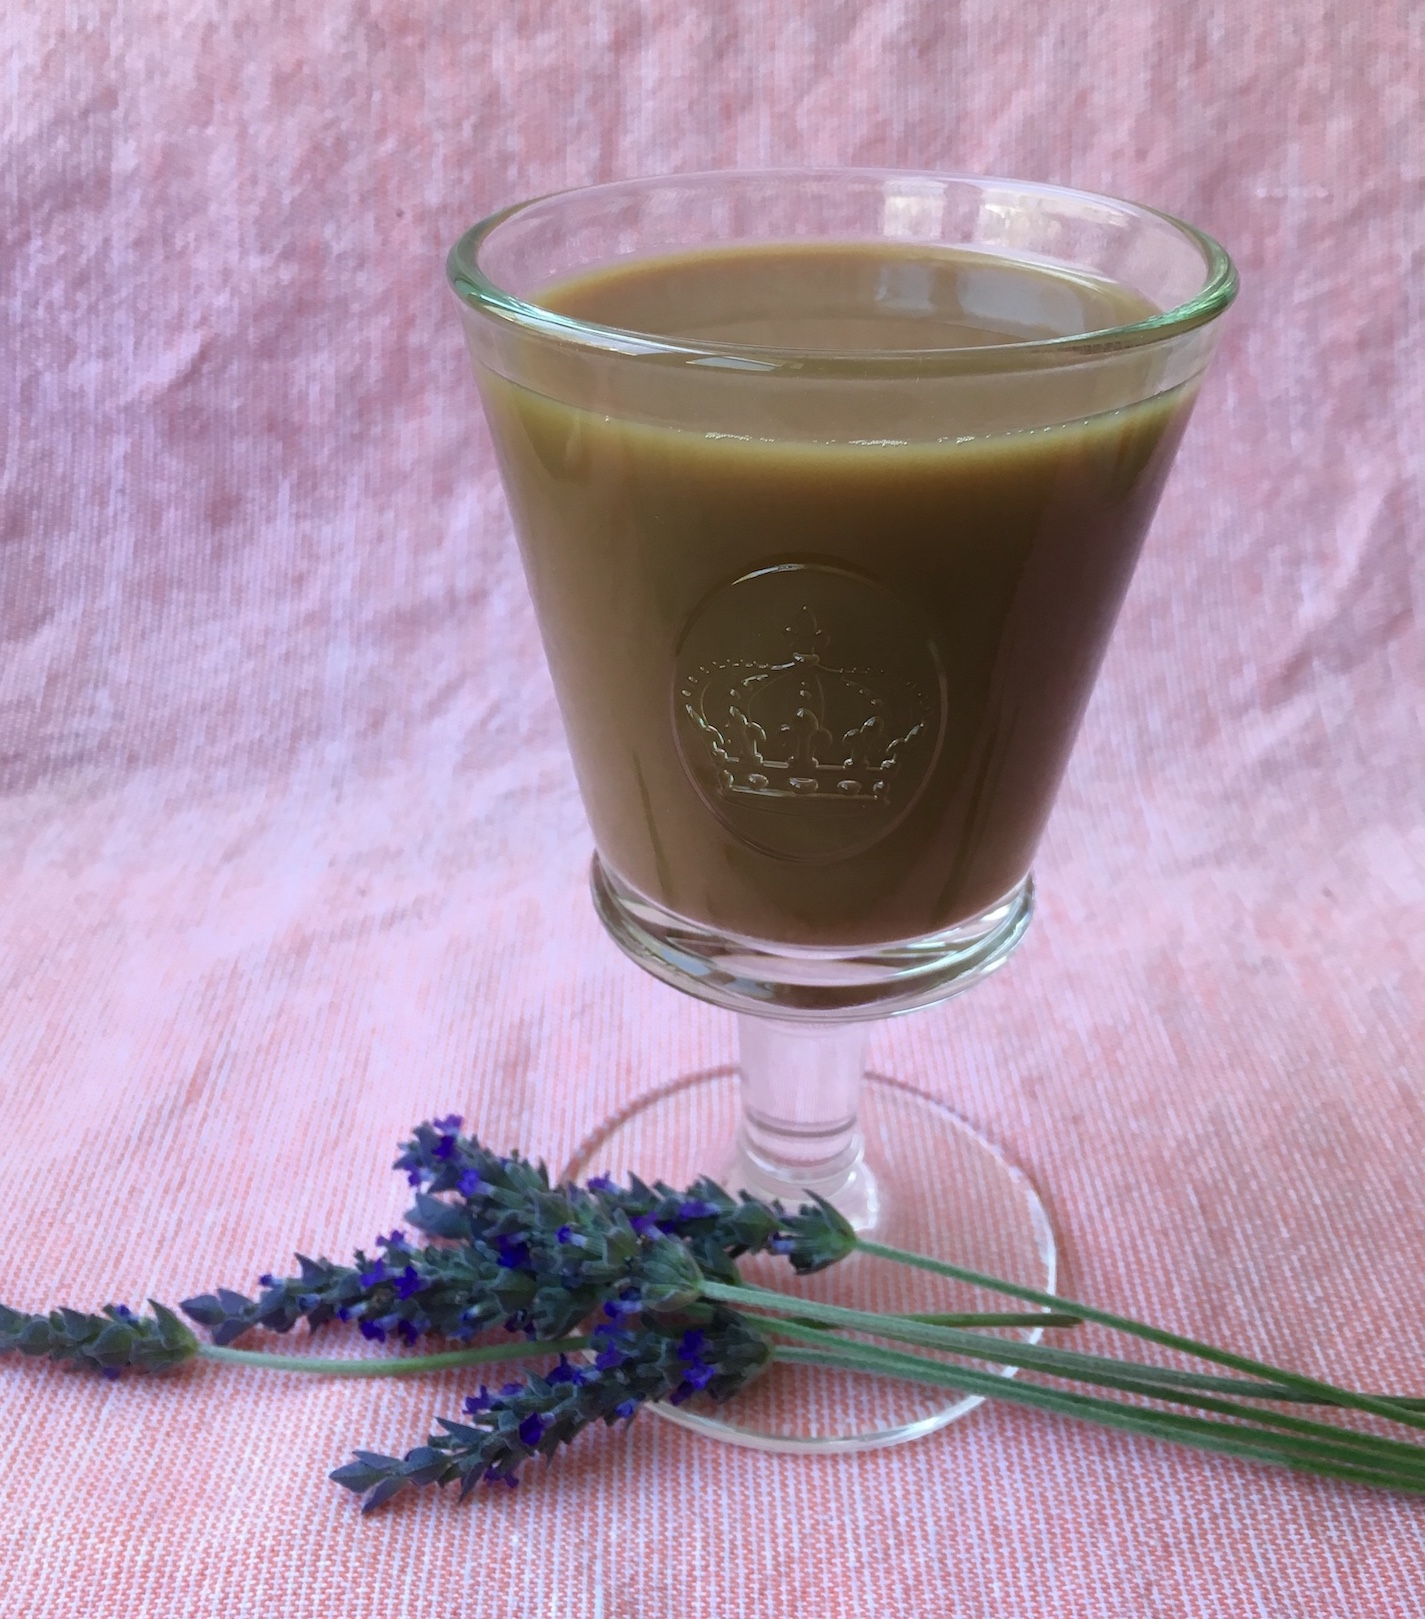
Lavender Tea Au Lait
Lavender Tea Au Lait
Serves 2
Ingredients:
2 cups water
1 tablespoon edible lavender flowers
2 teaspoons or 2 teabags black tea, (such as English Breakfast)
1 pinch sea salt
2-3 teaspoons agave syrup
¼ – ⅓ cup almond milk or other non-dairy milk
Instructions:
- In saucepan, heat water and lavender flowers to a boil over medium flame. Add black tea bags, turn the flame to low, cover and simmer for 5 minutes.
- Add a pinch of sea salt, agave syrup, and almond milk, and bring back to a gentle boil over medium low flame.
- Strain the tea and serve hot.
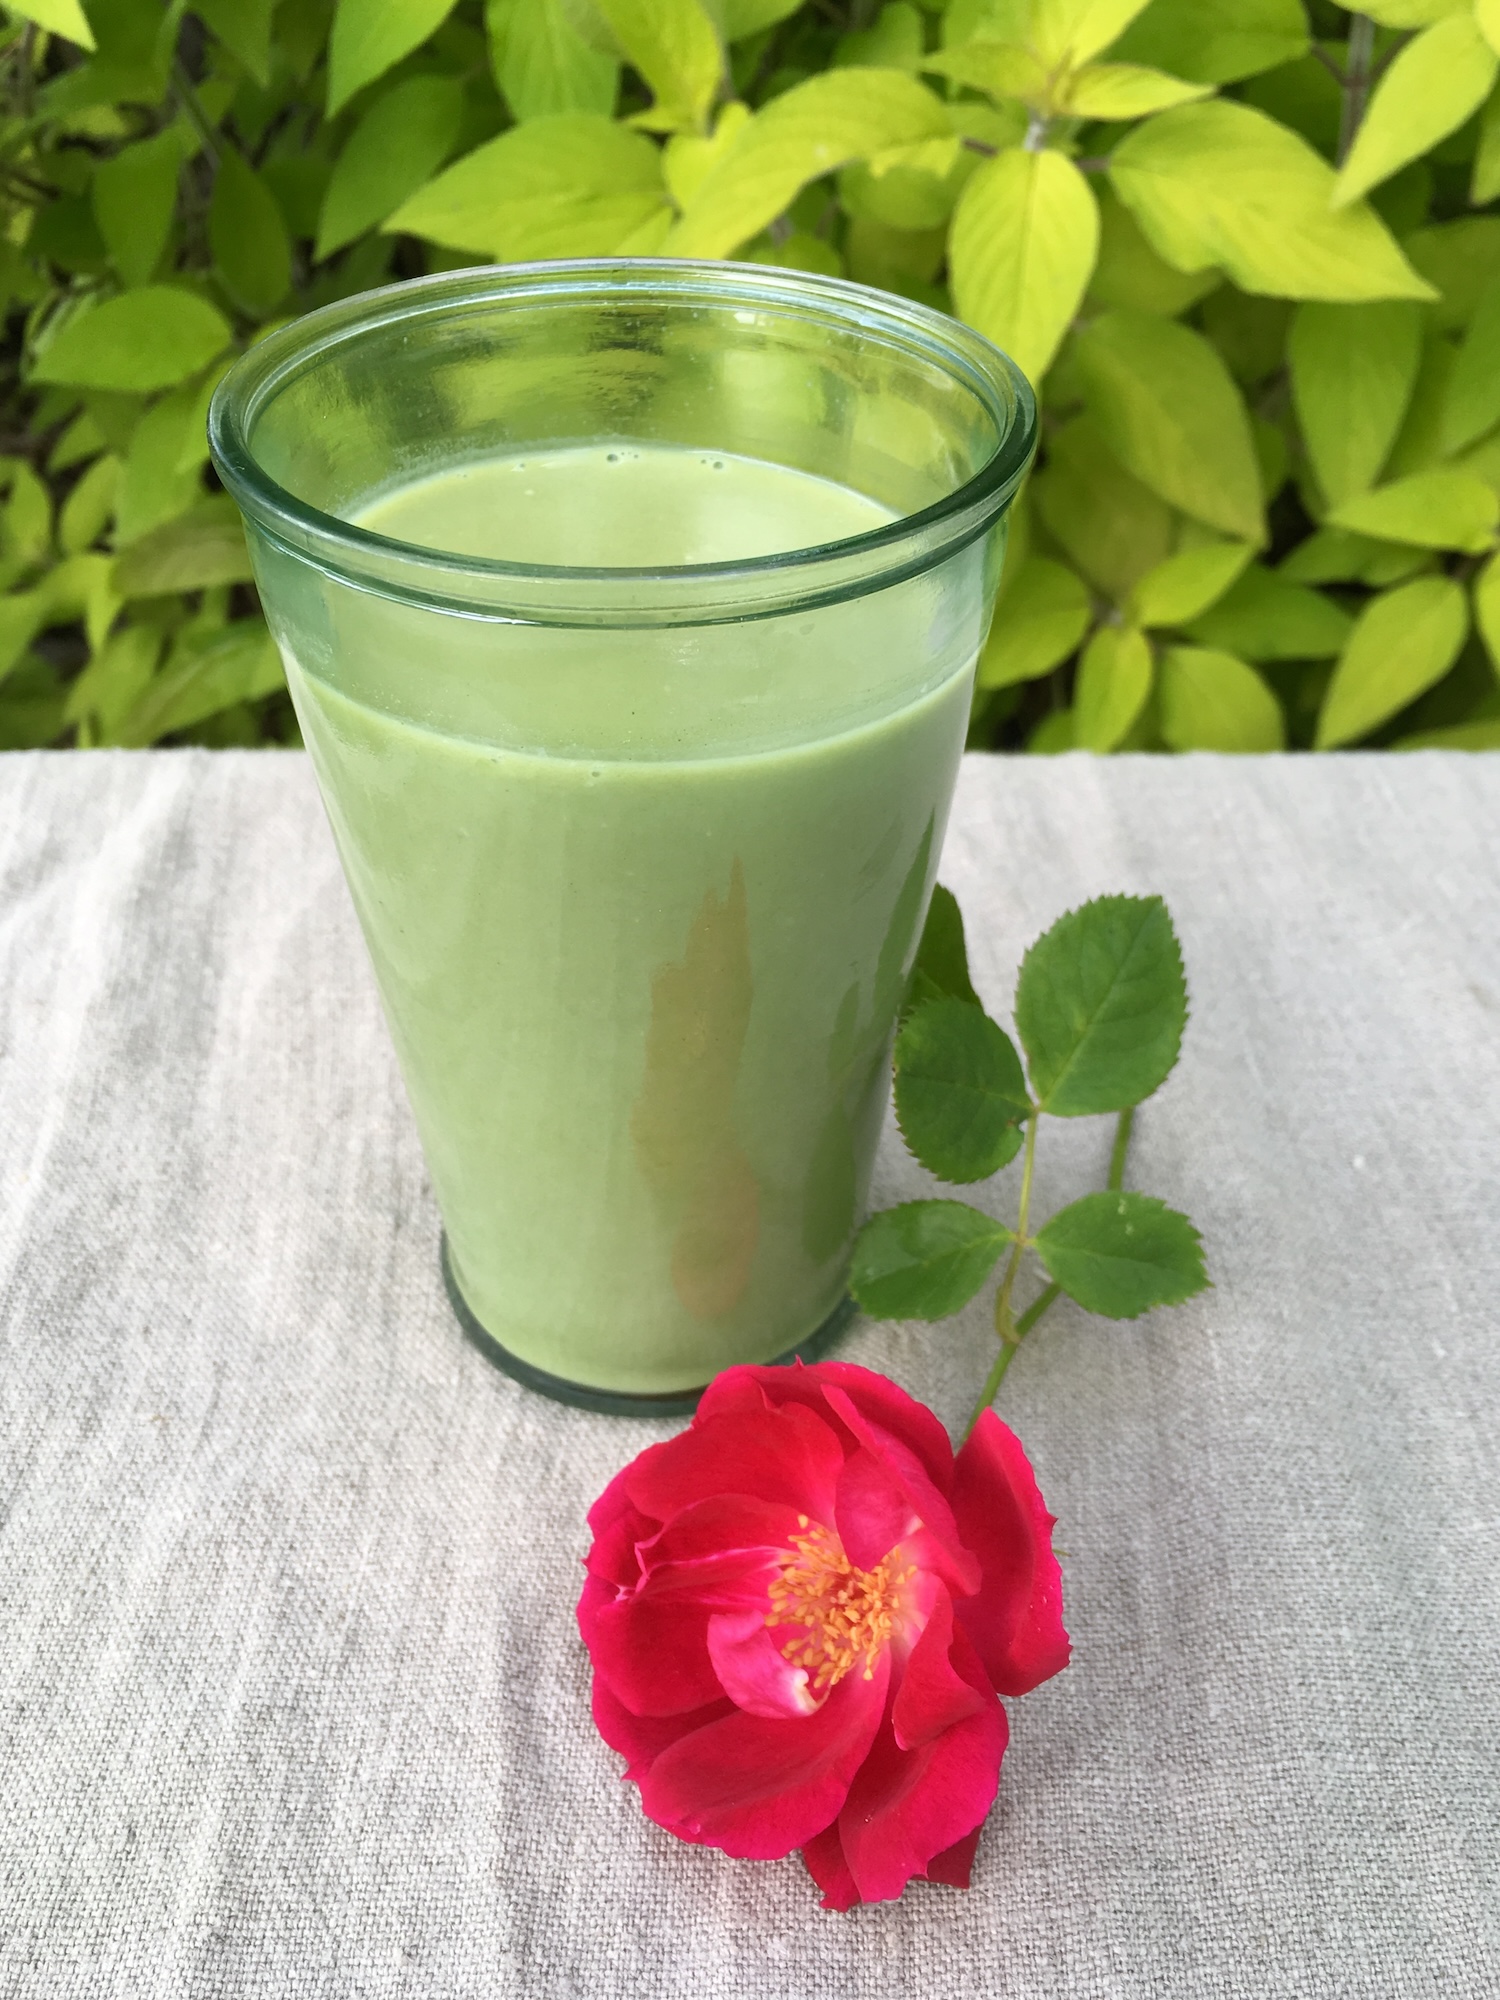
Matcha Green Tea Latte
Matcha Green Tea Latte
Serves 2
Ingredients:
2 teaspoons matcha green tea powder
2 cups almond milk or other non-dairy milk
1 pinch sea salt
3-4 teaspoons maple syrup
1/8 teaspoons cardamom powder (optional)
Instructions:
- Place matcha green tea powder in small mixing bowl and pour ¼ cup of hot water. Mix well with small whisk until matcha powder is dissolved completely. Set aside.
- In saucepan, heat almond milk over medium low flame to a gentle boil. Add a pinch of sea salt, maple syrup, the matcha mixture, and cardamom powder. Stir well to combine.
- Transfer to serving cups and serve hot or pour over ice to serve cool.

Vegan Eggnog
Vegan Eggnog
Serves 2.5 cups
Ingredients:
½ cup cashew halves, soaked for 4 hours (or overnight)
2 cups oat milk or other plant-based milk
5 medium Medjool dates, pitted and finely chopped (about 3 packed tablespoons)
2 teaspoons vanilla extract
1 teaspoon ground cinnamon
½ teaspoon ground nutmeg
Pinch sea salt
Pinch ground turmeric (optional for warmer color)
Instructions:
- Soak the cashews in water at least 4 hours, preferably overnight. Drain and rinse. Chop into fine pieces.
- Place cashews in blender with half the milk. Blend until smooth.
- Add the rest of the other ingredients and blend until smooth.
- Add the rest of the milk and blend until smooth.
- Serve sprinkled with ground nutmeg or cinnamon, or add cinnamon stick to serving cup. You can serve immediately, chilled or hot.
Grain Recipes
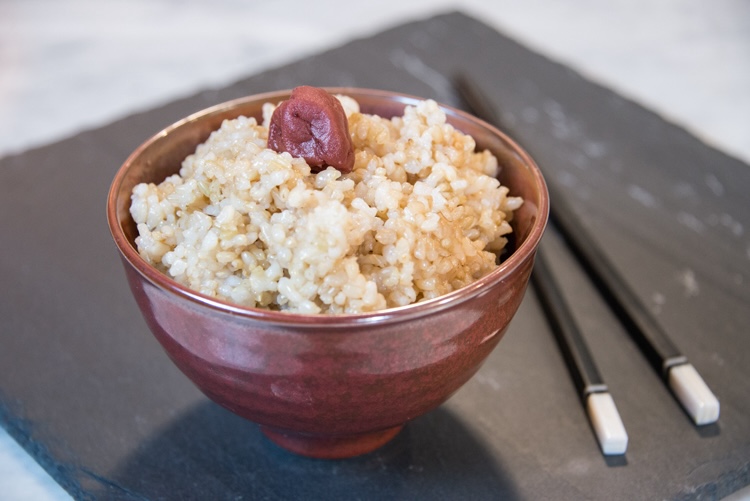
Basic Brown Rice
Basic Brown Rice
Serves 4
Ingredients:
1 ½ cup brown rice
3 cups water
2 pinches of sea salt
Instructions:
- Rinse rice and soak in 3 cups water 3-5 hours or overnight.
- Measure the discarded soaking water, and place the same amount of fresh water in a pot with the rice.
- Bring to a gentle boil over medium heat and add 2 pinches of sea salt.
- Cover and simmer for 45-50 minutes.
- Remove from heat and let stand for 10 minutes.
- Stir lightly with a wooden spoon.

Creamy Millet Porridge with Cauliflower
Creamy Millet Porridge with Cauliflower
Serves 4-6
Ingredients:
1 ½ cup millet
6 cups water
⅛ t sea salt
2 cups bite size cauliflower florets
¾ cup shredded mochi
Sliced scallions for garnish
Instructions:
- Rinse millet and place it in 6 cups water and soak for 6 hours or overnight.
- Place millet and soaking water in a pot, cover and bring to a boil over medium heat.
- Add the salt and simmer for 20 minutes.
- Add the cauliflower and cook for 15 minutes.
- Add the grated mochi and cook for 5 minutes or until mochi has melted.
- Garnish with sliced scallions.
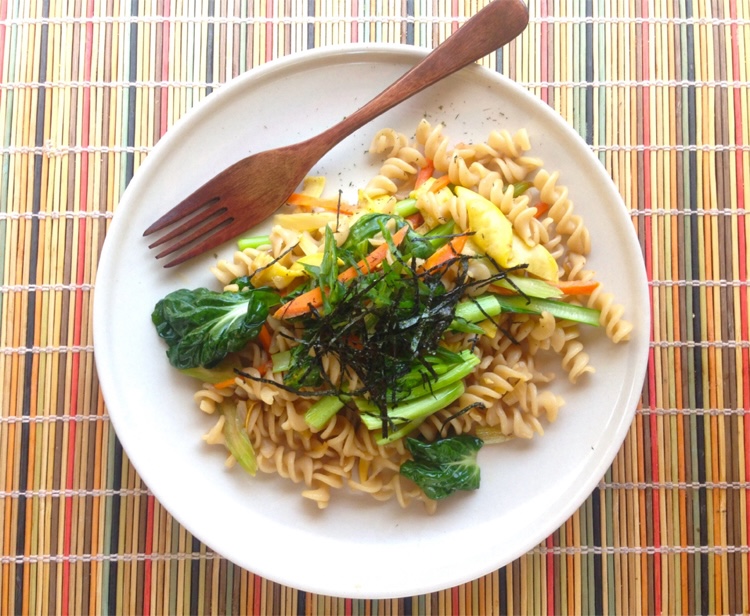
Fried Pasta with Vegetables
Fried Pasta with Vegetables
Serves 4
Ingredients:
2 cups brown rice pasta
1 T sesame or olive oil
½ clove garlic, minced (optional)*
½ cup onion, diced
½ cup celery, sliced on a thin diagonal
½ cup carrots, cut into matchsticks
½ cup summer squash, sliced into half moons
1 cup bok choy or seasonal greens, chopped into bite-size pieces Scallions and nori strips for garnish
Dressing:
2 T water
1 t lemon juice
2-3 t shoyu or tamari
1 t toasted sesame oil
Instructions:
- Cook pasta as per package.
- While pasta is cooking, heat oil a skillet.
- Add onions and sauté for 3 minutes,
- Then add celery and cook for 1 minute.
- Add carrots and cook for 1 minute.
- Add summer squash and cook for 1 minute.
- Add cooked pasta and mix gently.
- Add dressing and bok choy and gently mix everything together.
- Serve with scallions and nori strips for garnish.
*If you are using garlic, add garlic after sautéing the onions.

Herbed Polenta
Herbed Polenta
Serves 6
Ingredients:
1 cup polenta
4 cups water
⅛ teaspoon of sea salt
1 – 2 cloves garlic, sautéed in 1 T olive oil
½ cup onions, sliced in thin quarter moons
⅓ cup frozen or fresh corn
½ T dried sage or dried basil
Pinch of dried thyme
Safflower, grape seed or sunflower oil for frying
Instructions:
- Heat 1 T olive oil in a small pan and sauté garlic on medium-low heat for 30 seconds, stirring constantly and being careful not to burn the garlic.
- In a large saucepan, bring the water to a boil with the sea salt. Add polenta, onions, garlic, corn and spices and whisk together until smooth.
- Cover and bring to a boil over medium heat stirring occasionally to prevent clumps.
- Place the pot on a flame tamer. Turn flame to low and simmer, covered for 30-35 minutes.
- Pour into a 9×12 dish and let cool.
- Cut the set polenta into squares.
- Heat safflower, grape seed or sunflower oil in a heavy pan.
- Pan fry polenta squares for 4-5 minutes on each side until lightly brown.
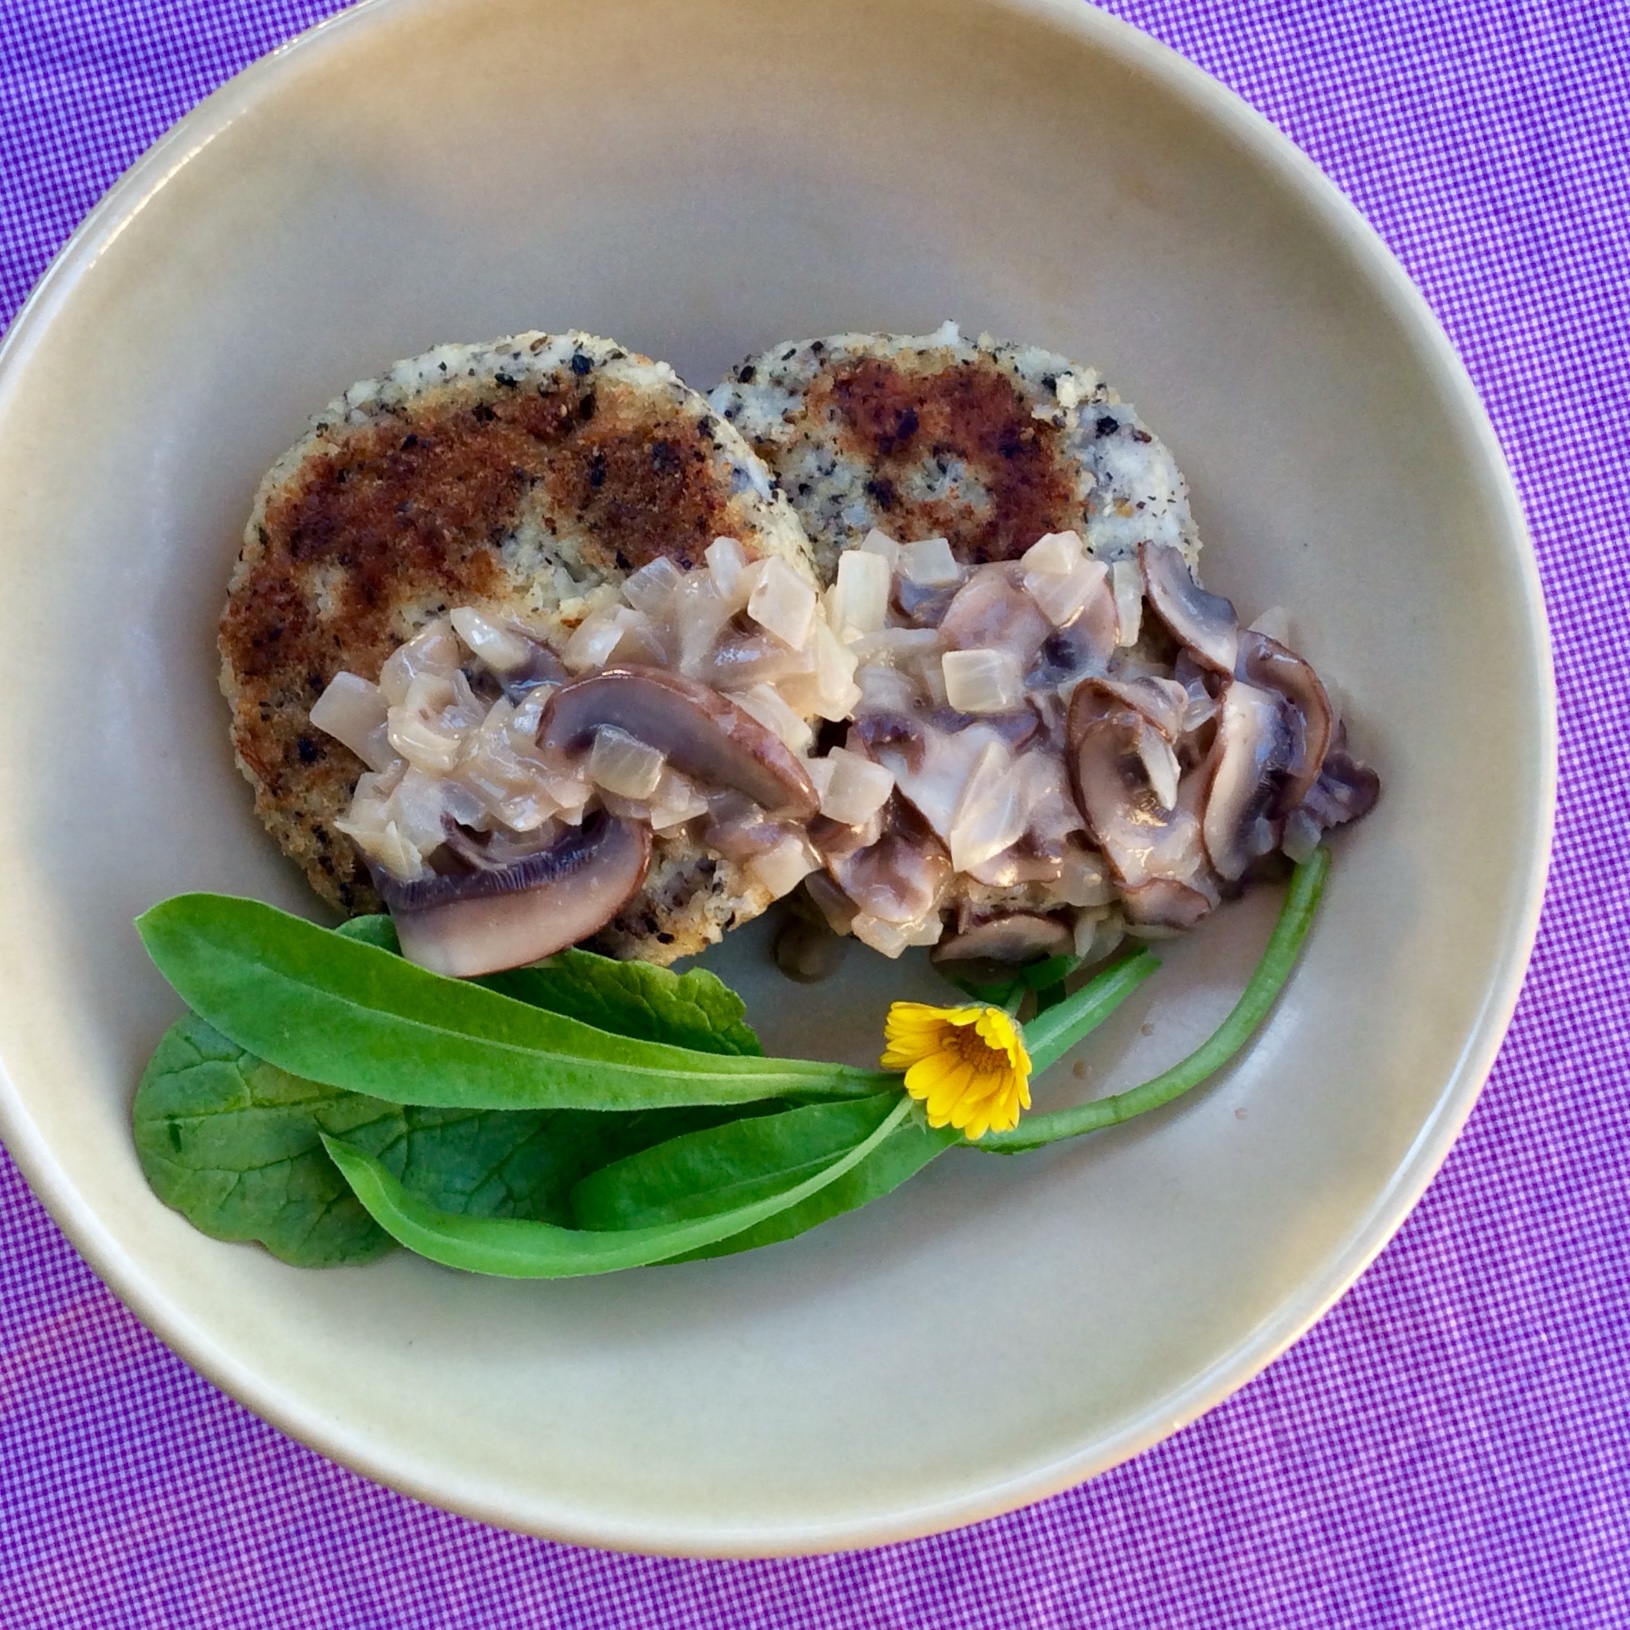
Millet Cauliflower Croquettes with Mushroom Bechamel Sauce
Millet Cauliflower Croquettes with Mushroom Bechamel Sauce
Serves 6-7
Ingredients:
Croquettes:
⅔ cup millet, soaked with 3 cups water overnight, reserve soaking water
2 cups cauliflower, thinly sliced
Pinch of sea salt
1 tablespoon toasted black sesame seeds, ground
Safflower oil for pan-frying
Mushroom Bechamel Sauce:
Makes about 1¼ cup
2 tablespoons olive oil
1 medium onion, finely diced (1 cup)
3 brown mushrooms, thinly sliced
¼ cup oat flour (certified gluten free oats)*
½ cup vegetable broth or water
2 tablespoons almond milk or other non dairy milk (optional)
Sea salt to taste
Black pepper to taste
* If you can’t find oat flour, you can also grind oat flakes in food processor into fine flour.
Instructions:
Croquettes:
- Layer millet on the bottom of a heavy pot, followed by cauliflower.
- Gently add the millet soaking water. Bring to a boil over medium flame, add sea salt, and cover. Place a flame deflector underneath the pot and reduce flame to low. Cook for about 40 minutes until millet becomes soft.
- Mash millet and cauliflower, and let cool for about 20 minutes until the temperature is warm but cool enough to handle. If you let the mixture cool to room temperature, millet will set so that it is not suitable to form patties.
- Combine millet with black sesame seeds and form rounded croquettes, about ¾ inch thick. Each croquette uses about ½ cup millet mixture.
- Heat oil in skillet and pan-fry each croquette on both sides until a nice golden color.
To Prepare the Sauce:
- Heat oil in skillet, sauté onions with a pinch of sea salt about 4 – 5 minutes until soft.
- Add mushrooms and a pinch of sea salt, continue sautéing for a couple minutes.
- Sprinkle in oat flour little by little and combine well with the vegetables.
- Add broth or water little by little while stirring well and bring to a boil. Lower the heat, cover the pot, and simmer for 4 minutes.
- Add almond milk, if using, and season with sea salt and black pepper and simmer for a couple minutes.
- Serve on top of the croquettes with a garnish, such as parsley or scallions.
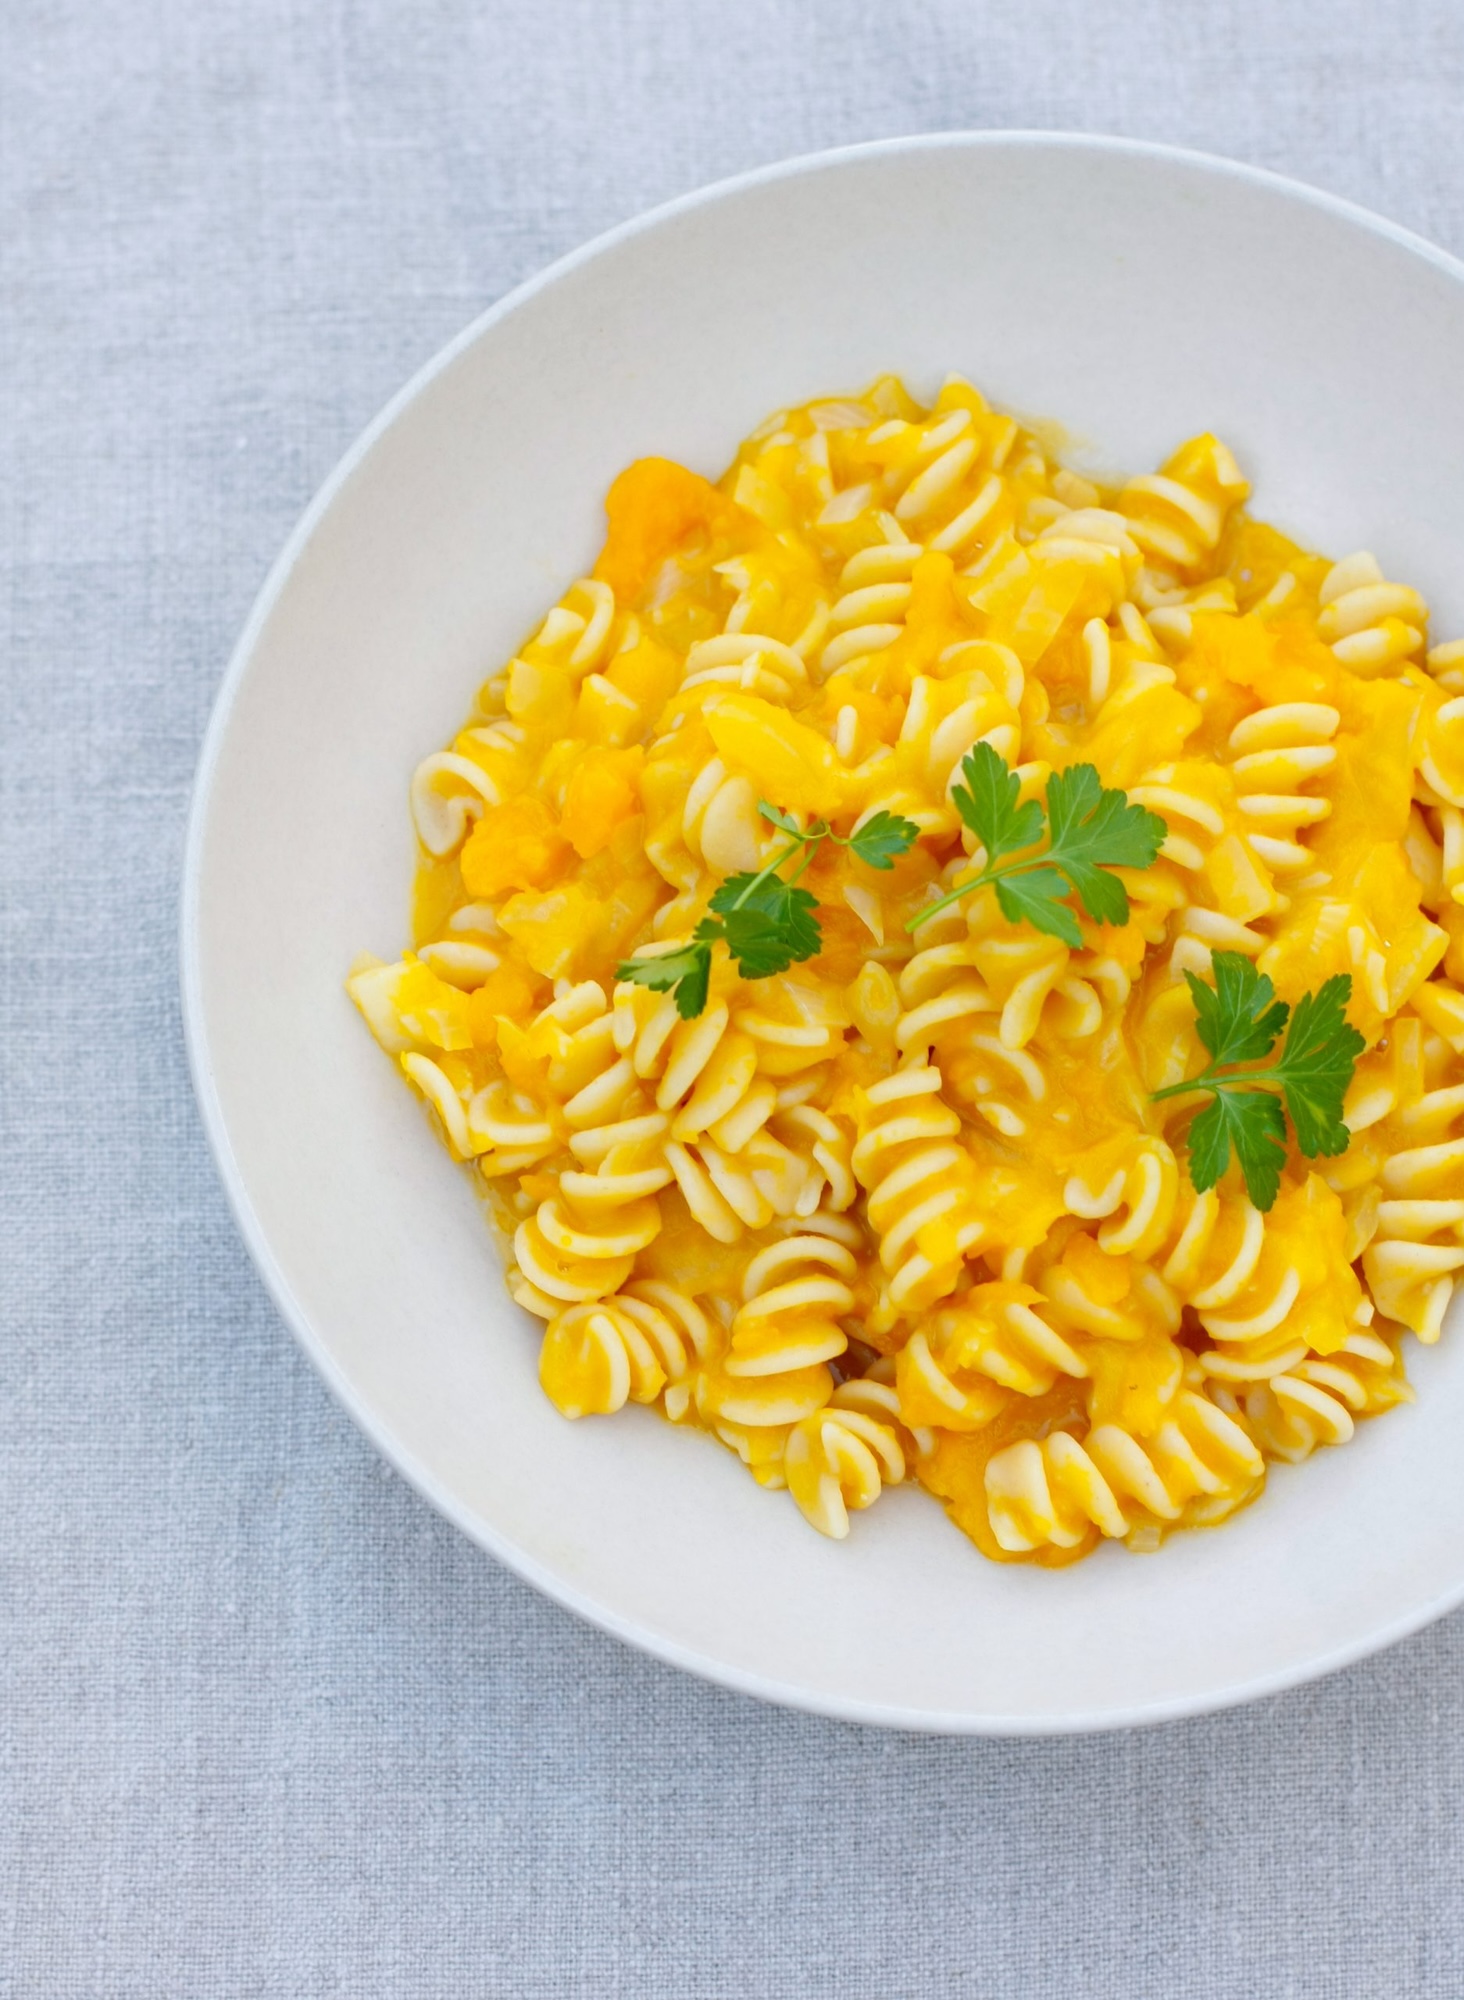
Pasta With Creamy Kabocha Sauce
Pasta With Creamy Kabocha Sauce
Serves 4
Ingredients:
3 cups kabocha, skinned and cut into cubes
2 tablespoons olive oil
1 medium onion, finely chopped
2 cloves garlic, minced
½ teaspoon sea salt, and more to taste
10 ounces spiral pasta
½ cup oat milk or other non dairy milk
1 teaspoon umeboshi vinegar
parsley for garnish (optional)
black pepper for topping (optional)
Instructions:
- In large pot, heat water for boiling pasta. Bring to a boil, cover, and keep it hot until it is time to boil the pasta.
- Steam kabocha in steamer in a separate pot until tender, for about 10 – 15 minutes. Place in mixing bowl and set aside to cool.
- Over low heat in skillet, place olive oil, onion, garlic and sea salt, sauté until onion turns lightly brown, about 20 minutes. Sautéing slowly with low heat makes this sauce sweet and savory.
- In the meantime, boil pasta according to the package.
- Add kabocha and 1 cup of pasta boiling water to the skillet, mashing kabocha with spatula to make sauce. Add oat milk and bring the sauce to creamy texture. Add more pasta boiling water if needed to make desired consistency.
- When pasta is done, immediately add into the skillet. Gently stir pasta into the sauce. Flavor with umeboshi vinegar and add more sea salt to taste.
- Serve with parsley for garnish and top with black pepper if desired.

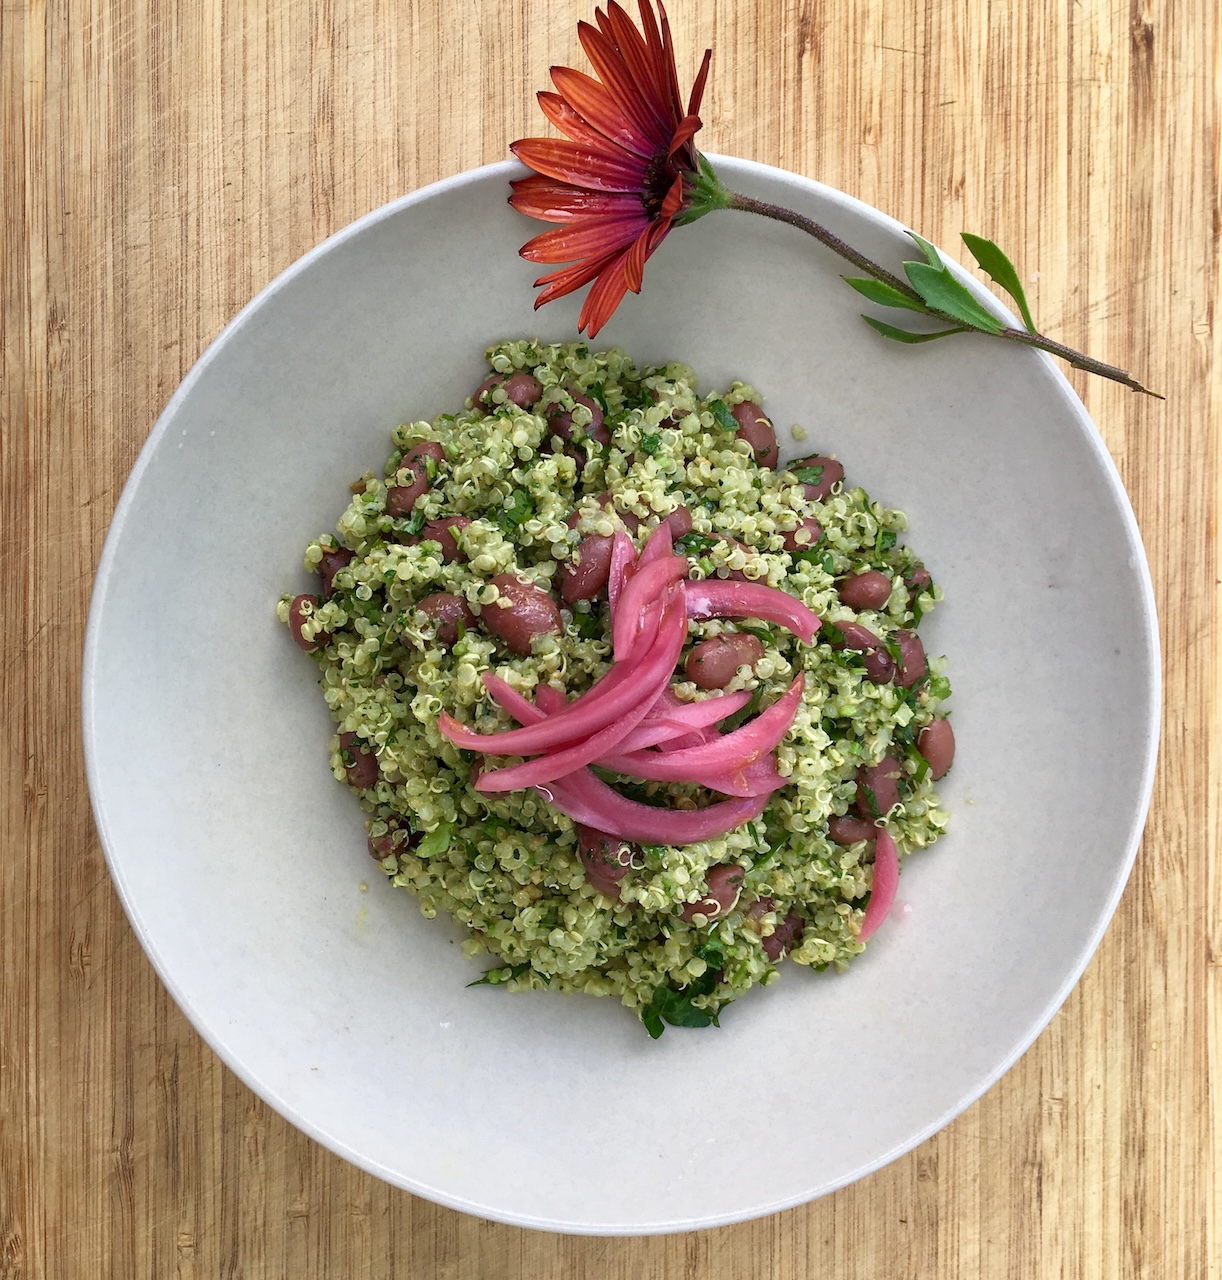
Quinoa Salad with Red Beans and Kale-sunflower Seed Pesto
Quinoa Salad with Red Beans and Kale-sunflower Seed Pesto
Serves 3-4
Ingredients:
Quinoa Salad:
1 cup quinoa, washed well
1 cup water
Pinch of sea salt
5 tablespoons Kale-Sunflower Seed Pesto, or more to taste
1 tablespoon water
1 tablespoon lemon juice
1 teaspoon umeboshi vinegar
1 cup cooked red beans or beans of your choice
2 tablespoons chopped parsley
Extra-virgin olive oil for topping
Kale-Sunflower Seed Pesto:
2 garlic cloves, not peeled
3 cups kale, chopped
½ cup toasted sunflower seeds
2 teaspoons chickpea or white miso
½ teaspoon umeboshi vinegar
¼ teaspoon sea salt or to taste
Black pepper to taste
¼ cup extra-virgin olive oil
Instructions:
- In a saucepan, add quinoa, water, and a pinch of sea salt. Over medium heat bring to a boil. Cover, lower the heat, and simmer for 20 minutes.
- Remove the saucepan from the heat, and let stand for 5 minutes. Transfer quinoa to a mixing bowl, and set aside to cool.
- In a small mixing bowl, combine Kale-Sunflower Seed Pesto, 1 tablespoon water, lemon juice, and umeboshi vinegar until smooth, loose paste.
- Add the pesto mixture to quinoa, mixing gently until well-combined.
- Add cooked beans and parsley to the quinoa, mixing gently until well-combined.
- Serve with a little olive oil drizzled on top.
Kale-Sunflower Seed Pesto
- Toast garlic cloves in skillet over medium flame, shaking skillet occasionally, until softened and spotty brown, about 8 minutes. When garlic is cool enough to handle, remove and discard the skins and chop coarsely.
- Meanwhile, toast sunflower seeds in now empty skillet over medium flame, stirring often, until golden and fragrant for about 4-5 minutes.
- Bring water to a boil in a pot, add a few pinches sea salt. Blanch kale for a couple of minutes until colors brighten and kale is tender. Set aside to cool.
- In food processor, place garlic, toasted sunflower seeds, blanched kale, chickpea miso, umeboshi vinegar, sea salt, and black pepper if using.
- Process until finely chopped, about 1 minute, scraping down sides of the bowl as needed.
- With processor running, slowly add olive oil until well-incorporated. Transfer pesto to jar for storage. To prevent browning, make the surface of the pesto flat and cover it with thin layer of olive oil.
Chef’s note
It is better to toast garlic cloves in order to tame its sharp flavor and to bring up its sweetness. The pesto can be refrigerated for up to 3 days or frozen for up to 3 months. Before using, bring to room temperature. As a variation, use 2 cups chopped kale and 1 cup fresh basil leaves for a more herby Mediterranean flavor.
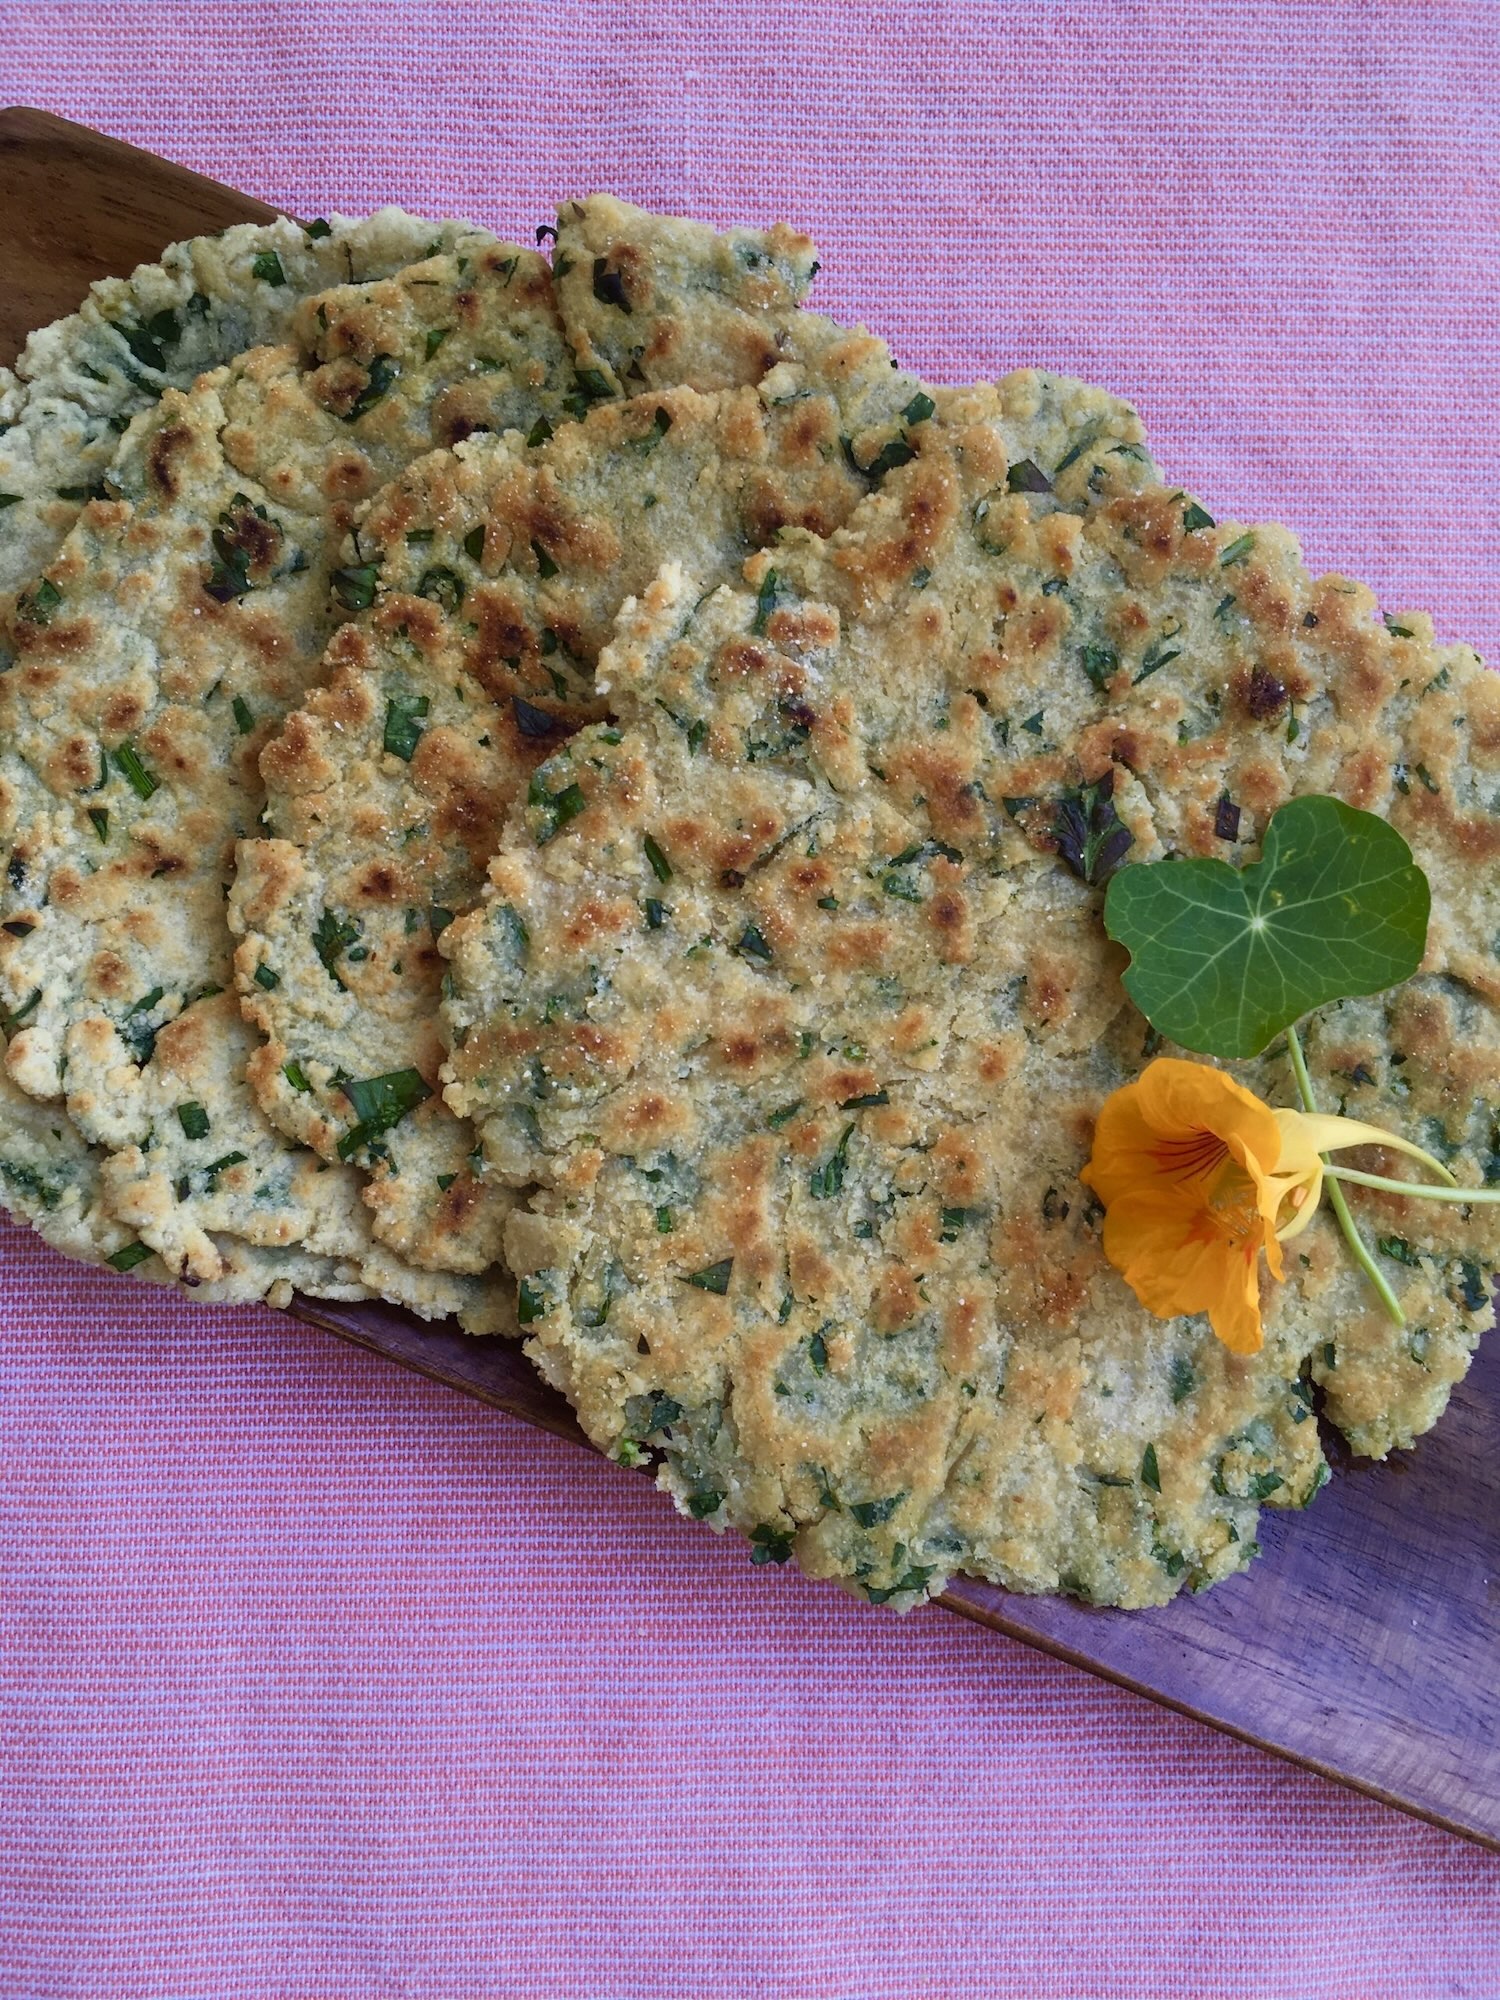
Vegan Gluten Free Flatbread
Vegan Gluten Free Flatbread
Serves 4
Ingredients:
1 cup gluten free all-purpose flour, plus more for dusting
1 teaspoon baking powder
¼ teaspoon baking soda
⅛ teaspoon sea salt
2 tablespoons finely chopped parsley (optional)
2 tablespoons non-dairy milk, such as gluten free oat milk
1 tablespoon safflower oil
¼ teaspoon apple cider vinegar
⅓ cup warm water, plus a little more, if needed
safflower oil for frying
Creamy Parsley Mint Sauce
Yields about 1 cup
¼ cup toasted and chopped almonds
1 cup packed parsley, chopped
½ cup packed spearmint, chopped
2 garlic cloves, minced
¼ cup lemon juice (juice of 1 medium lemon)
1 tablespoon brown rice syrup
½ teaspoon sea salt or more to taste
1 teaspoon umeboshi vinegar
¼ cup olive oil
Instructions:
- Place flour, baking powder, baking soda, sea salt, and parsley, if using, in medium mixing bowl. Mix well using whisk until everything is well combined and there are no lumps.
- Place non-dairy milk, safflower oil, and apple cider vinegar in small mixing bowl. Stir well to combine.
- Place wet mixture into dry mixture, mix to combine.
- Pour warm water into the mixture. If still dry, add a little more warm water.
- Knead for a couple of minutes, until dough becomes smooth. Cover and let the dough rest for 15 minutes.
- For Creamy Parsley Mint Sauce:
- Place almonds in food processor, process until finely ground.
- Add rest of the ingredients and process until smooth.
- Adjust seasoning if necessary.
- Keeps in the refrigerator for 3-5 days.
- Dust your work surface with flour. Divide dough into quarters, make round balls, then spread each ball into about a 6 inch flatbread shape using rolling pin.
- Heat skillet over medium heat, pour oil in pan, panfry each bread until golden for about 1-2 minutes on each side.
- Serve with Creamy Parsley Mint Sauce
Main Dish Recipes
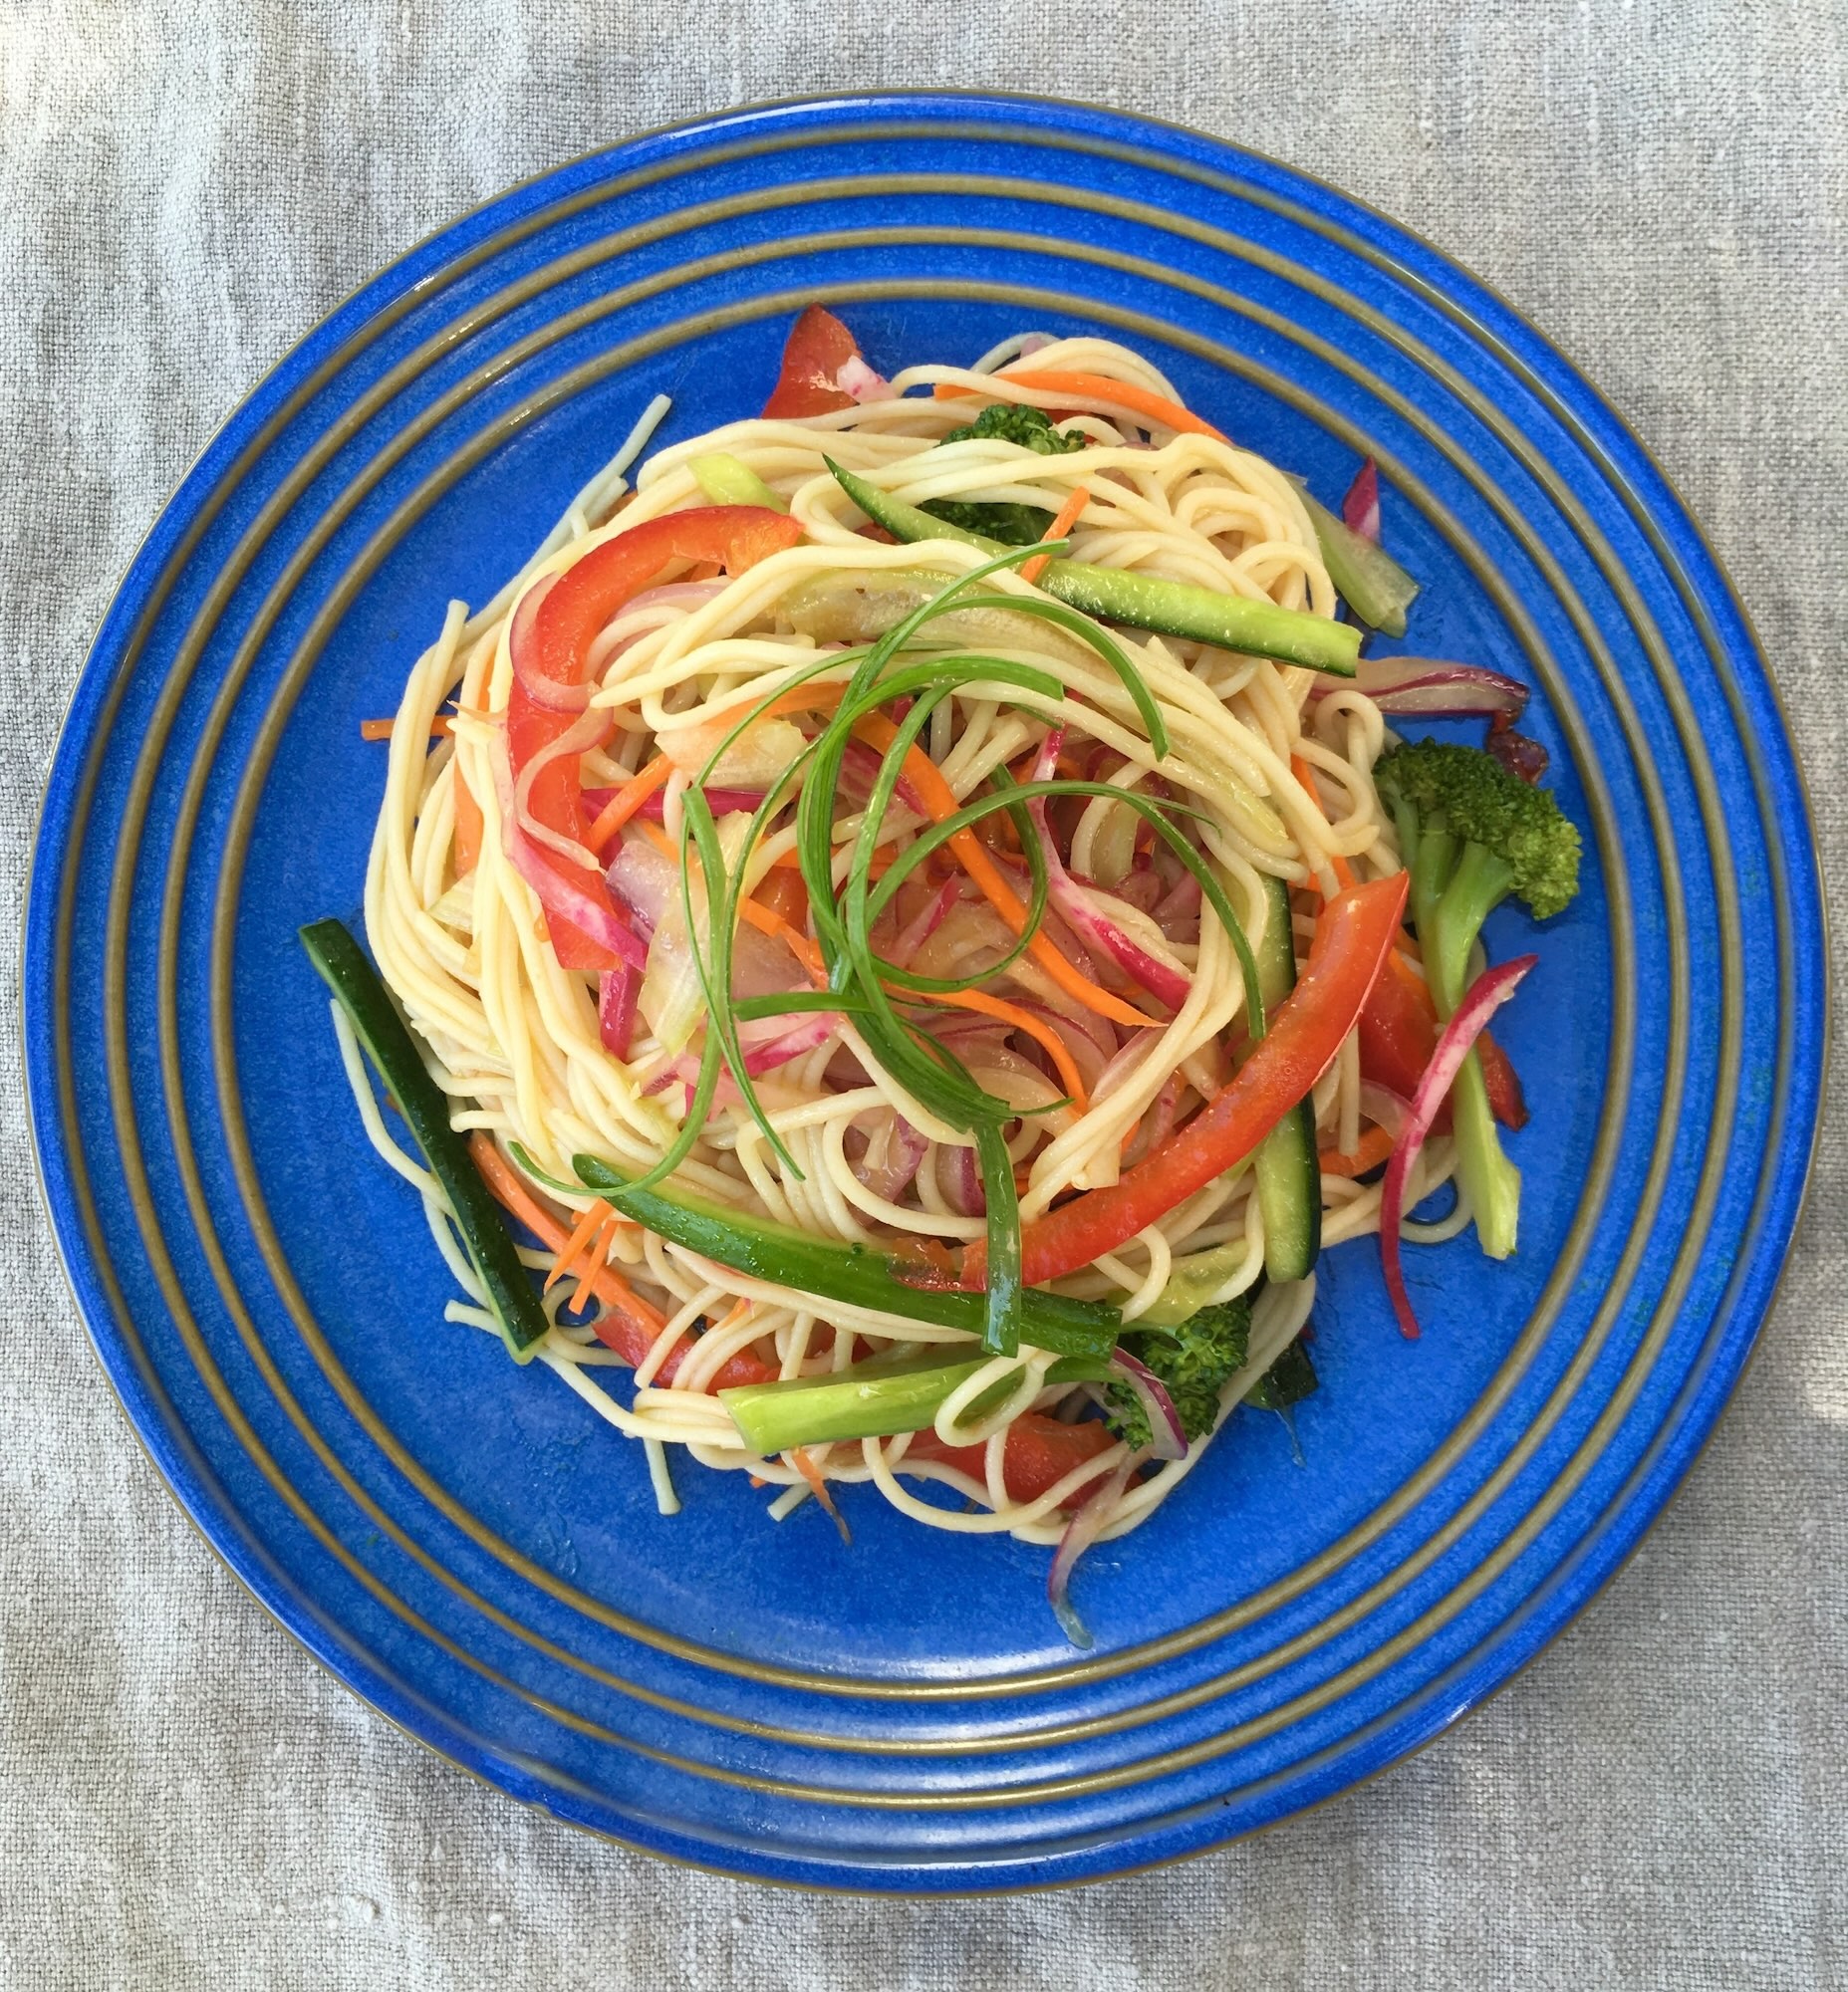
Asian Noodle Salad
Asian Noodle Salad
Serves 4
Ingredients:
8 oz thin pasta such as capellini or spaghetti
1 cup packed small broccoli florets or other leafy green vegetable of your choice
1 medium red onion, sliced into thin half moons (1cup)
2 teaspoons umeboshi vinegar
2 stalks celery, thinly sliced (1 cup)
1 medium carrot, sliced into thin matchsticks (1 cup)
1 medium cucumber, sliced into thin matchsticks (1 cup) *
2-3 radishes, sliced into thin matchsticks (½ cup)
1 small red bell pepper, sliced into thin slices or matchsticks (½ cup)
* If you are using American cucumber, scoop out the seeds by using spoon before slicing.
Asian Salad Dressing:
¼ cup extra virgin olive oil
2 tablespoons toasted sesame oil
3 tablespoons shoyu, or tamari as gluten free option
3 tablespoons rice vinegar
1 tablespoon umeboshi vinegar
1 tablespoon agave syrup
2 tablespoons lemon juice
2 cloves garlic, grated or crushed in garlic press
1 tablespoon juice from freshly grated ginger
Thinly sliced scallions for garnish
Instructions:
- Boil water in a pot, blanch broccoli or leafy greens of your choice until tender, drain well, and set aside.
- Using the same water, make noodles as directed on the package. Rinse noodles well under cold water and drain. Set aside.
- Place red onions in small mixing bowl. Add 2 teaspoons of umeboshi vinegar, massage with hands until onions release water, for about 30 seconds. Set aside.
- Place celery, carrot, cucumber, radish, and red bell pepper in separate bowls, massage with a few pinches of sea salt until vegetables start to release a little water. Set aside.
- Make Asian Salad Dressing by mixing ingredients well in jar.
- Drain excess water released from each vegetable.
- In a large mixing bowl, place noodles and prepped vegetables. Add Salad Dressing to taste and gently mix to combine.
- Serve with garnish.
Chef’s note:
Raw onions can be pretty sharp, so make sure to marinate them with umeboshi vinegar for at least at least 10 minutes, preferably 20 minutes. Marinating each vegetable with sea salt releases some of the vegetable water, so it won’t dilute the dressing. It also helps the texture to remain nice and crunchy, and helps digestion.
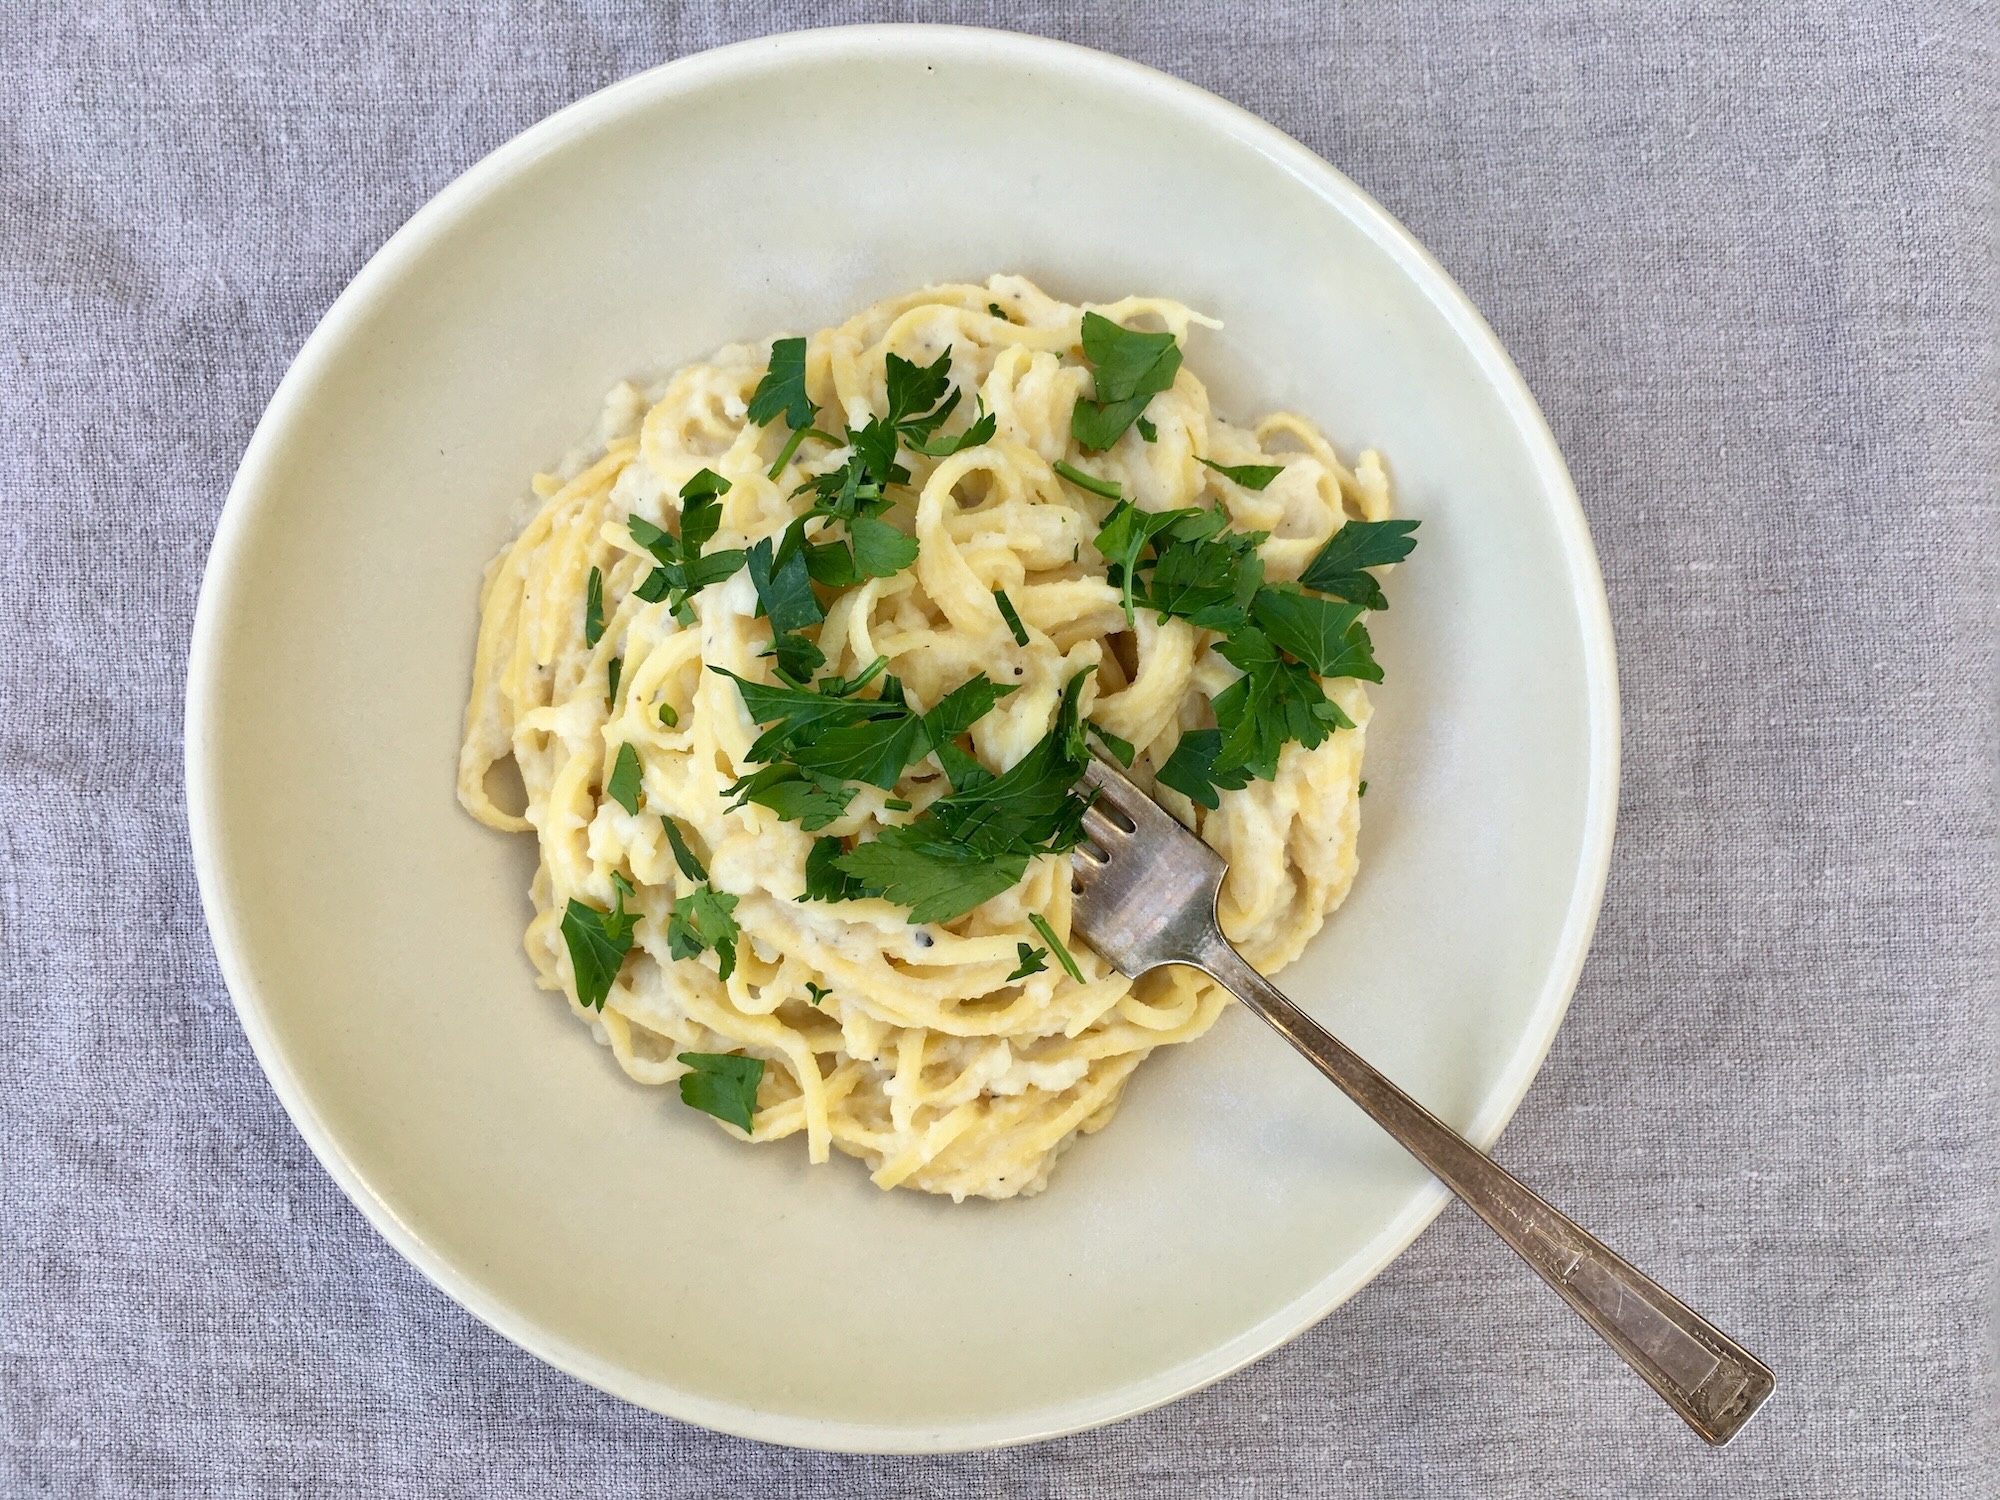
Cauliflower Alfredo
Cauliflower Alfredo
Serves 4
Ingredients:
½ large head of cauliflower, sliced into 3 inch length florets (1 pound)
3 tablespoons olive oil, divided
1 medium onion, diced (1 ½ cup)
¼ teaspoon sea salt
3 cloves garlic, minced
¼ teaspoon nutmeg powder
½ cup vegetable broth
1 ½ tablespoon white miso
Black pepper to taste
2 tablespoons almond milk or other non-dairy milk (optional)
8 ounces linguini or your favorite pasta
Parsley, finely chopped
Instructions:
- Steam cauliflower florets until fork tender and set aside to cool.
- Heat 2 tablespoons olive oil in heated skillet, then sauté onions with sea salt until soft.
- Add garlic and nutmeg powder. Continue to sauté for a couple of minutes. Add vegetable broth, remove from the heat and set aside.
- In a food processor, add steamed cauliflower and vegetable mixture. Process until completely smooth.
- Add white miso and black pepper, and blend well.
- Add 1 tablespoon olive oil and almond milk, if using, and process until everything is well combined.
- Place the sauce back in the skillet.
- Boil linguine per package instructions and drain.
- Meanwhile heat the sauce.
- Add the linguini to the Alfredo Sauce in the skillet, mix to combine. Adjust the flavor by adding sea salt if necessary.
- Serve the Linguini Alfredo topped with chopped parsley for garnish.
The sauce keeps well in the refrigerator for 3-4 days. Just warm gently in a skillet when you reheat it, and add vegetable broth or water to thin it out if needed.
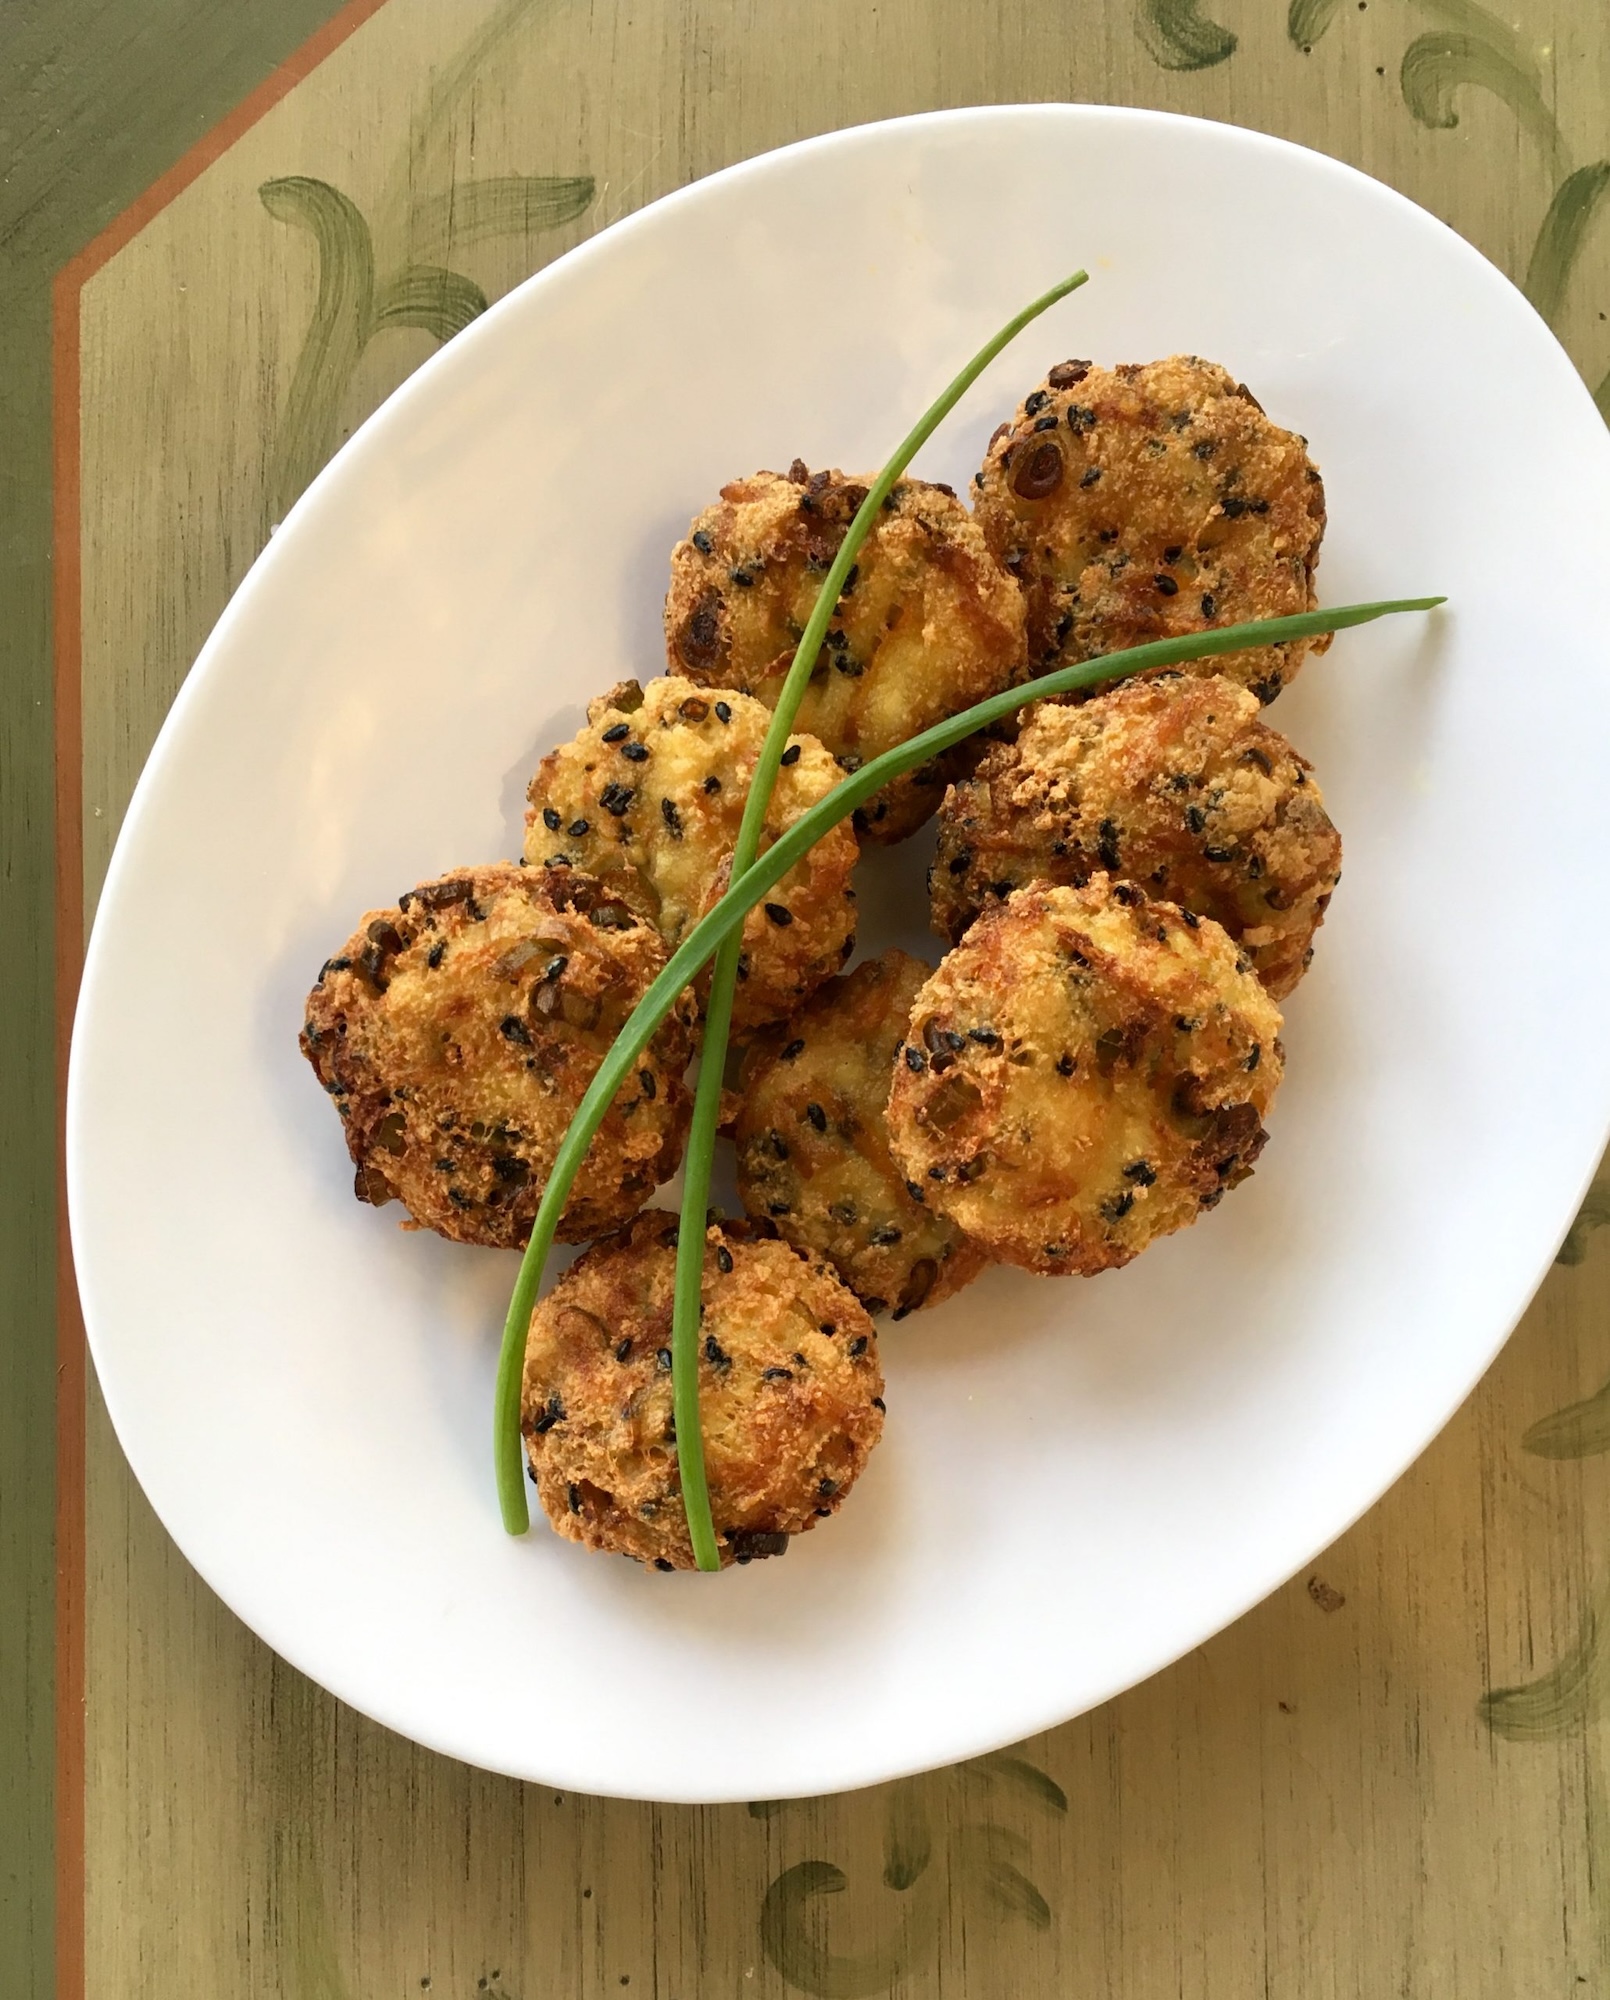
Ganmodoki – Fried Tofu Dumplings
Ganmodoki – Fried Tofu Dumplings
Serves 16 dumplings
Ingredients:
1- 14 ounce package firm tofu, drained and pressed about 30 minutes
1 medium carrot, grated
⅓ cup green onions, thinly sliced
1 tablespoon toasted black sesame seeds
3 tablespoons arrowroot powder
½ teaspoon sea salt
deep frying oil such as safflower oil
Instructions:
- Press tofu for 30 minutes. Drain pressed tofu and mash well with hands in mixing bowl.
- Sprinkle a couple pinches of sea salt on carrots, set aside for 5 minutes. Drain and squeeze out the water.
- Add carrots to the tofu in mixing bowl, along with green onions, black sesame seeds, arrowroot powder, and sea salt. Use hands to mix well to combine. Make sure the dumpling mixture is not watery. It should be easy to mold into patties. If still a little watery, add a little more arrowroot powder.
- Using small ice cream scoop or measuring spoon, make round or oval shaped dumplings. Each dumpling is about 1 heaping tablespoon.
- Heat high heat oil to 350 °F, fry dumplings until golden.

Gluten Free Vegan Pancakes
Gluten Free Vegan Pancakes
Serves 2-3
Ingredients:
1 cup gluten free oat flour
½ tablespoon baking powder
½ teaspoon baking soda
½ teaspoon cinnamon powder
a pinch sea salt
1 cup non dairy milk
2 tablespoons apple sauce
1 teaspoon vanila extract
½ teaspoon apple cider vinegar
oil for pan frying such as safflower oil
toppings such as maple syrup and strawberries
Instructions:
- In large mixing bowl, place all the dry ingredients: oat flour, baking powder, baking soda, cinnamon powder, and sea salt; stir well with whisk.
- In medium mixing bowl, place all the wet ingredients: non dairy milk, apple sauce, vanilla extract, and apple cider vinegar; stir well to combine.
- Pour the wet ingredient mixture into the dry ingredient mixture, whisk through until well combined.
- Let batter sit for a couple of minutes while preparing pan. Lightly oil frying pan, heat over medium high heat for a few minutes until hot, then reduce to medium/ medium low heat.
- Using a ladle, scoop batter about ¼ cup into pan. Cook for a few minutes until small bubbles form on the edge, then on the center of the pancake. Pan fry until the top starts to look dry. Flip pan cake to light cook other side for about a minute. Repeat this process until all the batter is used.
- Serve immediately with any toppings you like, such as maple syrup or fruit.
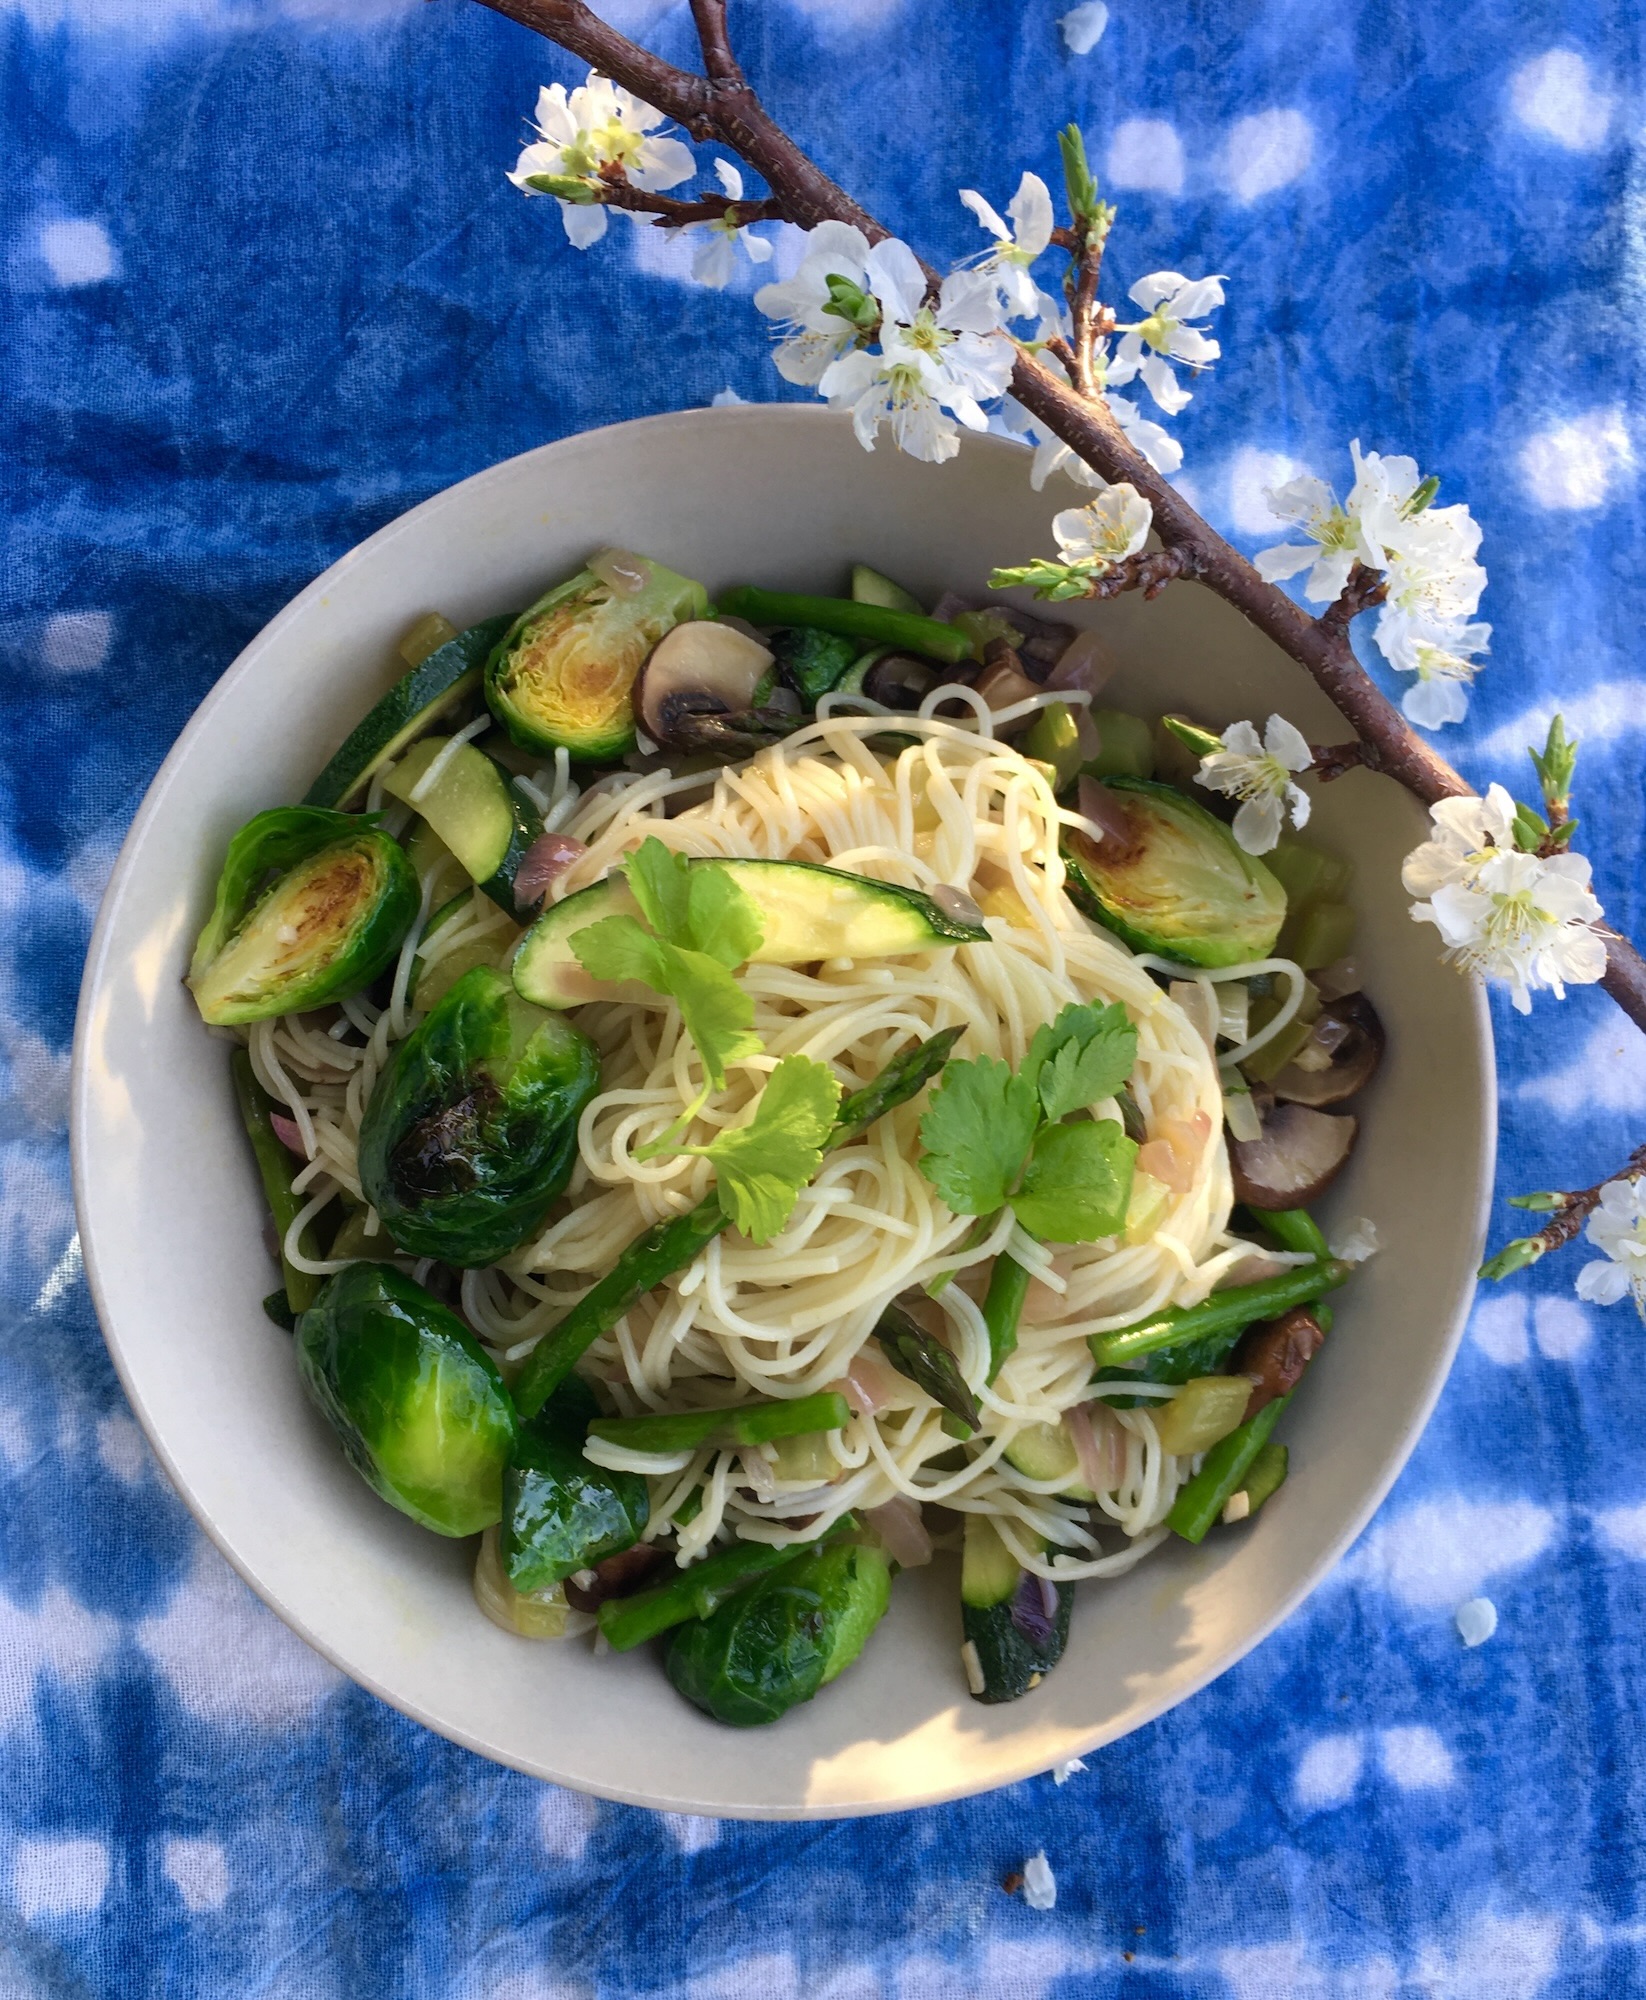
Pasta Primavera with Braised Brussels Sprouts
Pasta Primavera with Braised Brussels Sprouts
Serves 4
Ingredients:
Braised Brussels Sprouts:
2 tablespoons olive oil
2 cups Brussels sprouts, trimmed and halved
¼ cup vegetable broth or water
few pinches sea salt
black pepper to taste
Pasta Primavera:
8 ounces pasta such as angel hair or spaghetti
3 tablespoons olive oil, and a little more for a finishing touch
1 medium onion, finely diced
1 teaspoon sea salt, more to taste2 stalks celery, finely diced
3 cloves garlic, minced
4 medium size brown mushrooms, sliced
½ cup dry white wine
1 cup chopped asparagus
1 cup chopped zucchini
black pepper to taste (optional)
celery leaves or parsley for garnish
Instructions:
To make Braised Brussels Sprouts:
- Heat skillet over medium heat, add oil and Brussels sprouts. Pan fry Brussels sprouts until golden for about 1-2 minutes. Flip them and do the same on the other side.
- Pour broth or water over the Brussels sprouts, cover and steam cook them for 1 minute over medium low heat until tender.
- Remove cover, season with sea salt and black pepper.
- Let the remaining liquid evaporate in the skillet. Place the Brussel sprouts in bowl and set aside.
To make Pasta Primavera:
- Prepare to cook pasta by boiling water in large pot.
- Heat olive oil in large skillet over medium heat, add onion, sea salt, and garlic, sauté until onion becomes translucent, for about 5 minutes. Add celery and mushroom and sauté for about 3 minutes. Pour white wine and cook until wine cooks down, about 2-3 minutes.
- In the meantime, cook pasta according to the package. Save ¼ cup pasta cooking water. Drain pasta with colander but do not rinse. Add asparagus, and zucchini to the skillet, sauté for one minute. Pour ¼ cup pasta cooking water, continue to stir for another minute until vegetables become bright and tender. Add cooked pasta and the Braised Brussels Sprouts. Using tongs, gently stir to combine. Adjust flavor by adding sea salt and black pepper if using. You can also add some more olive oil if desired.
- Serve with garnish.
Chef’s note:
If you want a more aromatic garlic pasta, sauté onions with garlic for a long time until they become nice and caramelized. But be sure to lower heat if they become dry in the skillet to avoid burning.
Feel free to use your own favorite spring vegetables for this dish, such as broccoli, carrots, or baby spinach.

Sweet Potato Curry
Sweet Potato Curry
Serves 4-5
Ingredients:
5 tablespoons safflower oil
2 medium onions, diced
3 – 4 garlic cloves, minced
3 teaspoons sea salt, divided
1 medium carrot, diced
2 medium Japanese sweet potatoes (1 pound), peeled and diced into small pieces
2 medium ripe tomatoes, cut into large chunks
2 teaspoons ground cumin
1 teaspoon ground turmeric
1 teaspoon ground coriander
1 teaspoon curry powder
2 small bay leaves
2 cups vegetable broth or water
parsley for garnish
Instructions:
- Heat oil in heavy pot over medium heat, add onions, garlic, and 1 teaspoon sea salt, sauté for about 5 minutes until onions become translucent.
- Add mushrooms, carrot, sweet potato, tomatoes and 1 teaspoon sea salt, sauté for a couple of minutes.
- Lower heat to medium low, add spices and stir for 1 minute.
- Add broth, bay leaf and 1 teaspoon sea salt, bring to a boil. Cover, lower heat and simmer for about 20 minutes.
- At this point, if preferred, take out tomato peels for smoother texture. Peels will fall easily off of the tomatoes.
- Continue to simmer for about 10 more minutes until sweet potatoes become tender.
- Turn off heat, mush chunks of sweet potatoes using wood spatula until stew thickens.
- Serve with parsley for garnish.
Chef’s tip: If you can’t find Japanese sweet potatoes, you can substitute any sweet potatoes with white, creamy flesh, such as Hannah sweet potatoes.
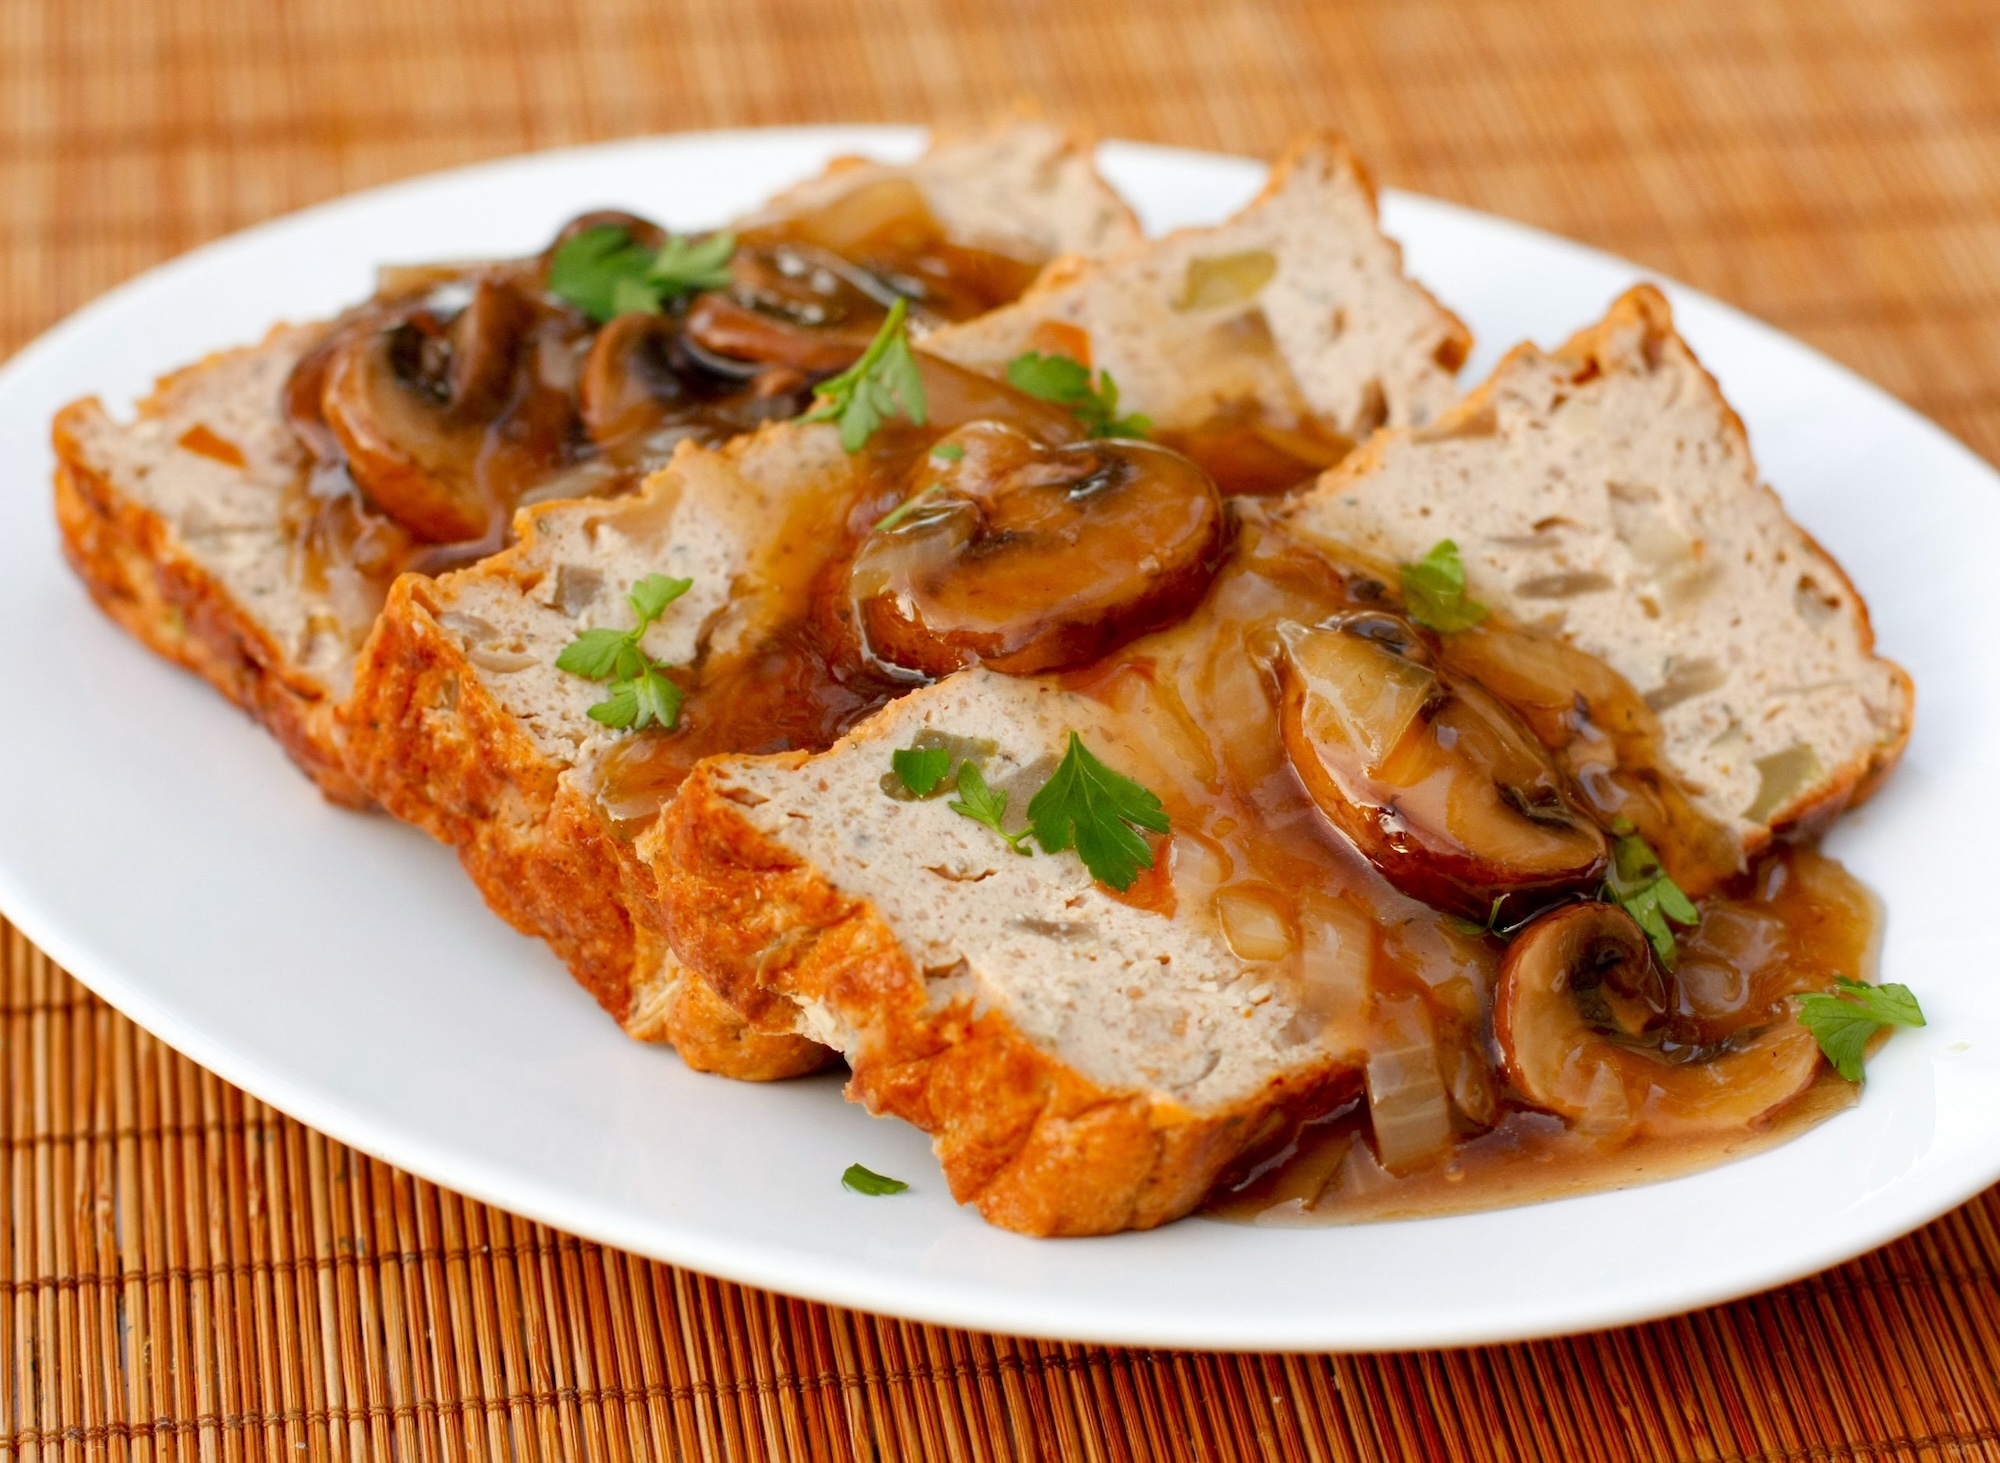
Tofu Loaf
Tofu Loaf
Serves 9in loaf
Ingredients:
2 (14 ounce) packages firm tofu
1 tablespoon olive oil
1 medium onion, chopped
2 cloves garlic, minced
pinch of sea salt
1 medium carrot, chopped
2 ribs celery, chopped
1 tablespoon tamari
2 tablespoons tomato paste
2 teaspoons dried rubbed sage
1 ½ teaspoons dried thyme
1 teaspoon dried rosemary
½ teaspoon sea salt
1 teaspoon smoked paprika
1 ½ cups crumbled brown rice cakes, divided and more if needed
Mushroom Gravy
1 tablespoon olive oil
¼ medium onion, finely chopped (½ cup)
2 pinches of sea salt
4 ounces brown mushrooms, chopped
1 cup vegetable broth or water
1 tablespoon tamari
2 tablespoons arrowroot powder, diluted in ¼ cup water
1 teaspoon ginger juice (optional)
parsley for garnish
Instructions:
- Press tofu for 30 minutes to remove excess water. Set aside
- Place skillet over medium heat, add olive oil, onion, garlic, and a pinch of sea salt, and sauté until onion turns translucent, about 3 minutes.
- Add celery and carrot, continue to sauté until vegetables become tender, about 3 more minutes. Place in mixing bowl, and set aside.
- Turn oven to 350 F. Line 9 inch loaf pan with parchment paper. Set aside.
- In food processor, place crumbled tofu, tamari, tomato paste, sage, thyme, rosemary, sea salt, smoked paprika, and 1 cup rice cakes. Puree until smooth. Add ½ cup rice cakes and puree again until smooth. Check the texture. It should not be watery; it should have a whipped cream cheese like consistency. If still soft, add more rice cake crumbles.
- Transfer to a mixing bowl, and stir in vegetable mixture.
- Spoon tofu mixture into the loaf pan and smooth top.
- Bake covered with aluminum foil for 20 minutes. Uncover and bake for about 20 – 25 more minutes until golden.
- Remove from oven and cool slightly before slicing and serving.
Chef’s Notes: Serve alone, with mushroom gravy, or with cranberry sauce. For the brown rice cakes, choose plain unsalted ones, if not available, pick a lightly salted, plain variety.
Mushroom Gravy
- Over medium heat, add oil, onion and a pinch of sea salt in a saucepan. Sauté onions for a couple of minutes until translucent.
- Add mushrooms with a pinch of sea salt and continue to sauté until mushrooms shine.
- Add broth or water, bring to a boil. Lower heat, add tamari, cover and simmer for 5 minutes.
- Little by little, pour in arrowroot powder mixture. Stir until mixture turns clear and the sauce thickens. Add ginger juice if using and stir to mix.
- Serve with garnish.
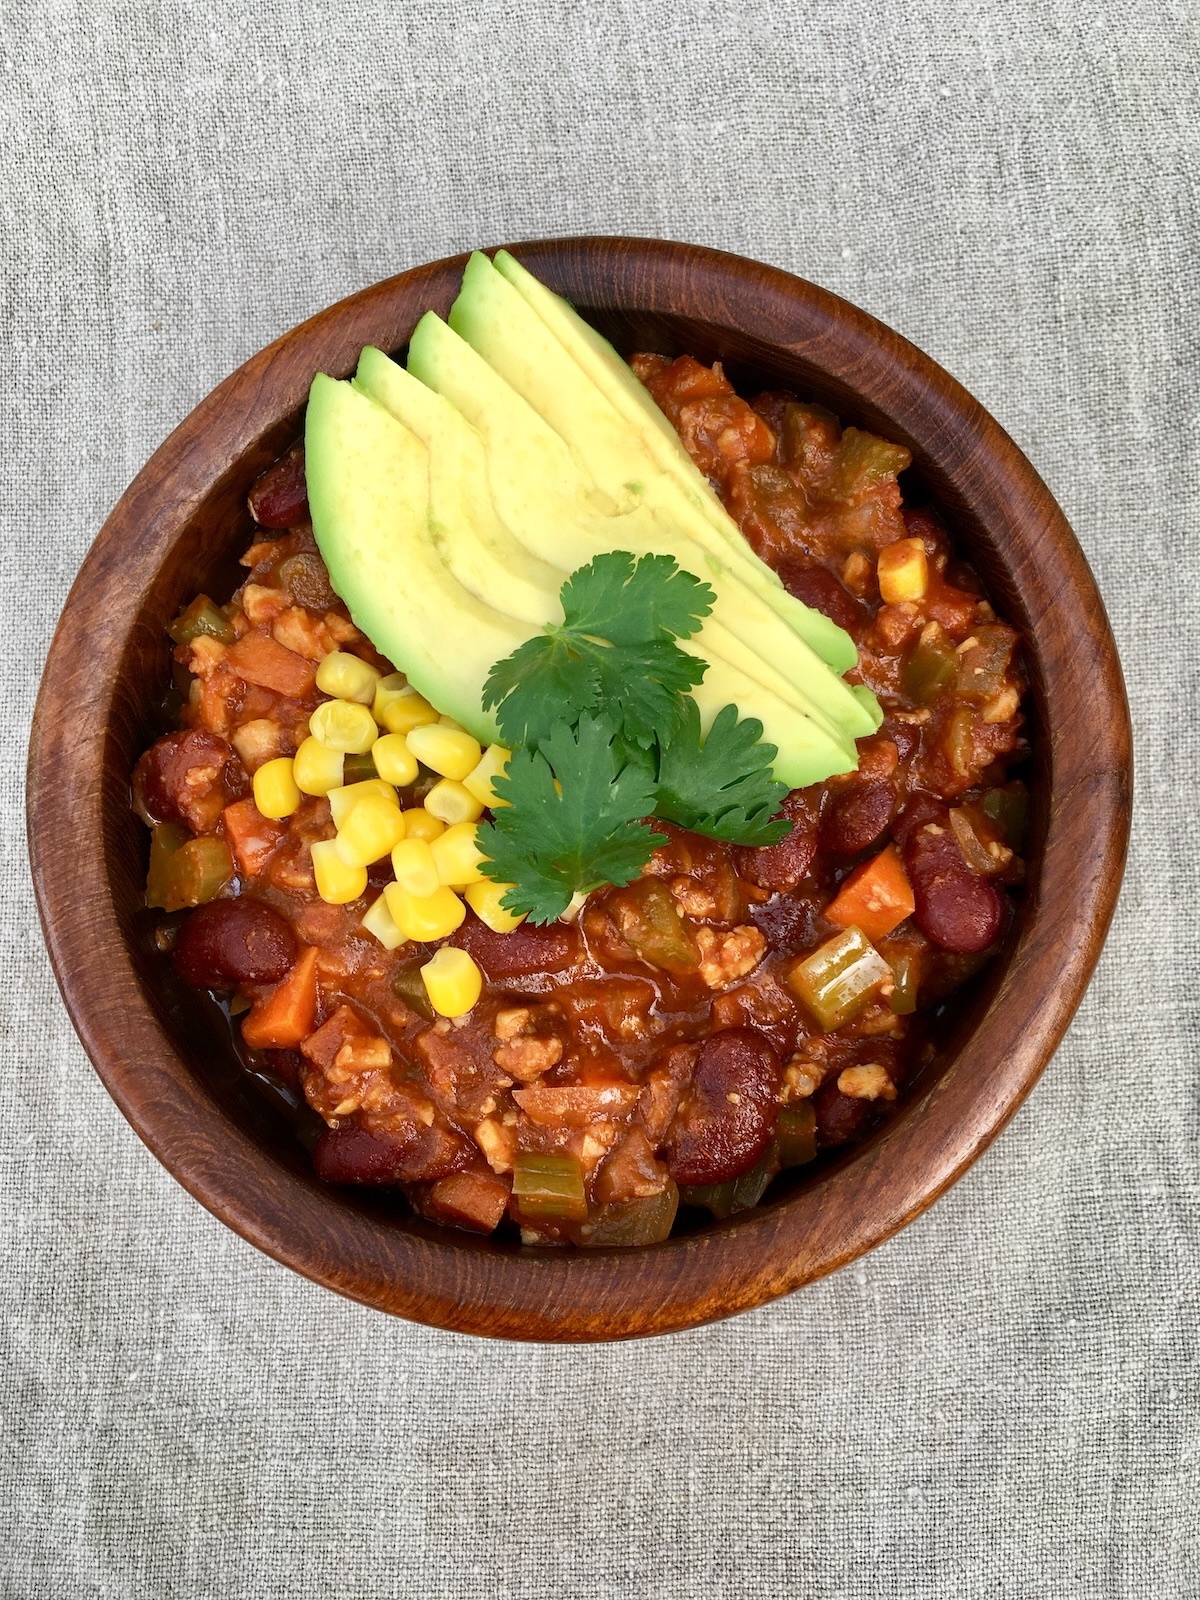
Vegan Chili
Vegan Chili
Serves 6-7
Ingredients:
2 tablespoons safflower oil
2 medium size onions, diced (2 cups)
3 stalks celery, diced (1 ½ cups)
1 medium carrot, diced (1 cup)
1 medium bell pepper, diced (1 cup)
4 – 5 cloves garlic, minced (2 tablespoons)
1 tablespoon ground cumin
½ tablespoon ground coriander
1 tablespoon ground chili powder
3 cups cooked kidney beans or 2 (15 ounce each) cans kidney beans, drained
2 cups crushed tomatoes (from canned tomato: ⅔ of 28 ounce can)
1 ½ cups vegetable stock or water
1 bay leaf
½ teaspoon sea salt
1 tablespoon shoyu or tamari (for gluten free) or to taste
For tempeh crumbles (optional):
2 tablespoons safflower oil
8 ounce package tempeh, diced into ½ inch squares
¼ cup apple juice
1 tablespoon shoyu or tamari (for gluten free)
Instructions:
To prep tempeh crumbles:
- Heat oil in medium skillet, pan fry tempeh cubes until light brown. Mix apple juice and shoyu to make seasoning, add to the tempeh. Simmer for 15 minutes until liquid is almost all absorbed but a little bit remains on the bottom.
- Remove from heat and let cool for 15 minutes, then mash into crumbles with wood pestle or wood spatula. Set aside.
To make Vegan Chili:
- Heat oil in large heavy pot such as cast iron pot over medium heat, sauté onions and celery with a few pinches of sea salt until translucent, for about 5 minutes.
- Add carrot, bell pepper, garlic and spices and continue sautéing for 5 more minutes.
- Add beans, tempeh crumbles if using, tomatoes, vegetable stock and bay leaf and bring to a boil. Add ½ teaspoon sea salt and shoyu, cover and lower the heat. Simmer for about 40 – 45 minutes, until the stew has a nice thick consistency. If still too thin, take off top and continue cooking until liquid is reduced and chili has desired consistency.
- Check flavor and adjust by adding sea salt or shoyu, if necessary. Take out the bay leaf.
- Remove from heat and rest chili for 10 minutes before serving.
- Serve with toppings and garnishes.
Chef’s note:
Children will love this stew. To make their portions without the heat, reserve chili powder and take out children’s servings at the end of stewing. Add the chili powder, simmer for 5 more minutes, and it’s ready to serve adults.
It’s even better on the next day, so feel free to make this a day ahead of time.
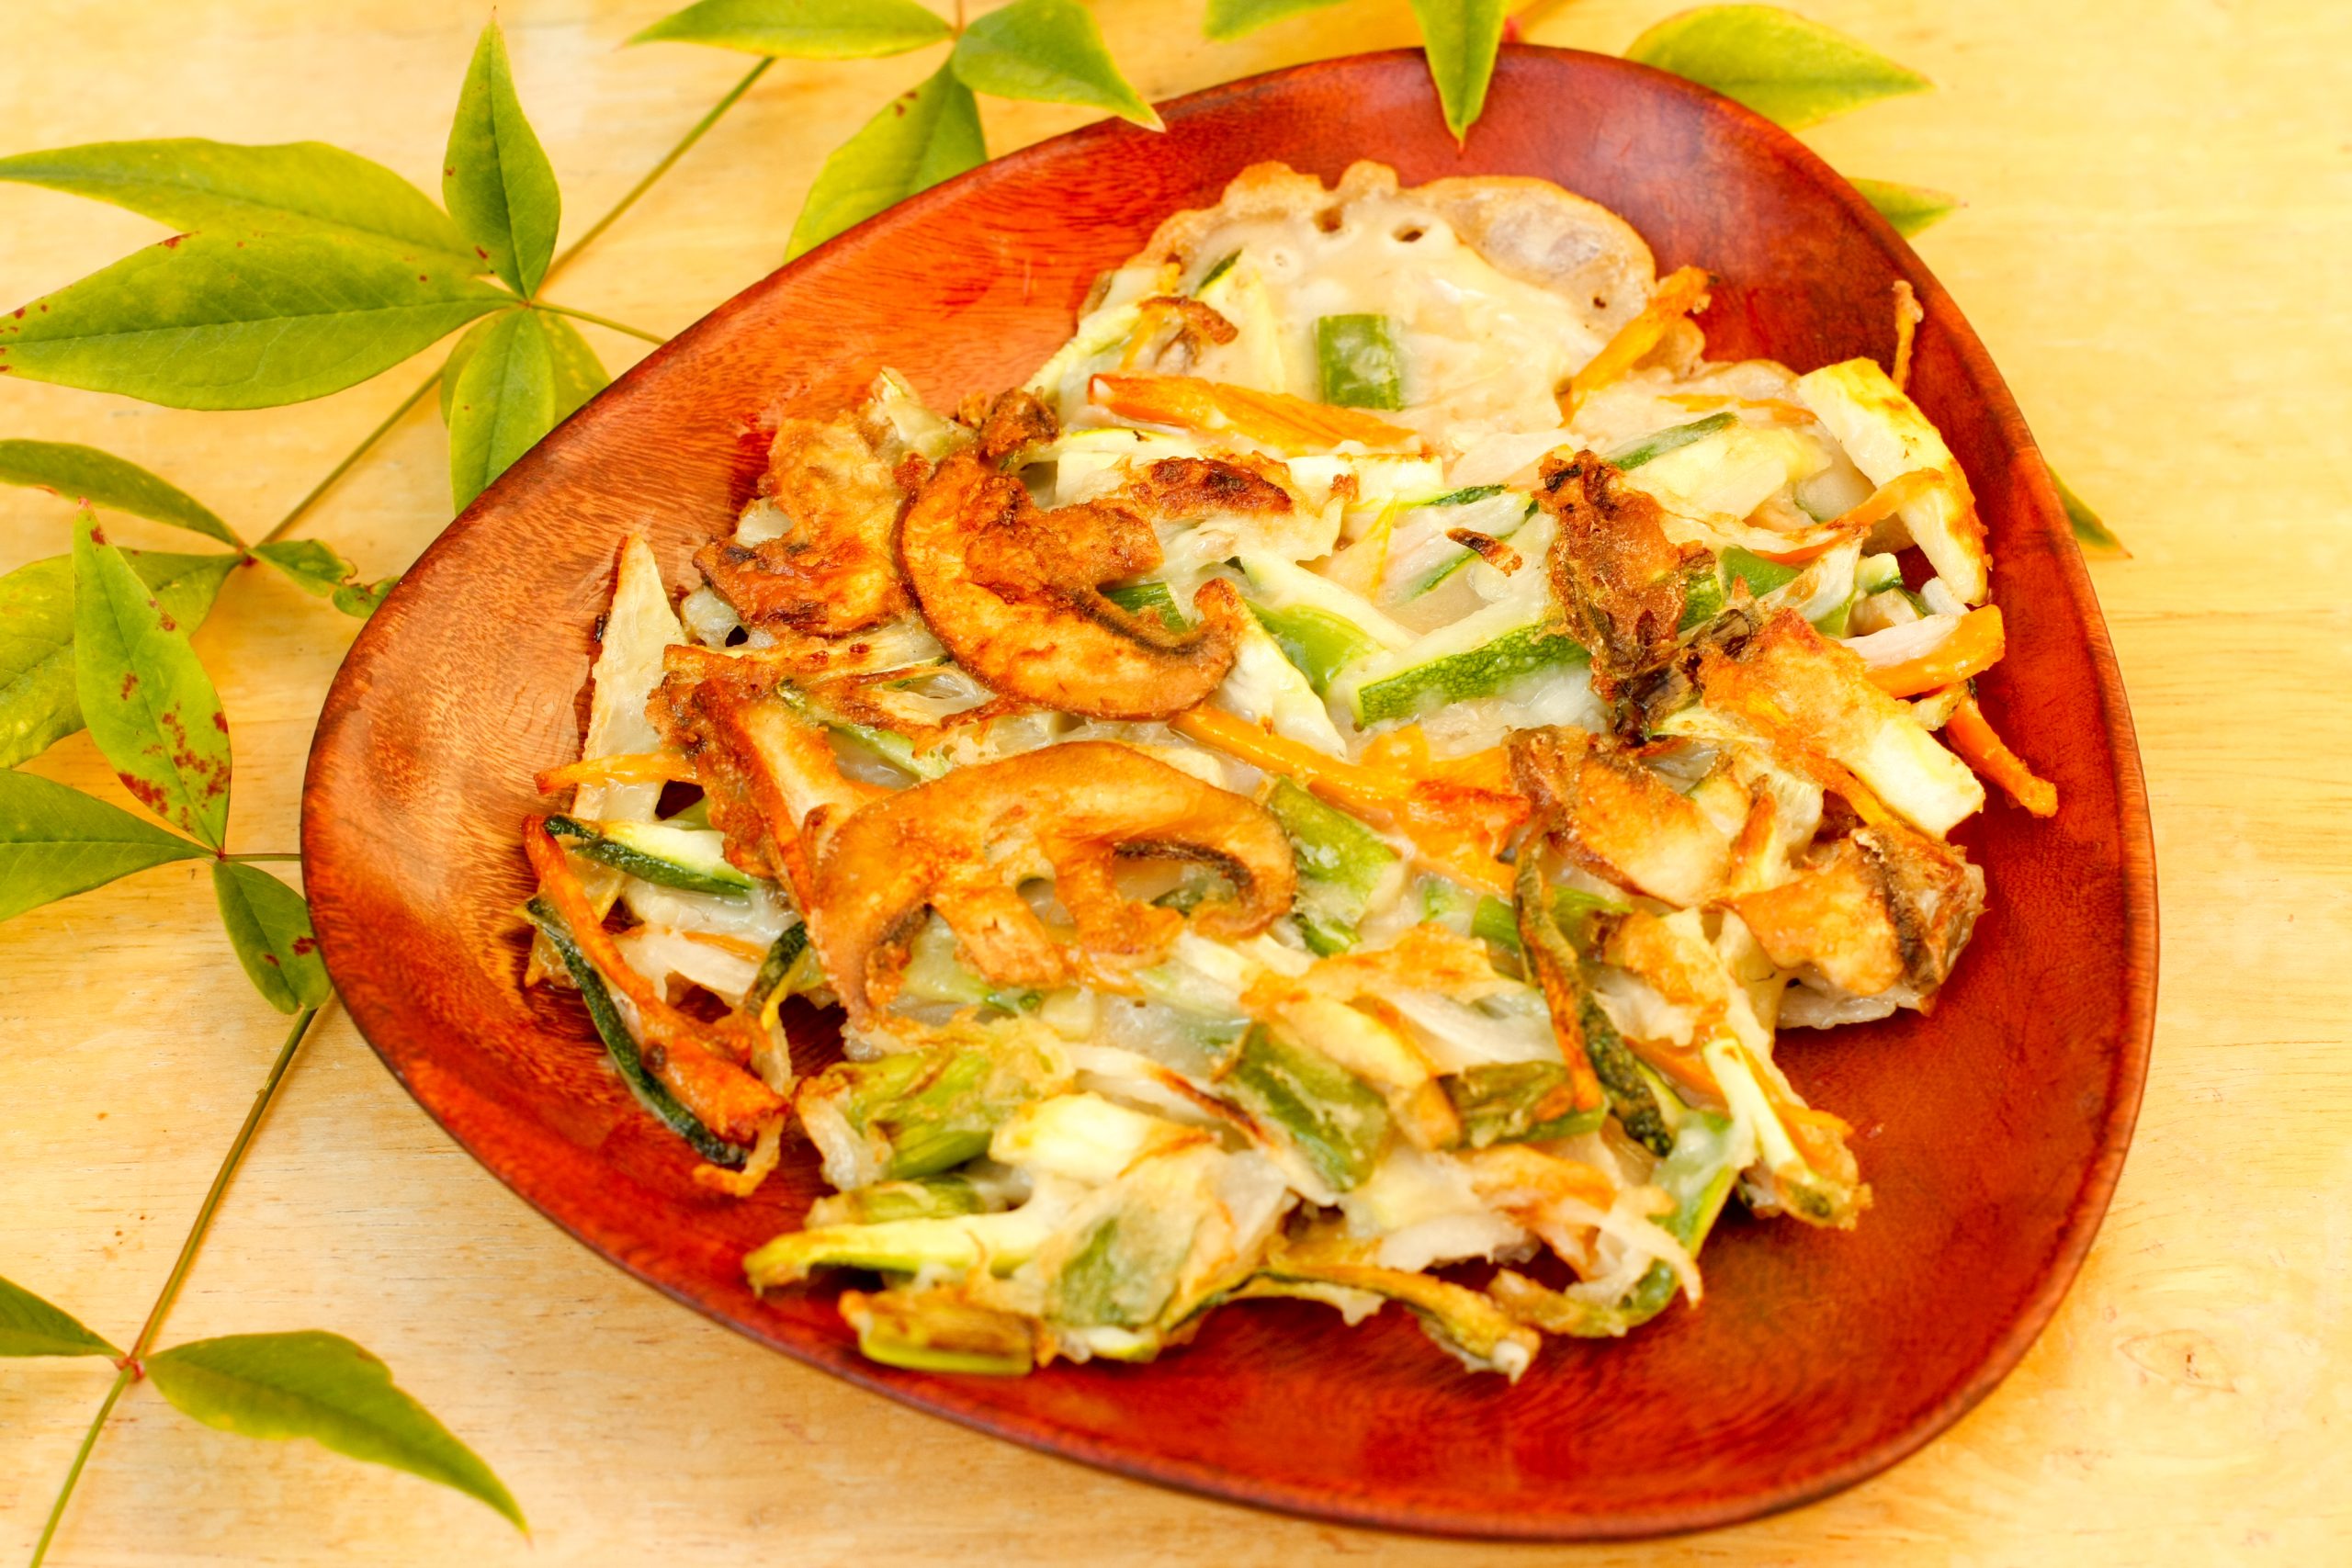
Savory Vegan Gluten Free Pancake
Savory Vegan Gluten Free Pancake
Serves 5-6 pancakes
Ingredients:
This is inspired from a Korean vegetable pancake called, Yachaejeon. It is adapted into a gluten free version, so it’s much easier on your digestion. It is topped with a savory Tamari vinaigrette sauce, and will be a treat for the whole family. You can top with vegan mayo if you desire.
Batter:
1 cup chopped scallions
2 cups matchsticks zucchini (1 medium zucchini)
1 cup onion (1 medium onion)
2⁄3 cup carrot (1 small carrot)
1⁄2 cup matchsticks sweet potatoes (1 small sweet potato)
4 brown mushrooms, thinly sliced
13⁄4 cup superfine rice flour *
1⁄4 cup arrowroot flour
2 cups water
1⁄4 teaspoon sea salt
Sunflower or Safflower oil to pan fry
Sauce:
4 tablespoons tamari
2 tablespoons rice vinegar
1 tablespoon toasted sesame seeds
2 tablespoons chopped scallions, optional
Instructions:
To make batter:
- Place all the ingredients from the batter list in a mixing bowl. Mix well until well combined.
To fry pancakes:
- Heat a well seasoned cast-iron skillet (or a natural non stick frying pan) over medium heat, spread about 1 tablespoon oil, then place about 1 1⁄2 cup batter, spreading into about 6 inch round shape.
- Panfry over medium to medium-low heat about 4 minutes until crispy and golden brown, flip with spatula, add 1⁄2 tablespoon oil, panfry the other side about 3-4 minutes until golden.
- Serve immediately with the dipping sauce.
*Chef’s Tip: It is important to use superfine rice flour for a crispy and fluffy texture for the pancakes. Regular grainy rice flour produces a much more dense texture. Usually you can find superfine rice flour online or in Asian grocery stores.

Spring Stir Fry with Vegan Oyster Sauce
Spring Stir Fry with Vegan Oyster Sauce
Serves 3 -4
Ingredients:
This quick stir fry has a sweet and savory sauce that will make your vegetables sing! It’s
a fabulous side dish that will satisfy your palate.
1 1⁄2 -2 tablespoons sesame or safflower oil
1 tablespoons minced ginger
1 medium leek, slice in middle, cleaned well and thinly sliced
1 medium carrot, thinly sliced
4 – 5 cups chopped bok choy, separate white and green parts
vegan oyster sauce:
1 tablespoon coconut amino
1 tablespoon tamari
1 teaspoon toasted sesame oil
1 teaspoon rice vinegar
Instructions:
- Over medium heat, heat large skillet until hot, place sesame oil and minced ginger into the skillet. Sizzle ginger for about 20 seconds until aromatic. Be careful not to burn minced ginger. Lower heat, if it turns brown quickly.
- Over medium heat, place leek and carrot into the skillet until leek becomes translucent, for a couple of minutes.
- Add white parts of bok choy and sauté for 1-2 minutes until white parts become translucent. Then add green parts of bok choy; keep sautéing for about 1 -2 minutes until green parts of bok choy become tender.
- Pour vegan oyster sauce into vegetable mixture to your taste, lower heat and gently mix the stir fry.
- Serve immediately.
Chef’s tip:
Using toasted sesame oil in sauces and dressing makes great Asian style sauces. However, they can go bad rancid easily, so keep them in refrigerator. For sautéing dishes, I recommend using regular tan sesame oil or good quality plant-based oils such as safflower oil.
Sea Vegetable Recipes
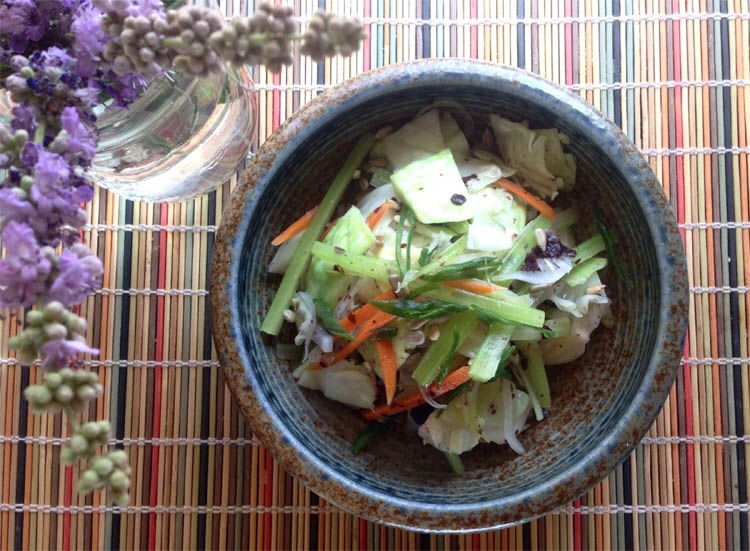
Dulse Salad with Umeboshi-sesame Dressing
Dulse Salad with Umeboshi-sesame Dressing
Serves 4
Ingredients:
½ cup dulse
1 cup Chinese cabbage, sliced into 1 inch pieces
½ cup daikon, cut into matchsticks
½ cup carrot, cut into matchsticks
¼ cup onion, cut into thin half moons
¼ cup celery, sliced on a thin diagonal
Umeboshi-sesame Dressing
1 ½ umeboshi plums (pits removed)
2 tablespoons toasted seeds (sesame, sunflower or pumpkin seeds)
1 teaspoon minced parsley or scallions
¾ cup water
Instructions:
- Place 4 cups of water with a pinch of sea salt in a pot. Cover and bring to a boil.
- Add carrots and boil for 1 minute. Remove and let cool.
- Add celery and boil for 1 minute. Remove and let cool.
- Add daikon and boil for 1 minute. Remove and let cool.
- Add onion and boil for 45 seconds. Remove and let cool.
- Add Chinese cabbage and boil for 1 minute. Remove and let cool.
- Turn heat down, add dulse and simmer for 30 seconds. Remove and let cool.
- Place all ingredients in a bowl and toss with umeboshi-sesame dressing.
Umeboshi-sesame Dressing
- If you are using sesame seeds, place them in a suribachi or blender and grind until half-crushed.
- Add the umeboshi plums and grind or blend to a smooth paste.
- Add the parsley and water and puree.
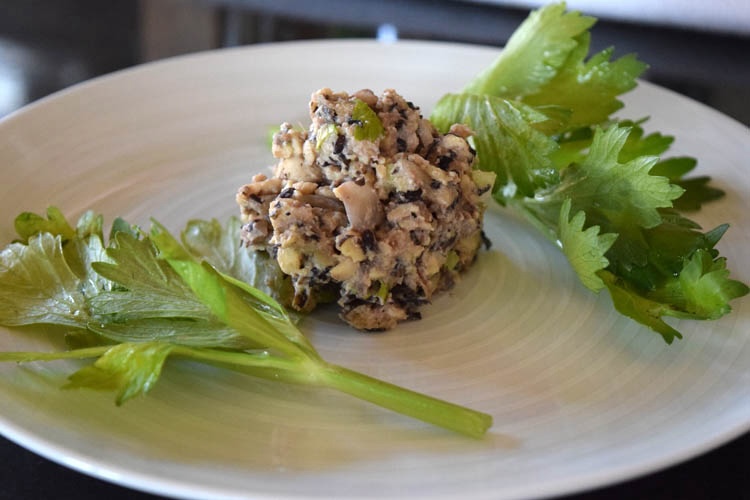
Tempeh Mash With Arame
Tempeh Mash With Arame
Serves 4-5
Ingredients:
½ cup arame
8 ounces tempeh
1 cup finely diced onion
½ cup water
Pinch of sea salt
½ cup finely chopped celery
2 T tahini
1 T ginger juice
1 T lemon juice
½ t umeboshi vinegar (optional)
Chopped parsley for garnish
Instructions:
- Rinse arame and let stand for 2 minutes.
- Cut the tempeh in large chunks and place it in a pot with the onion and arame.
- Add water and a pinch of salt and bring to a boil over a medium flame.
- Reduce heat to low and cook for 30 minutes, stirring occasionally.
- When it’s done cooking, drain excess water, transfer to a mixing bowl, and mash with a fork.
- Add celery, tahini, umeboshi vinegar, ginger juice, and lemon juice.
- Mix well and garnish with chopped parsley.
- Enjoy alone, on bread as a sandwich, or wrapped inside a lettuce leaf or lightly steamed collard green leaf.
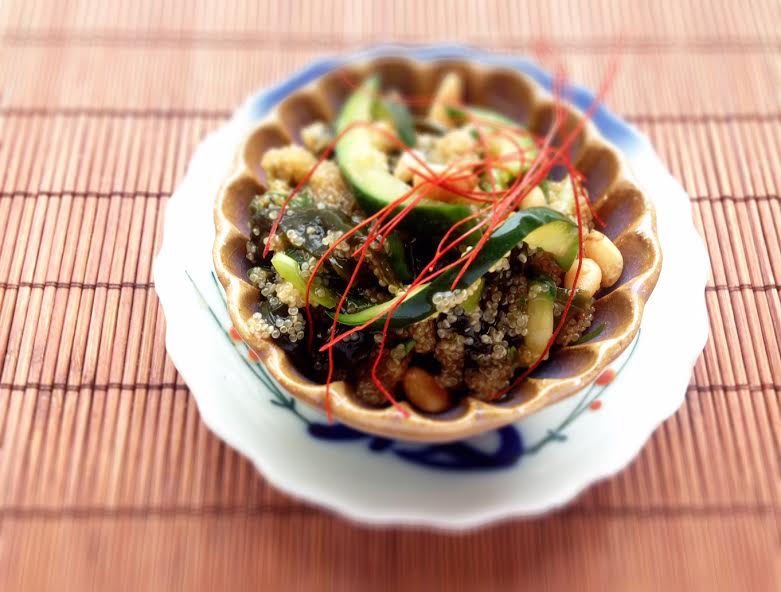
Wakame Salad with Amaranth and Pine Nuts
Wakame Salad with Amaranth and Pine Nuts
Serves 2-4
Ingredients:
¾ cup water
½ cup amaranth
Pinch of sea salt
2 cups sliced cucumber, marinated with ¼ teaspoon of sea salt
¼ cup dried wakame flakes, soaked in water until soft and drained
¼ cup pine nuts, toasted
¼ cup scallions, sliced finely
PONZU SAUCE:
3 tablespoons soy source
2 tablespoons lemon juice
Instructions:
- Slice the cucumbers and mix with ¼ t salt.
- Place in a bowl, then place a small plate on top of the cucumber, then place a 1-2 lb weight on top of the plate (I like to use a jar or tea kettle
- filled with water). Press the cucumbers for 15 minutes, then drain the excess water.
- While the cucumbers are pressing, bring the water to a boil in a saucepan.
- Add a pinch of sea salt and amaranth and bring to a boil again.
- Place a flame deflector underneath the saucepan, reduce the flame to low and simmer for 15 minutes.
- When finished remove from the flame and allow it to sit covered for 10 minutes. Then flavor with ponzu sauce and allow it to come to room
- temperature.
- Mix the rest of the ingredients together with the amaranth.
*To toast the pine nuts heat a pan over medium-high heat. Then add the pine nuts, turn the flame to low and continuously move the nuts around until they are lightly toasted. They toast fast and burn easily so be careful not to burn them.
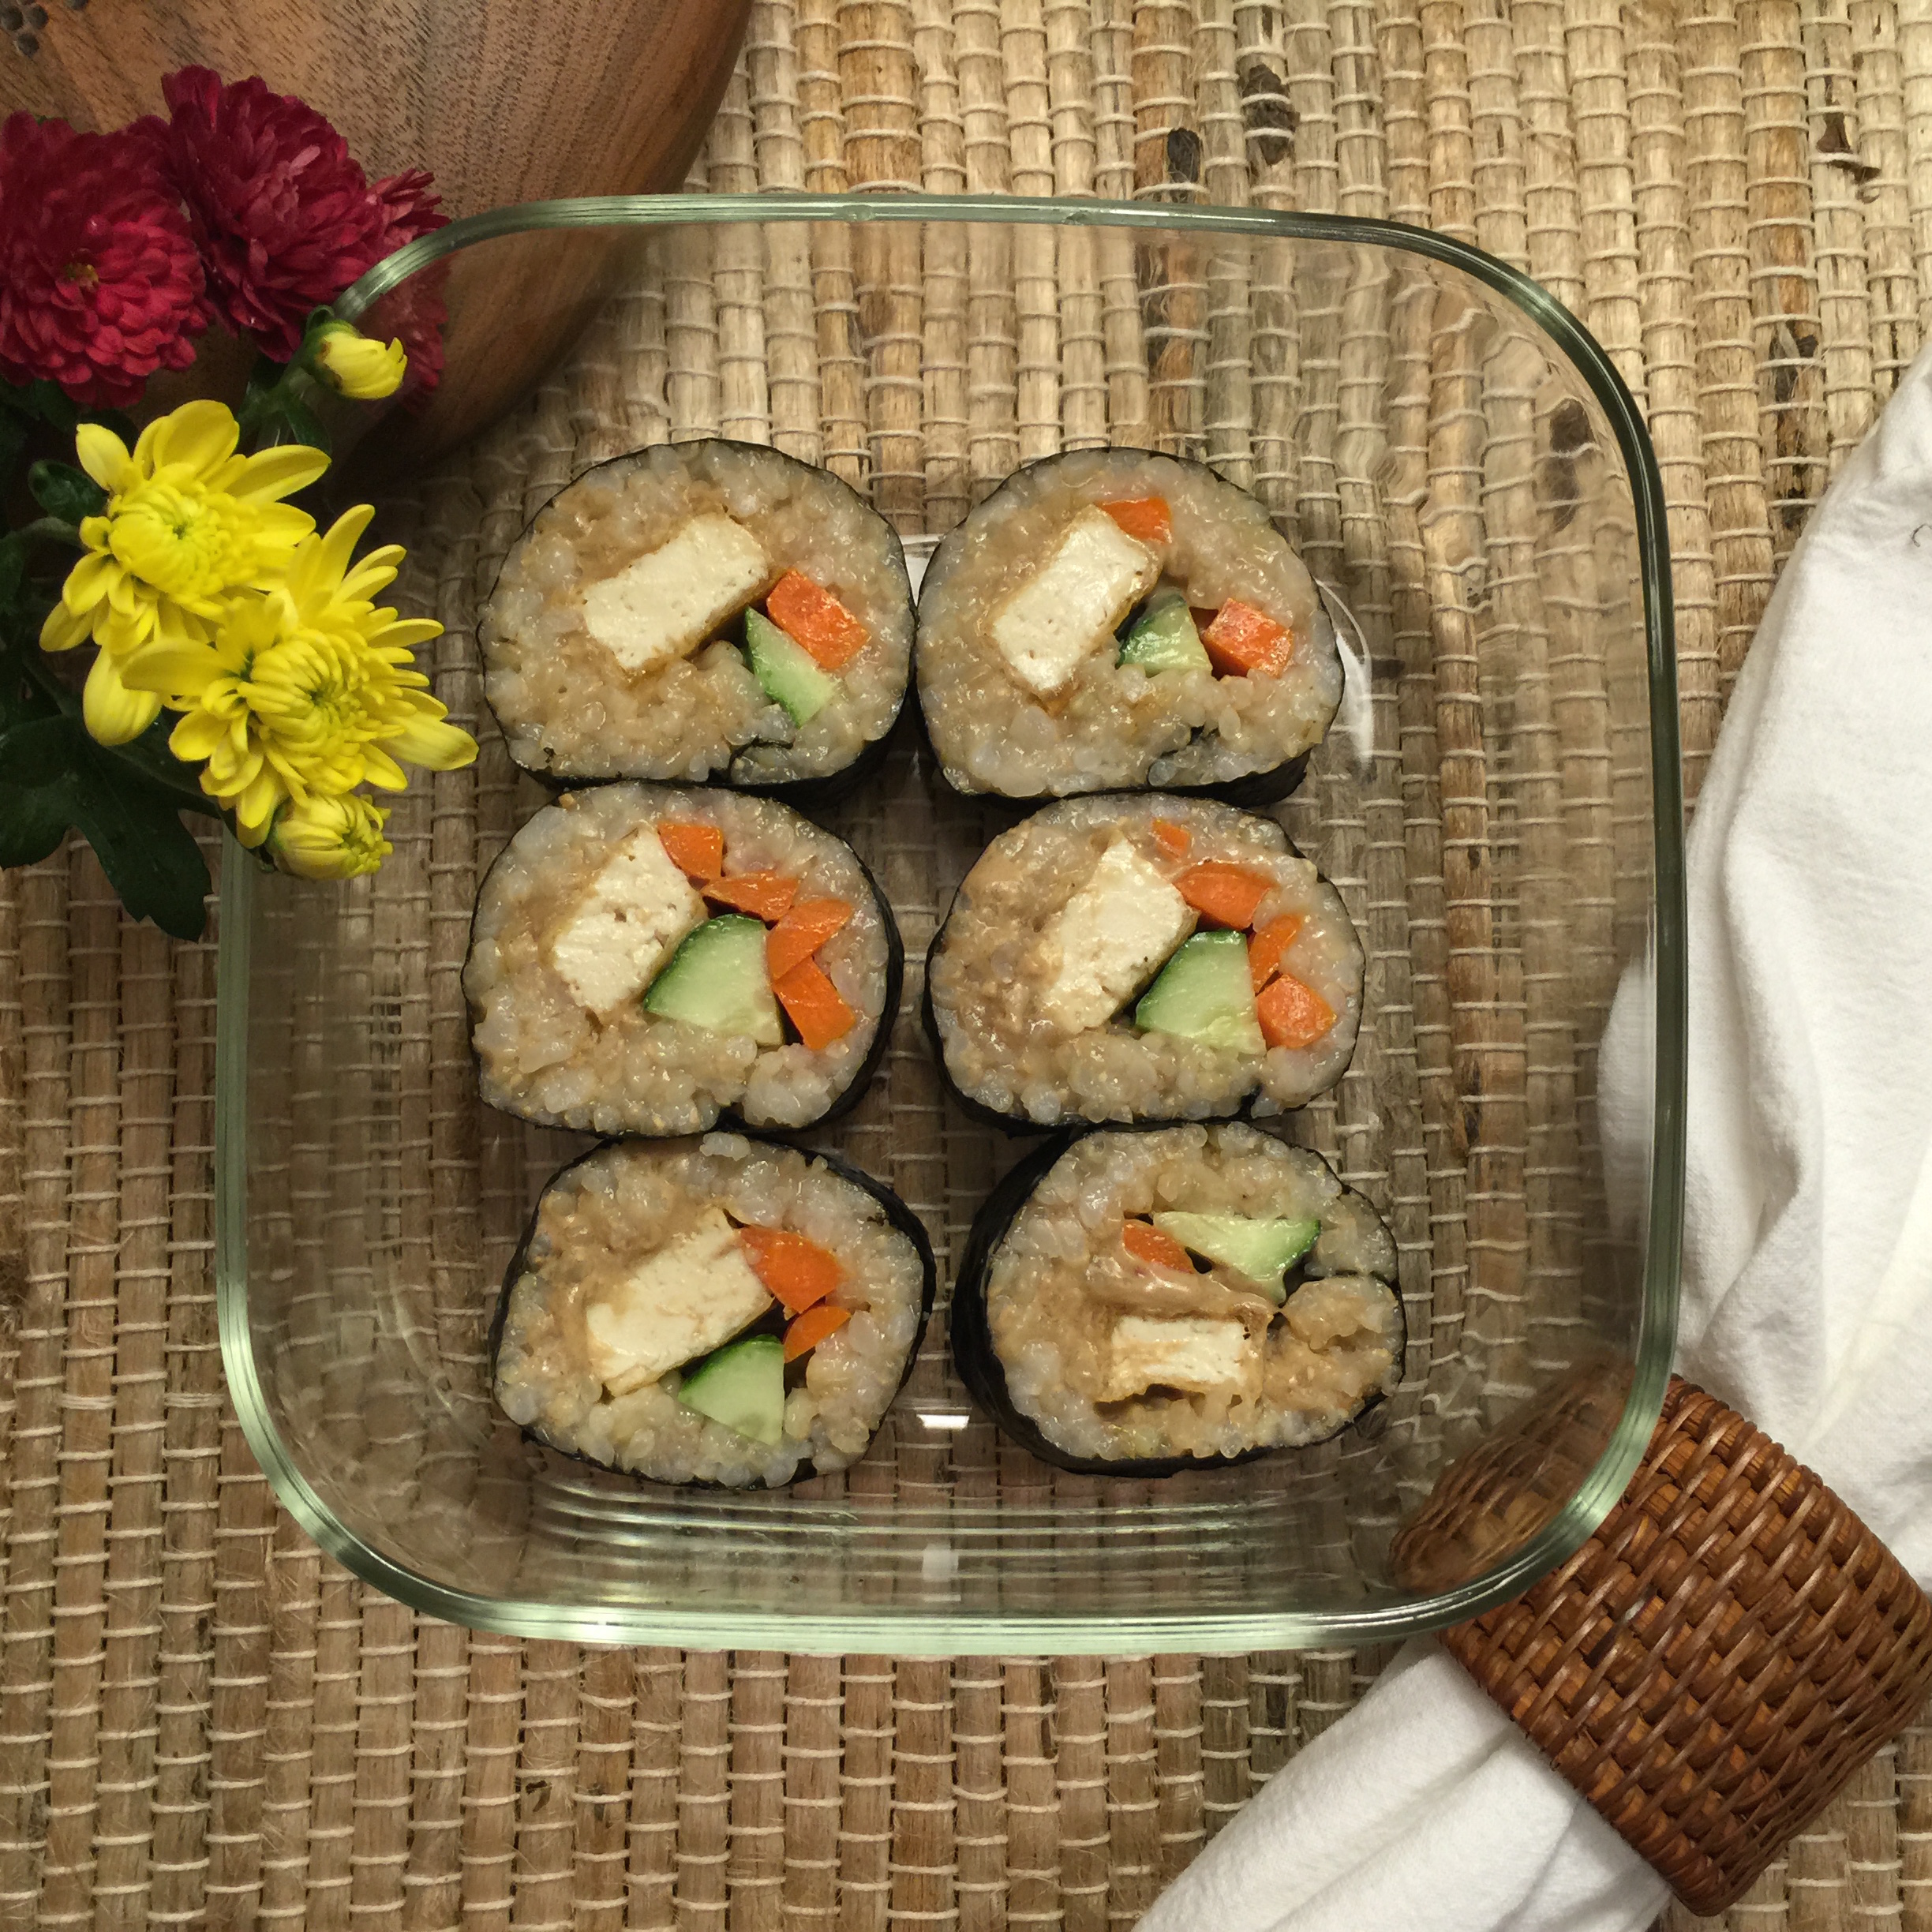
Veggie Nori Rolls — A Great Travel Food
Veggie Nori Rolls — A Great Travel Food
Ingredients:
Nori rolls are easy, tasty, and a great food for travel. I’ve made them the night before travel and taken them on airplanes, long car trips, and for picnics on the beach. They keep for a few hours outside of refrigeration, or longer in a cooler with some ice. If you are looking for a travel food that can keep for a few days without refrigeration, try my backpacker’s energy rice balls recipe.
My favorite veggie nori roll combination is fried tofu, avocado, carrots and mustard, but you can do a variety of foods including green onions, tempeh, asparagus, cucumber and sauerkraut. For a different seasoning, try umeboshi paste or tahini.
1 ½ cups short grain brown rice
1 ½ cups sweet brown rice (if you can’t find this, just use regular short grain brown rice)
6 cups water
¼ t sea salt
½ block firm tofu, cut into 1-inch thick strips
2 T safflower or avocado oil
1 carrot, cut into matchsticks
½ avocado, cut into strips
Nori sheets
Mustard or umeboshi paste
Toasted sesame seeds
Instructions:
- Rinse rice and soak in 6 cups water for 3-5 hours or overnight.
- Measure the discarded soaking water, and place the same amount of fresh water in a pot with the rice.
- Bring to a gentle boil over medium heat and add salt.
- Cover and simmer 45 minutes. Then remove from heat, keeping the lid on, and let sit for 10 minutes.
- Remove lid and stir with a wooden spoon to aerate. Transfer to a bowl to cool.
- Meanwhile, heat oil in a heavy skillet. Once it is warm (it will lightly sizzle when you add a piece of tofu), add the tofu pieces one at a time.
- Cook the tofu on each side 4-6 minutes until golden brown.
- Remove and place on a paper towel to cool and drain.
- While the tofu is cooking, bring a pot of water to a boil. Once it is at a rolling boil, add the carrots until bright in color, approximately 15 seconds. Remove and place on a plate to cool.
- To assemble the rolls, have the nori sheets, vegetables, tofu, seeds, mustard all easily accessible.
- Lay your sushi mat in front of you and place a sheet of nori on the mat, horizontally and shiny side down onto the mat.
- Wet your fingers, take ½ cup of rice and place it onto the sheet of nori, spreading it about ½ inch think. Make sure to place it all the way to the sides, but leave a ½-inch margin along the edge closest to you and 1-2 inch margin along the edge farthest from you.
- Sprinkle 1-2 teaspoons of toasted seeds on the rice, then layer with a line of mustard or umeboshi paste.
- Layer the fried tofu, avocado and carrot on the rice.
- Using your thumbs on the outside of the sushi mat while your fingers curl over and steady the filling, gently roll the mat away from you – bringing the sheet of nori and contents with it.
- Continue to roll and release the sushi, while releasing the mat, so the mat doesn’t get caught up in the food.
- When you get to the edge of the nori, wet your finger and drag it along the exposed edge of nori. Continue rolling to seal the sushi.
- While the mat is over the sushi, gently press around to tighten the circular roll.Remove the mat and slice the roll in half with a wet vegetable knife. Then slice each half again, and again, to make pieces. It’s helpful to wet the edge of the knife prior to cutting each piece and to make sure you have a nice sharp knife.
Snack Recipes
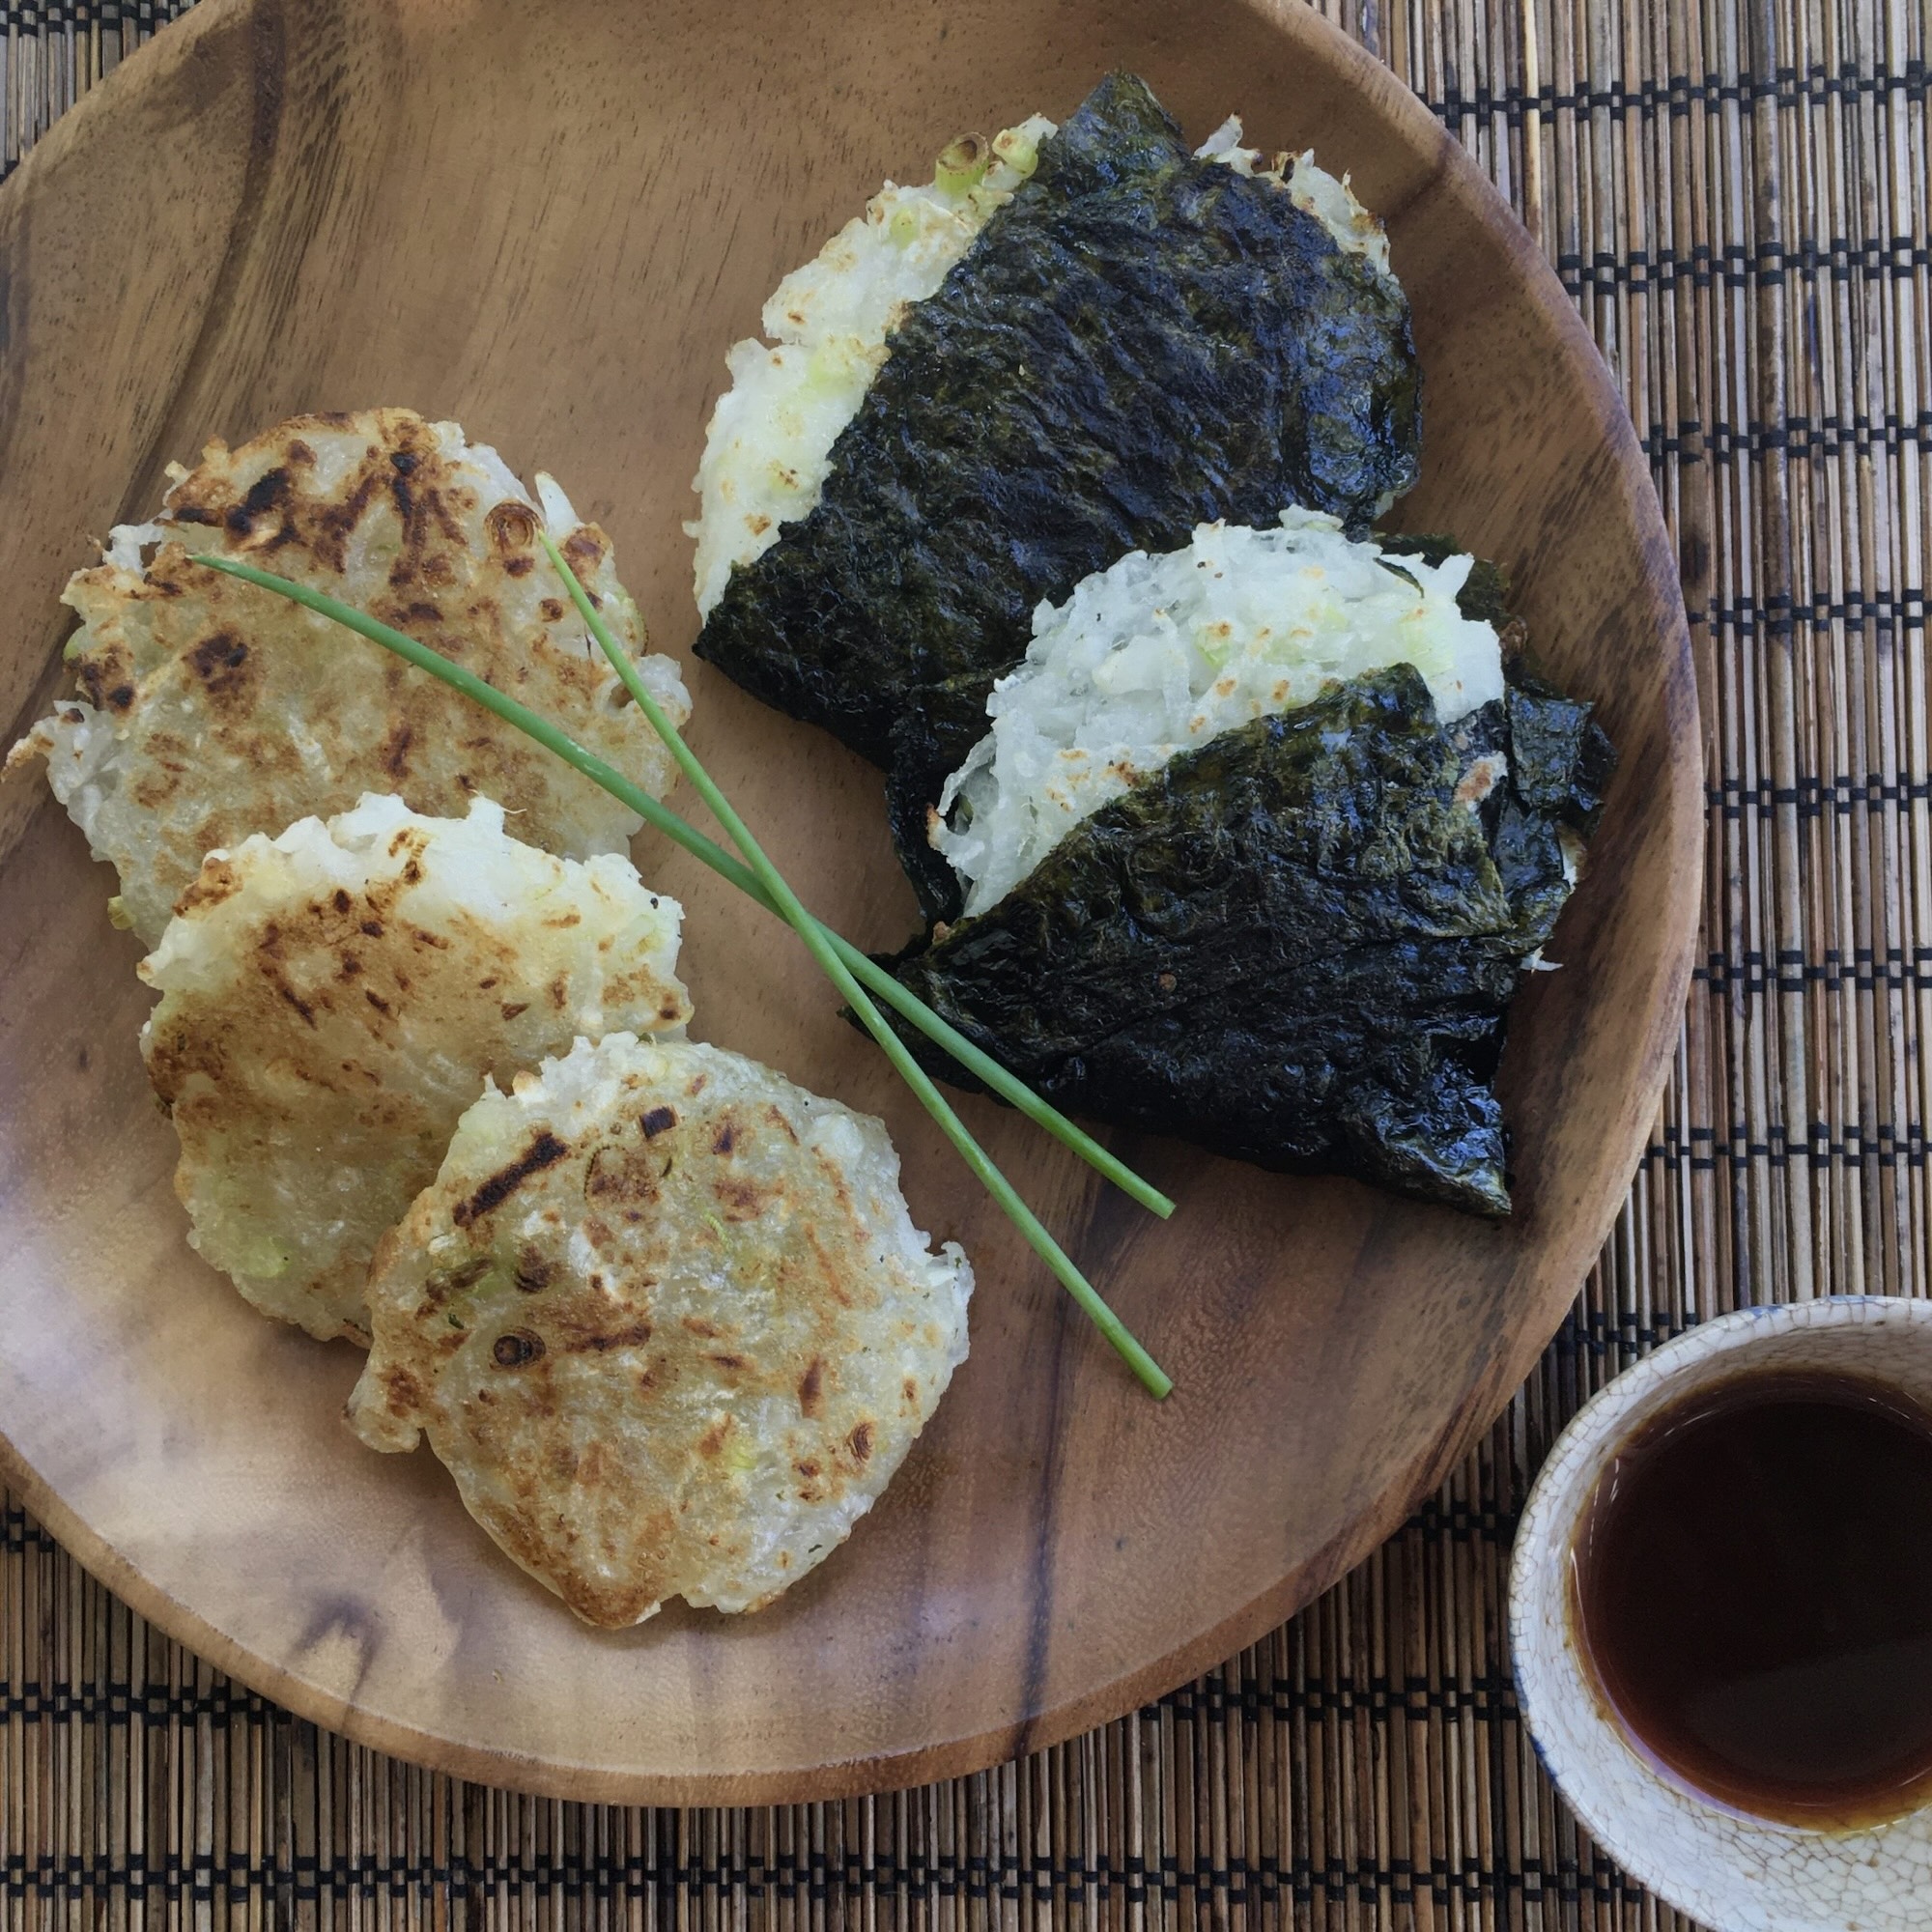
Daikon Mochi
Daikon Mochi
Serves 5-6 pancakes
Ingredients:
2 cups grated daikon
1 cup arrowroot flour
¼ teaspoon sea salt
¼ cup chopped scallions
one sheet sushi nori, cut into squares that will cover the pancakes (optional)
sesame oil for pan-frying
dipping sauce:
1 tablespoon tamari
2 teaspoons rice vinegar
½ – 1 teaspoon fresh ginger juice
Instructions:
- Place daikon, arrowroot powder, sea salt and scallions in mixing bowl. Mix well to combine. Grated daikon should produce enough juice to make a moist mixture. If the mixture is dry or powdery, add a little water.
- Heat skillet over medium heat, pour oil to cover surface, spoon out about ¼ cup mixture per pancake, making round clumpy pancakes of about 3 inches across each. To insure pancakes are thoroughly cooked, cover pan for the first 1 – 2 minutes. When you see the edge of the pancake becomes nice and brown, flip. Panfry both sides without cover until golden for about 2 – 3 minutes. Lower the heat if oil in pan starts to smoke.
- Cakes are done when translucent all the way through.
- If serving with nori, place one piece of nori underneath the mixture and another one on top to sandwich the pancake as you fry.
- While panfrying pancakes, make dipping sauce by combining all ingredients.
- Serve immediately with dipping sauce.
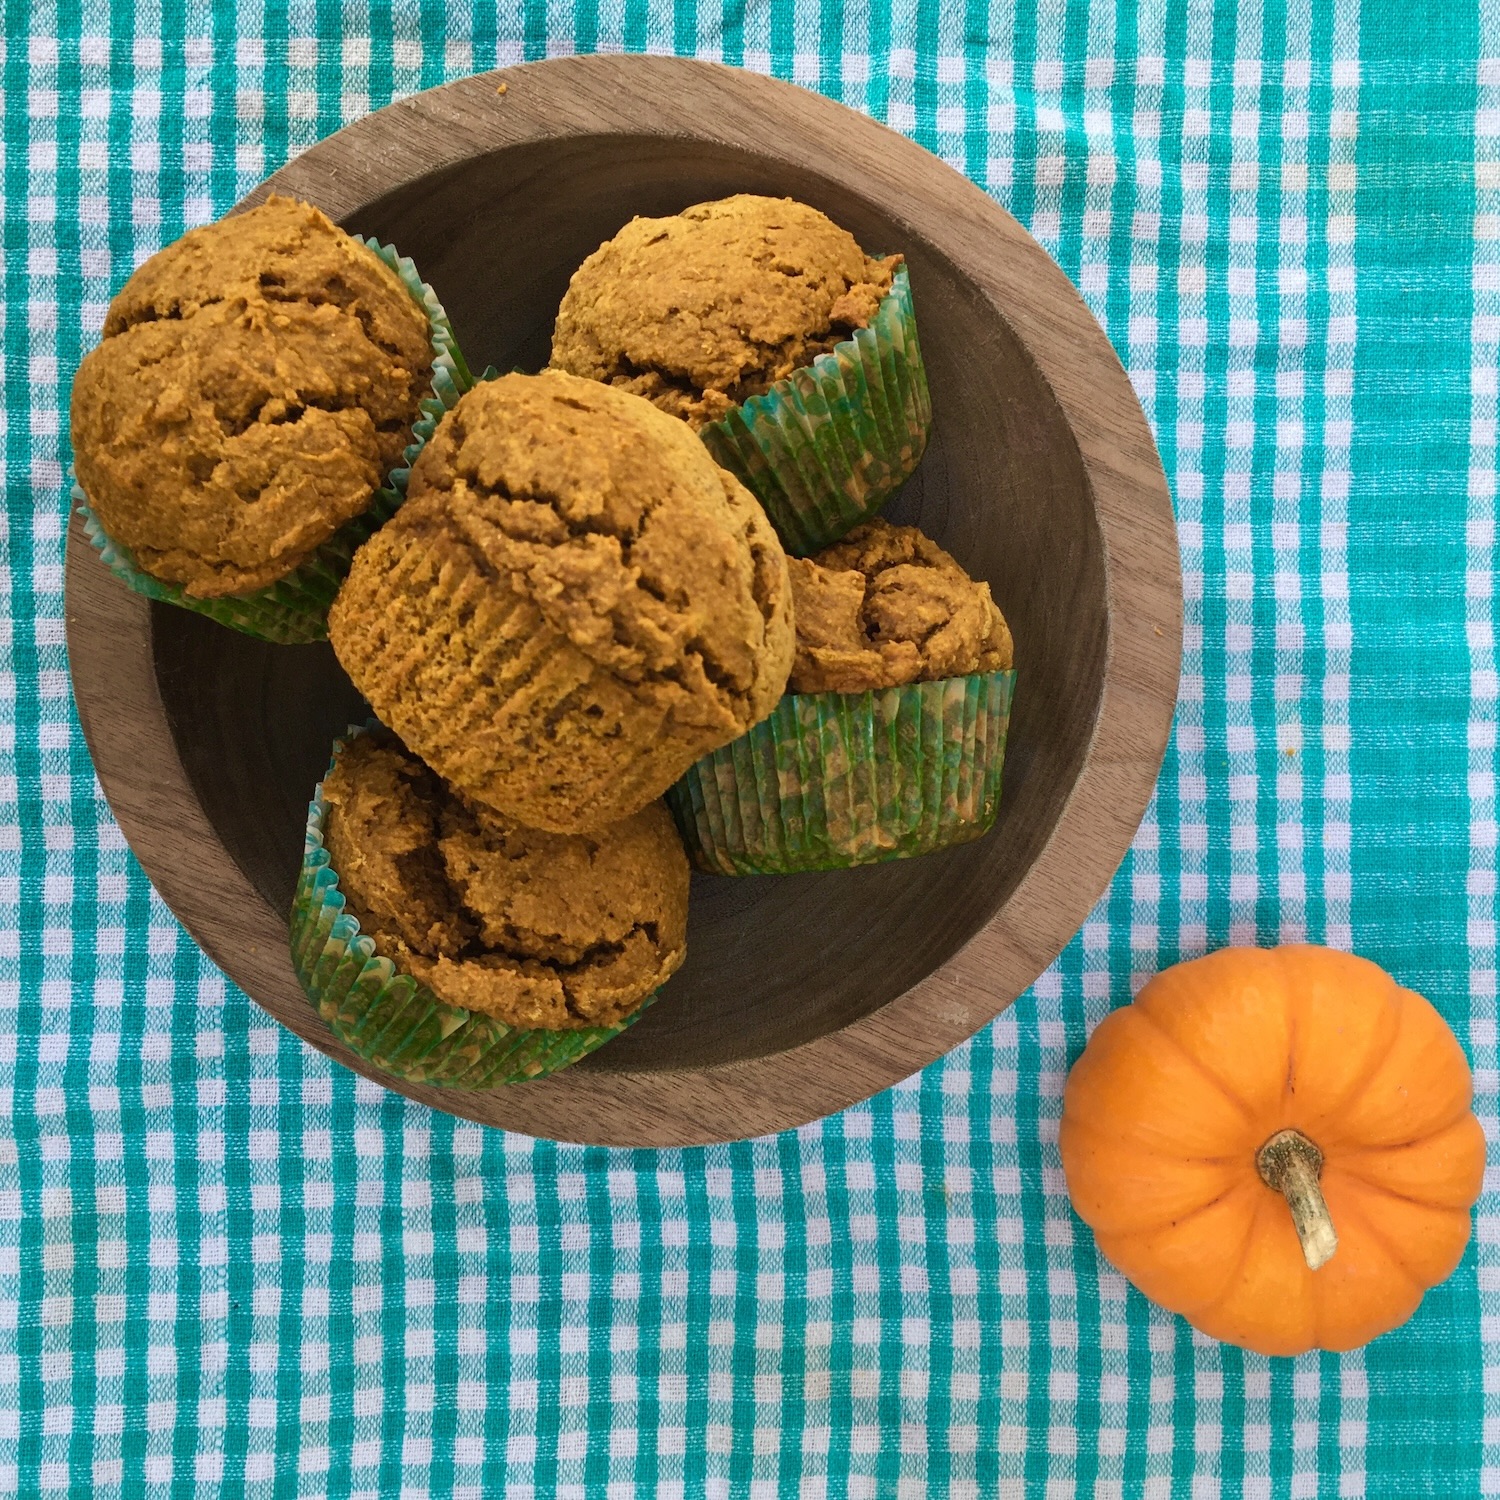
Gluten Free Vegan Pumpkin Muffins
Gluten Free Vegan Pumpkin Muffins
Serves 8 muffins
Ingredients:
1 ¾ cups gluten free oat flour
1 teaspoon baking powder
½ teaspoon baking soda
½ teaspoon sea salt
2 teaspoons ground cinnamon
¼ teaspoon ground cloves
¼ teaspoon ground nutmeg
1 can (15 ounce) pumpkin puree
¼ cup safflower oil
½ cup maple or agave syrup
2 teaspoons vanilla extract
1 teaspoon apple cider vinegar
Instructions:
- Preheat oven to 350°
- Line a muffin pan with muffin liners. Set aside.
- In a large mixing bowl, place dry ingredients: flour, baking soda, sea salt, cinnamon, cloves and nutmeg, and mix well using whisk.
- In a separate medium bowl, place wet ingredients: pumpkin puree, safflower oil, syrup, vanilla extract and apple cider vinegar. Mix well using whisk.
- Add wet ingredients to dry mixture. Using spatula, mix very well until thoroughly combined.
- Using an ice cream soup or a large spoon, place the mixture into each muffin cup.
- Bake for 10 minutes, then lower the temperature to 325°F and bake about 15 minutes. Check with a bamboo stick. If it comes out clean, the muffins are done.
- Let muffins cool on a cooling rack before serving.
Chef’s note: If oat flour is not available you can use brown rice flour, although the texture will be more dense. Remember, you can always make your own oat flour out of rolled oats by putting them in a food processor or high speed blender until finely ground.
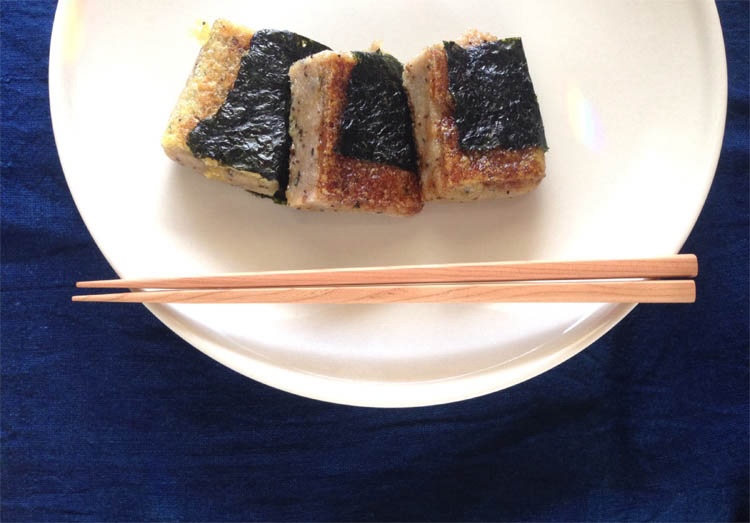
Pan Cooked Mochi
Pan Cooked Mochi
Instructions:
- Cut mochi into 1 ½-2 inch squares.
- Heat a cast iron skillet on high until hot.
- Turn flame to the lowest heat and place the mochi in the skillet.
- Cover and cook on each side for 3-4 minutes until soft and slightly puffy.
Serving Suggestions
- For a savory snack, wrap in a small slice of nori, garnish with grated daikon and a few drops shoyu.
- For a sweet snack, drizzle with brown rice or maple syrup or eat with apple butter.
- Place 2-3 pieces of cooked mochi in soups toward the end of cooking.
- My favorite mochi is Grainaissance. It comes in all different flavors and becomes very soft when cooked.
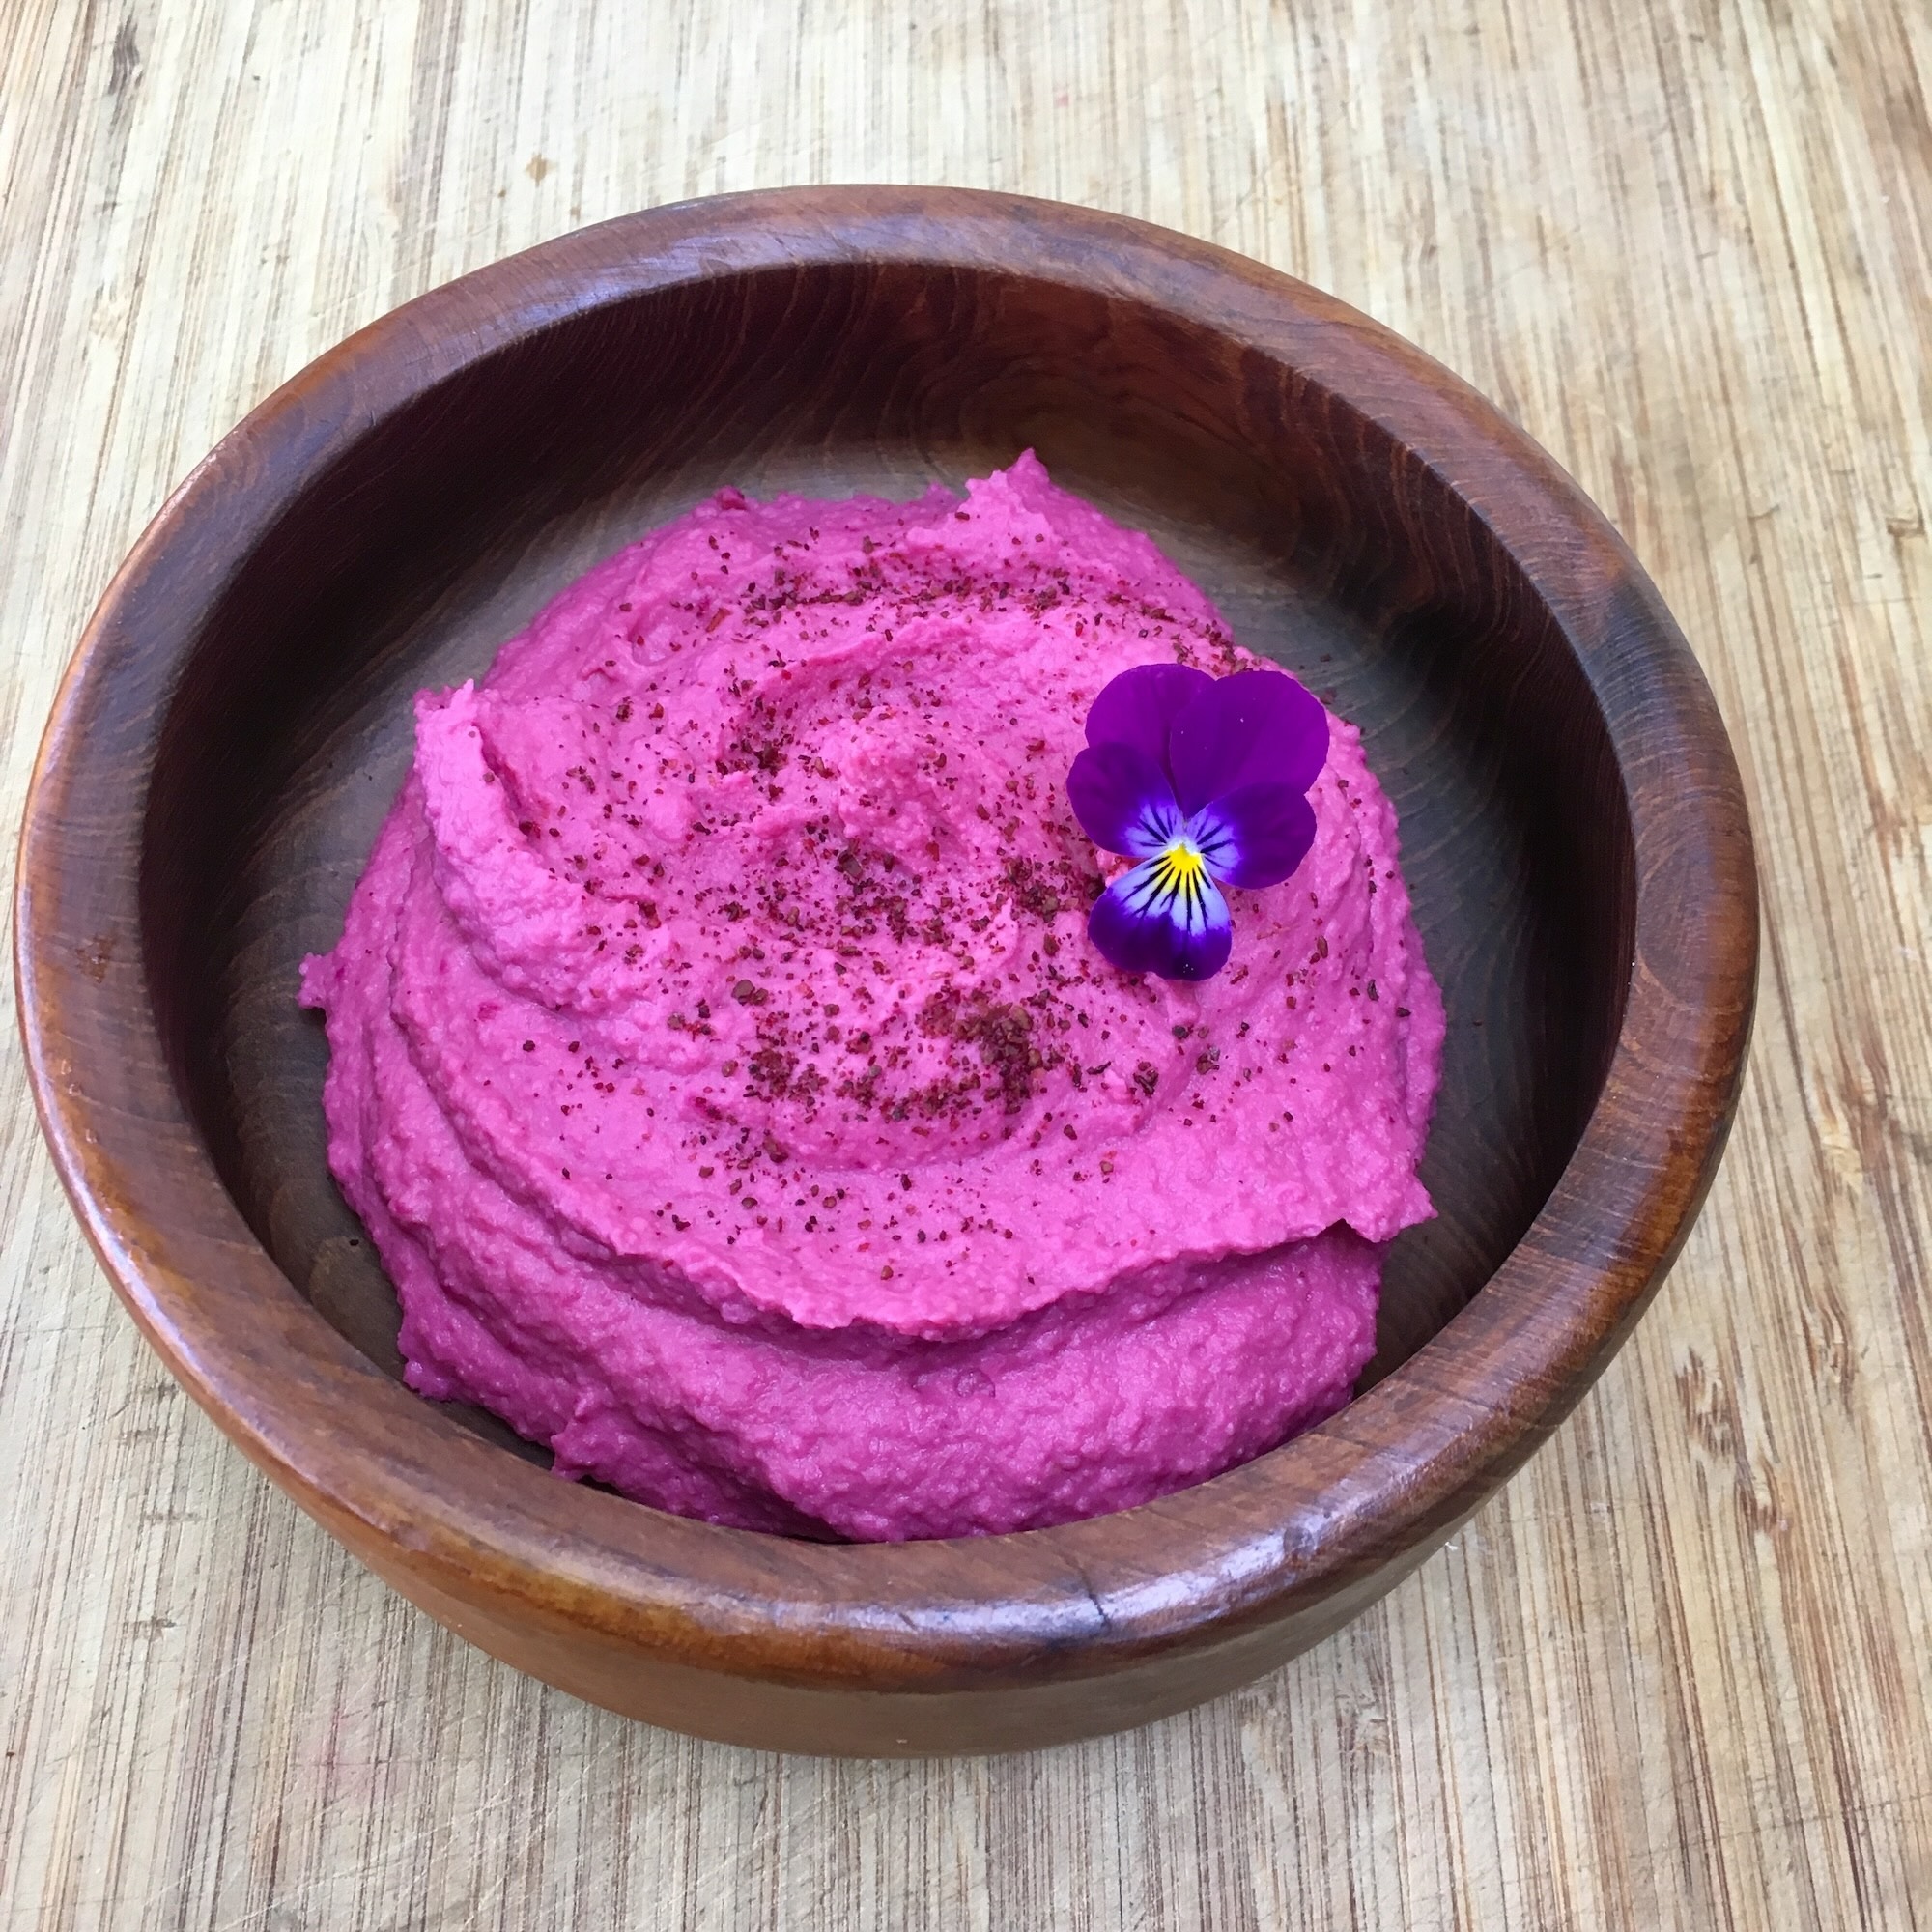
Roasted Beet Hummus
Roasted Beet Hummus
Serves 4-6
Ingredients:
4 cups cooked* or canned chickpeas, drained
1 medium size beet, roasted
3-4 cloves garlic, roasted
1 teaspoon umeboshi vinegar
2 teaspoons white miso
1 teaspoon tahini
2 tablespoons olive oil
2 tablespoons lemon juice (plus zest from 1 lemon)
1 teaspoon cumin powder
Sea salt to taste (if necessary)
Instructions:
TO COOK CHICKPEAS:
- Rinse and then soak dry chickpeas overnight.
- Discard soaking water.
- Place kombu and chickpeas in a pressure cooker. Add water to just cover the beans.
- Bring to a boil uncovered, skimming off any white foam as it arises.
- Cover the pressure cooker with the lid and lock in place. Bring to pressure over medium heat then simmer for 50 minutes.
- Turn off the flame and allow pressure to come down naturally.
- Open the pot and let the beans cool to room temperature.
TO COOK BEETS:
- Preheat the oven to 375 F.
- Wrap garlic bulb and beet with parchment paper and place them on a baking sheet.
- Place baking sheet on the middle rack in the oven. Bake garlic about 30-40 minutes until soft. Remove garlic and continue to bake beet about 1
- hour until soft. When cool, gently peel off the skin.
- In food processor, put all the ingredients, and process until everything becomes smooth and creamy. Add water if needed if it is dry.
- Plate your beet hummus topped with sumac or your favorite garnish.
- Serve with raw vegetables, pita bread, corn tortillas, or in a sandwich.

Vegan Bran Muffins with Raisins (Gluten Free)
Vegan Bran Muffins with Raisins (Gluten Free)
Serves Makes about 8-10 muffins
Ingredients:
After many trials of making crumbling gluten free muffins, this recipe finally evolved into a delicious gluten free take on the classic raisin bran muffin, with a nice non-crumble texture. These fiber rich muffins make tasty treats, especially for children and those who like baked goods that are not too sweet. The moisture and sweetness of the raisins will be infused into the muffins the next day, too.
DRY:
2 cups gluten free oat flour
1 cup gluten free oat bran
3-4 tablespoons coconut sugar (adjust to your desired sweetness level)
1 teaspoon cinnamon powder
1 teaspoon baking powder
1⁄2 teaspoon baking soda
1⁄4 teaspoon sea salt
WET:
Flaxseed Egg (3 tablespoons flaxseed meal mixed with 6 tablespoons water)*
1 cup non dairy milk
1⁄2 cup safflower oil
1 teaspoon apple cider vinegar
1 teaspoon vanilla extract
1⁄2 cup raisins
Instructions:
- Heat oven to 350 degrees. Prepare a muffin pan by placing muffin cups.
- Whisk all the DRY ingredients in large bowl until well combined.
- Make Flaxseed Egg by mixing 3 tablespoons ground flaxseeds and 6 tablespoons water. Set aside until the mixture thickens for 5 minutes.
- Vigorously whisk the rest of the WET ingredients until well emulsified. Add Flaxseed Egg into the mixture and mix well.
- Pour WET mixture into the DRY mixture and mix with spatula. Add raisins and mix until well combined.
- Divide batter evenly among prepared muffin cups.
- Bake until golden and toothpick inserted in center comes out clean, about 20 minutes, rotating muffin pan halfway through baking.
- Let muffins cool in the pan for 15 minutes, then transfer to wire rack and let cool for at least 10 minutes. Serve warm or at room temperature.
Chef’s note: It is best to make your own flaxseed meal. Simply grid flaxseeds in a spice grinder until it becomes a fine meal. If you have leftover, put it in an air tight container and store in refrigerator. It will keep up to 3 months.
Soup Recipes

Butternut Squash Orange Bisque
Butternut Squash Orange Bisque
Serves 4-5
Ingredients:
1 large butternut squash, cut into halves
1 medium onion, diced (1 1/2 cup)
1 T olive oil
2 cups vegetable stock or water
1/2 t cinnamon powder (optional)
1/2 cup orange juice
1/2 t sea salt or to taste
Parsley, finely chopped
Instructions:
- Preheat oven to 400℉. Coat the butternut squash halves with olive oil, and roast them cut side up on a baking sheet for about 30 minutes until soft. Set aside to cool.
- Heat oil in a heavy pot, add onions with a few pinches of sea salt, sauté the onion until they turn translucent, about 4 to 5 minutes.
- Scoop out the meat of the baked squash and place on top of the onion.
- Add about 2 cups vegetable stock to cover the squash. Sprinkle cinnamon on top, if using. Simmer for about 30 minutes until everything is tender.
- Remove from flame, blend into creamy texture with a blender, food processor, Vitamix or immersion blender.
- Place the pot back on the stove over low heat, add sea salt and orange juice, and simmer for another 10 minutes.
- Serve with chopped parsley for garnish.
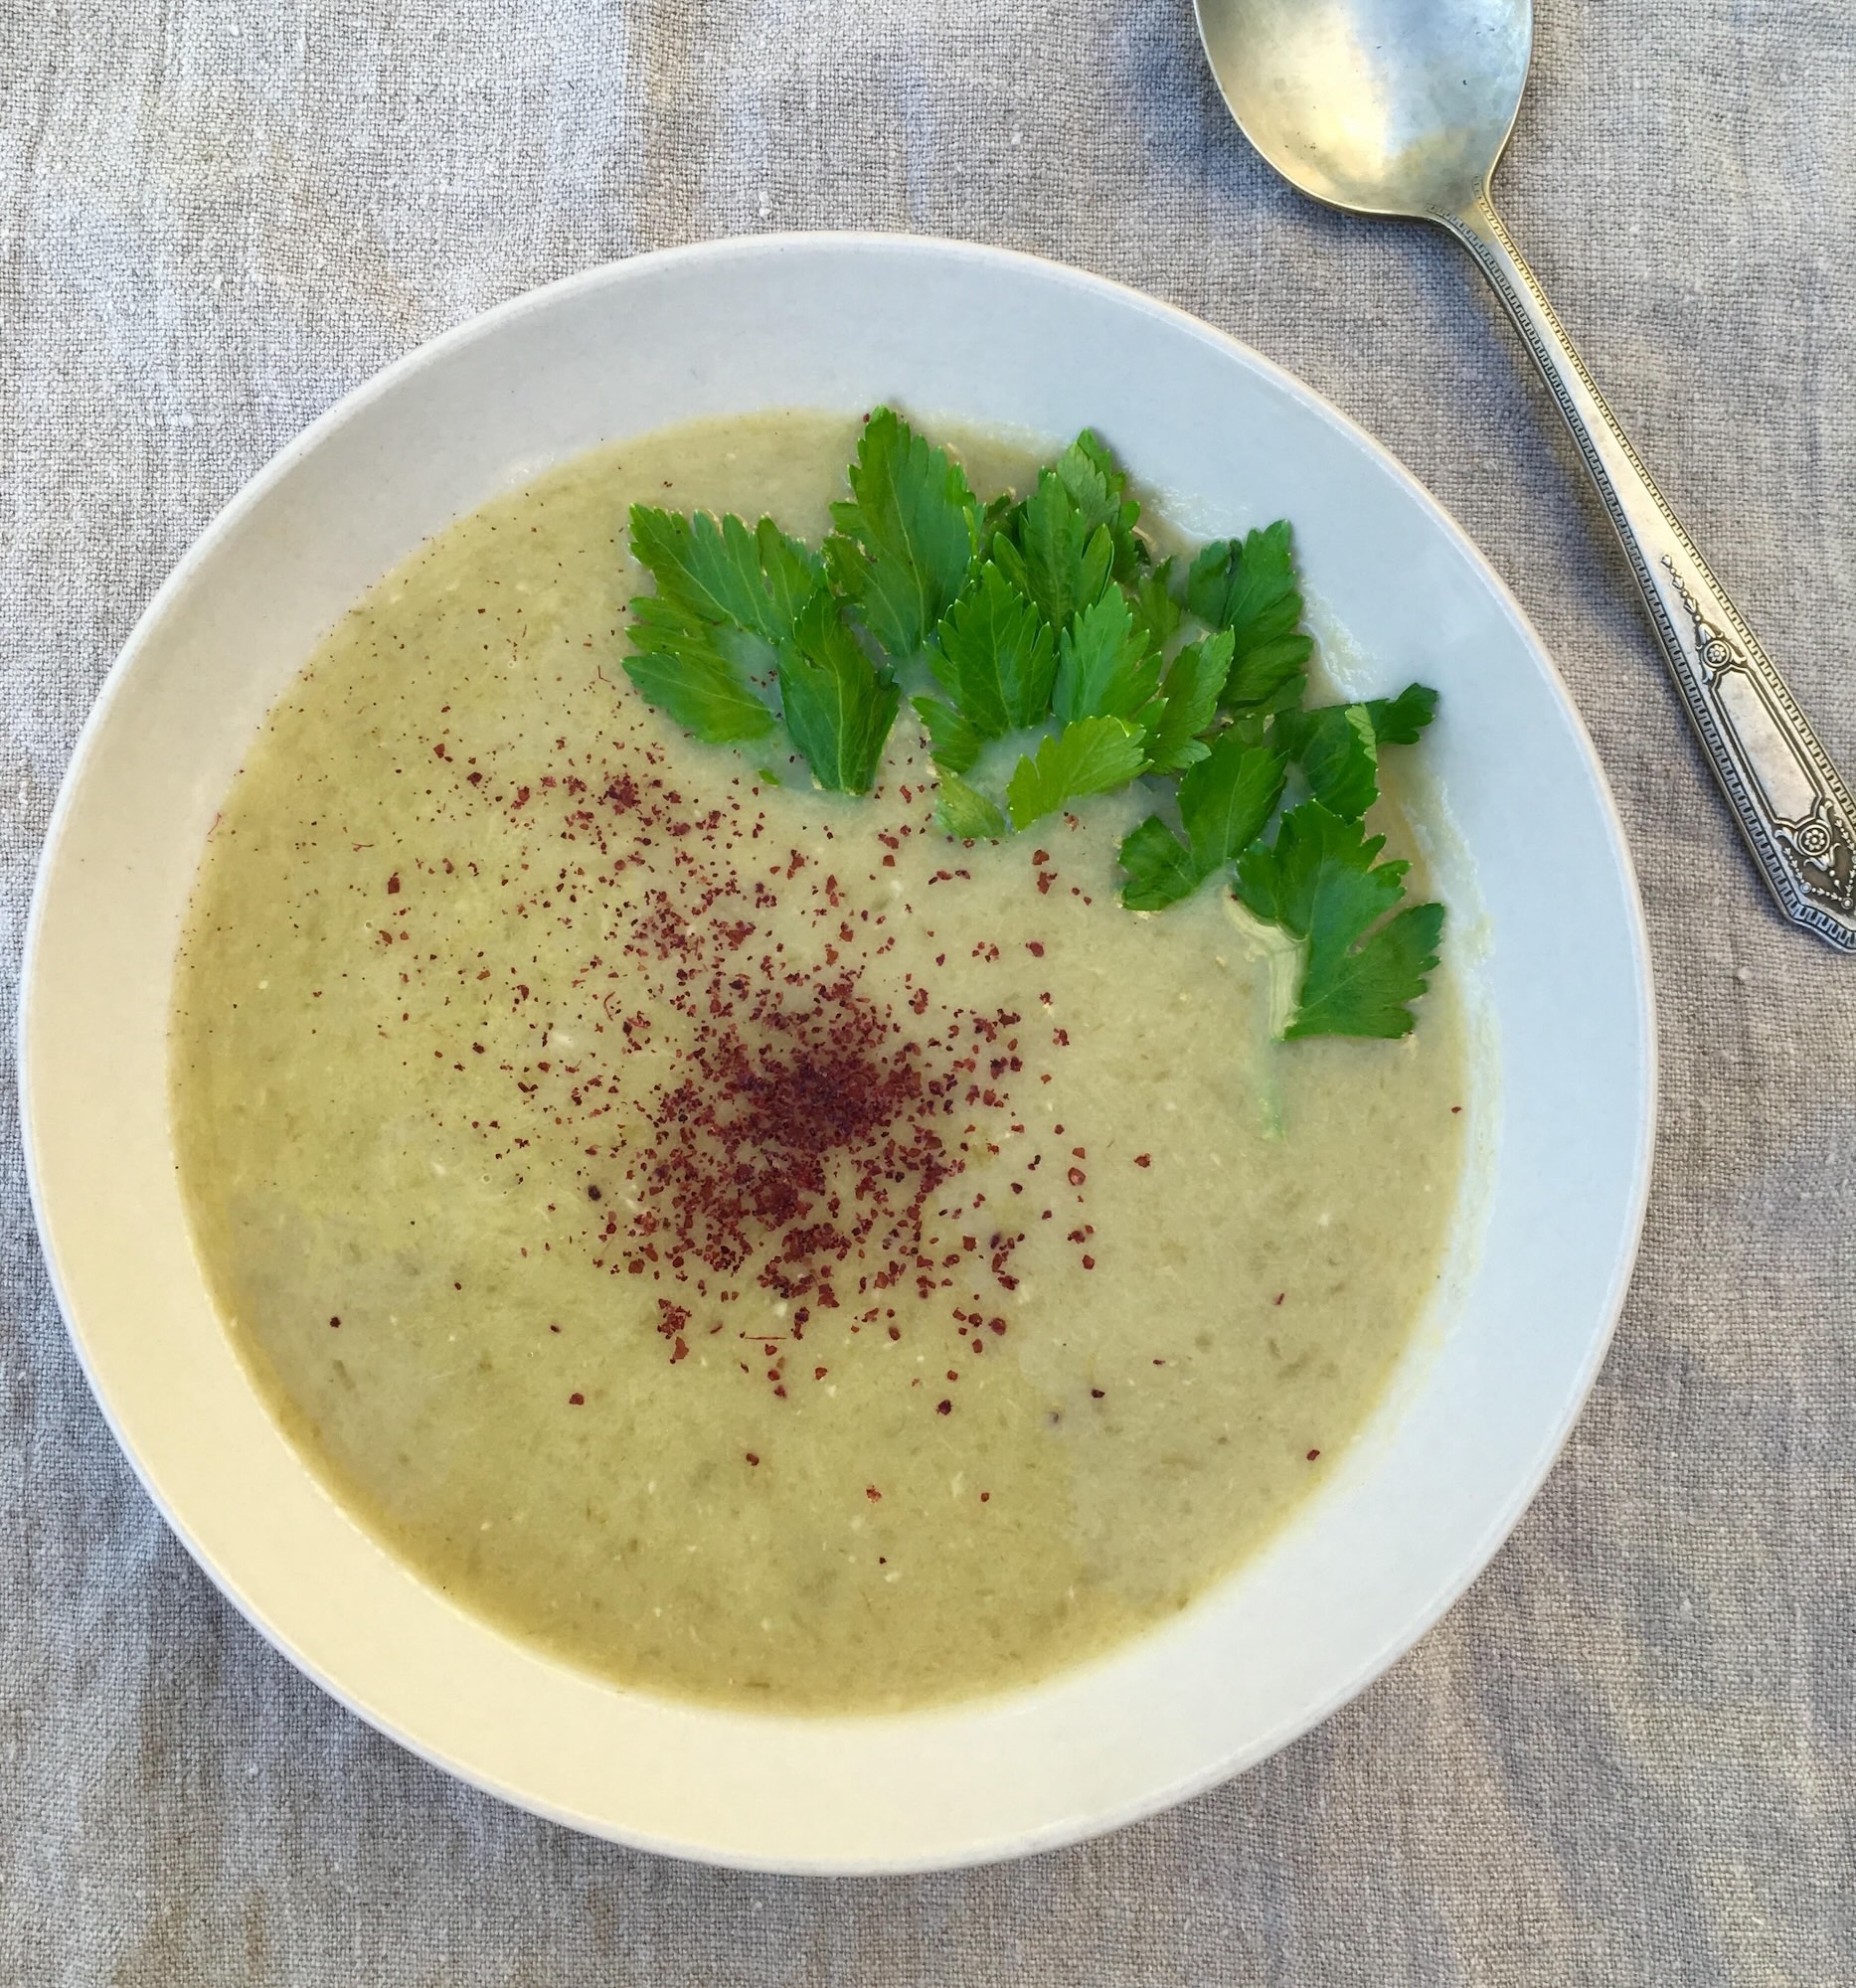
Creamy Celery and Leek Soup
Creamy Celery and Leek Soup
Serves 3-4
Ingredients:
2 tablespoons olive oil
½ medium onion, diced
1 medium leek, cleaned well, white and light green parts, diced
3 cloves garlic, minced
8 stalks celery, strung and diced
3 cups vegetable stock or water
¼ teaspoon sea salt or to taste
⅓ cup full fat coconut milk
Celery leaves for garnish
Black pepper and sumac or sweet paprika powder for garnish (optional)
Instructions:
- Heat oil in a large pot over medium flame. Add onions and leeks with a few pinches of sea salt, and sauté for about 5 minutes until translucent.
- Add garlic and celery, and continue sautéing for about 5 minutes until fragrant.
- Add vegetable stock and sea salt to the pot. Over medium-high flame, bring to a boil, then cover.
- Reduce flame to low and simmer for 20 – 25 minutes until the vegetables become really tender.
- Remove from flame, blend into creamy texture with an immersion blender or transfer to a blender or food processor and blend until creamy.
- Place the pot back on the stove over low heat, add coconut milk, and simmer for another 5 minutes.
- Serve the soup garnished with celery leaves and a sprinkle of black pepper and sumac or sweet paprika, if using.

Fresh Pea Soup
Fresh Pea Soup
Serves 3-4
Ingredients:
2 tablespoons olive oil
1 medium onion, finely diced
2 cloves garlic, minced
2 stalks celery, finely diced
2 cups fresh sugar peas or one 10 ounce package frozen peas
2 cups vegetable broth or water
1 tablespoon lemon juice
sea salt to taste
black pepper (optional)
extra virgin olive oil and vegan creamer for topping (optional)
Instructions:
- Heat oil in pot over medium heat, add onion and a couple pinches of sea salt and sauté until translucent, about 5 minutes
- Add garlic and celery and continue to sauté for about another 5 minutes until tender.
- Add fresh or frozen peas on top. Pour vegetable broth to just cover all vegetables, slowly bring to a gentle boil.
- Cover and simmer over low heat for about 2 minutes until peas are tender. Remove from heat. Blend soup using blender until smooth.
- Pour soup into back to pot, season with lemon juice, sea salt and black pepper if using. Gently simmer for a minute over low heat.
- Drizzle with extra virgin olive oil and vegan creamer if desired.
Chef’s note:
Sometimes frozen peas have fibrous skin that is hard to blend to a smooth texture. Try to blend with higher speed settings. If you like a smooth silky texture, I would recommend using a high speed blender such as Vita Mix.
Make sure not to overcook peas since they can lose their rich green color. You might not need to cook for a full 2 minutes, especially using frozen peas. Once they come to a boil, they are almost done, and you should stop cooking if the bright green color starts to fade.
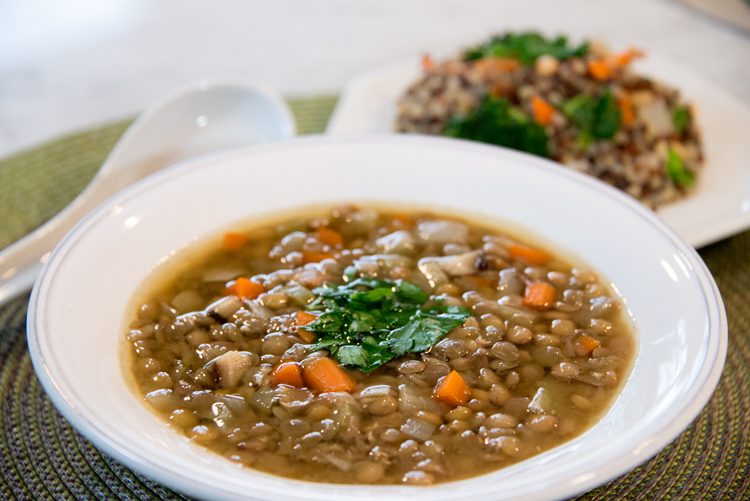
Lentil Soup
Lentil Soup
Serves 4
Ingredients:
1 cups green lentils, rinsed and drained
5 cups water
1 inch piece of kombu
2 inch piece of wakame, torn into smaller pieces or 1 t wakame flakes
1 T olive oil
1/2 onion, diced
1 stick celery, diced
2 dried shiitake, soaked in ¾ cup water and diced
1 carrots, diced
1 T shoyu
2 t ginger juice*
chopped parsley
*To obtain 1 T ginger juice, grate a 2-3 inch piece of ginger and squeeze out the juice.
Instructions:
- Soak the shiitake in ¾ cup water until soft, then dice.
- Heat the olive oil in a skillet on medium-high heat, and sauté the onion until soft.
- Add the celery and sauté for 2-3 minutes.
- Place the sautéed vegetables, shiitake, shiitake soaking water, kombu, wakame, lentils and 5 cups water in a pot. Cover and bring to a boil.
- Simmer for 45 minutes.
- Add the carrots and cook for 5 minutes.
- Add the shoyu and simmer for 10 minutes.
- Turn off the heat and stir in the ginger juice.
- Served garnished with chopped parsley.
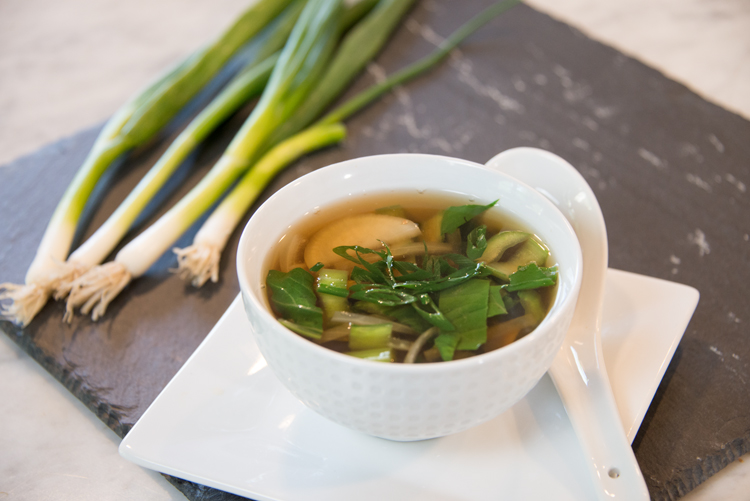
Miso with Onion, Daikon, Bok Choy
Miso with Onion, Daikon, Bok Choy
Serves 2
Ingredients:
1 inch piece of wakame
¼ cup daikon, sliced into thin half rounds
¼ cup onions, cut in thin half moons
1 cup bok choy, cut into 1 inch pieces
3 cups water
3 level teaspoons of brown rice or barley miso
green onion, thinly sliced for garnish
Instructions:
- Rinse and soak wakame until tender in a small dish of water.
- Place wakame with the soaking water and onions in a small saucepan with 1 cup water and bring to a boil over medium heat.
- Let boil for 3 minutes, until onions are soft.
- Add the daikon and the rest of the water and boil for 3-5 minutes.
- In the meantime, place the miso paste in a bowl with a small amount of soup water and mix until dissolved.
- Turn soup to low (so it is simmering, not boiling) and pour diluted miso into the soup, mixing gently.
- Add bok choy and simmer for 3 minutes.
- Garnish with chopped scallion.
Variation:
Place cooked mochi in your serving bowl, then pour hot soup over the mochi and serve.

Creamy Cauliflower Soup
Creamy Cauliflower Soup
Serves 4 to 5
Ingredients:
1 T olive oil
1 cup diced onion
1 cup thinly sliced leeks
1 clove garlic, minced
3 cups cauliflower florets
2 ½ cups vegetable broth or water
1 bay leaf (option)
¼ t sea salt, or to taste
⅛ t cumin powder (optional)
Dash of shoyu or tamari
Fresh dill or parsley for garnish
Instructions:
- Heat oil in a pot, then add the onion and sauté until translucent, approximately 4 minutes.
- Add leeks and sauté for 3 minute.
- Add garlic and sauté 30 seconds.
- Place cauliflower on top then pour the broth or water to barely cover the cauliflower.
- Add one bay leaf, cover and bring to a oil over medium heat.
- Reduce heat and simmer until cauliflower is tender (approximately 20-30 minutes).
- Take out the bay leaf and turn off the flame.
- Transfer to a blender and puree or use a hand-held immersion blender to blend in the pot.
- Return back to the pot and flavor with sea salt, shoyu and cumin powder.
- Simmer for 10 minutes.
- Garnish with fresh dill or parsley.
Recipe and photo provided by Sachi Kato. www.macrobiotic.sachikato.com
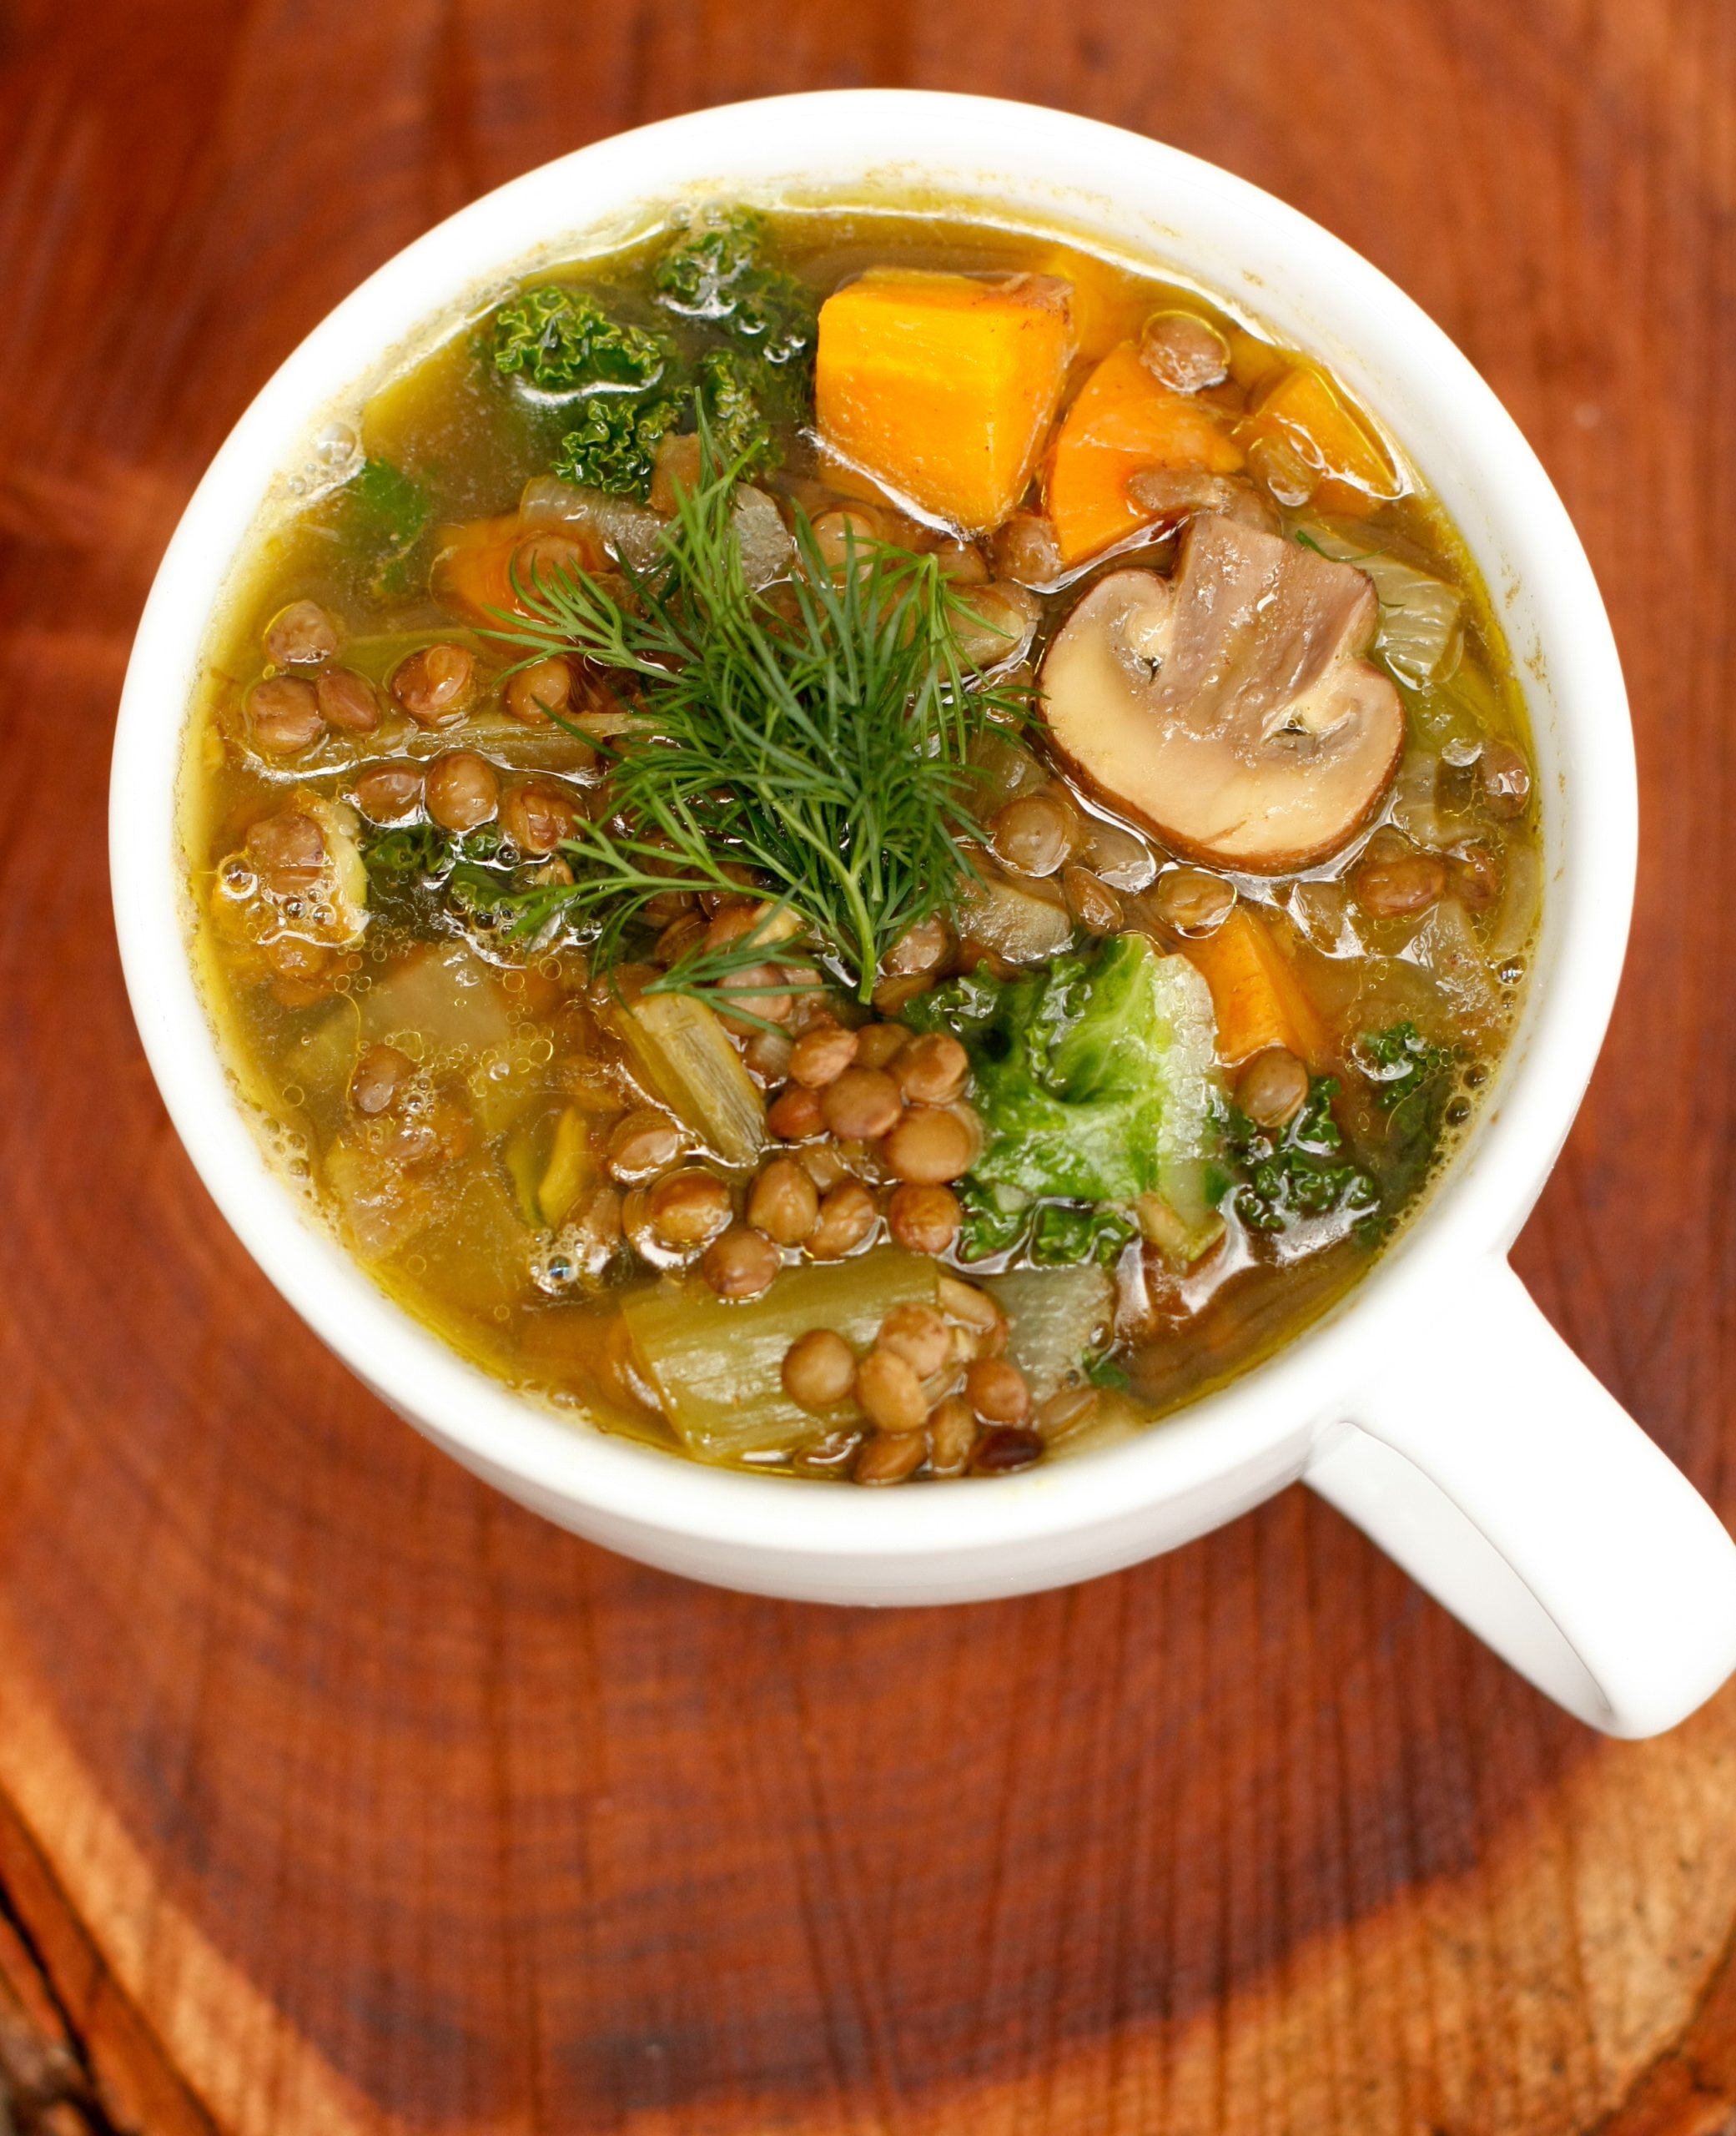
Lemony French Lentil Soup
Lemony French Lentil Soup
Serves 4
Ingredients:
Easy to prepare, yet hearty and flavorful, this spring lentil soup is a perfect addition to your meal.
1 cup dried French lentils, rinsed, soaked overnight, and drained
2 tablespoons olive oil, and more for topping on soup
1 onion, diced
2 cloves garlic, minced
1 medium carrot, cubed
2 celery stalks, chopped
1⁄2 cup mushrooms, variety of your choice
1⁄2 teaspoon cumin
1⁄2 teaspoon turmeric
1⁄2 teaspoon cinnamon
1⁄2 teaspoon sea salt, and more to taste
3- 4 cups vegetable broth or water
1 bay leaf
2 cups torn kale leaves, or choice of leafy greens
1 tablespoon lemon juice, or to your taste
dill and lemon zest for garnish
Instructions:
- In medium saucepan, place lentils and cover them with water, 1 inch above the beans. Bring to a boil, skim the white foam as it arises on the surface. Cover and simmer until lentils become almost tender, for about 20 – 25 minutes. During simmering, make sure to cook with low and gentle heat. Do not overcook lentils. If lentils are boiled for too long, the skin will break and peel off. Set cooked lentils aside.
- In skillet, place olive oil, onion, garlic and 1⁄2 teaspoon of sea salt. Sauté until onions become translucent over medium heat.
- Add carrots and mushrooms with pinch of sea salt, keep sautéing for about 2-3 minutes. Lower heat to medium low, add cumin, turmeric, cinnamon, and sautéing for 30 seconds.
- Add broth and bay leaf, bring to a boil over medium heat, cover and simmer for about 10 minutes until vegetables become tender. Over medium low heat, add cooked lentils, its cooking liquid and kale leaves, continue to cook together for another 5 minutes with gentle simmer.
- Adjust flavor by adding more salt to taste, keep cooking for another 3 minutes. Turn off flame, add lemon juice to your taste.
- If you desire, drizzle a little olive oil on top. Serve with garnish.
Chef’s tip: Make sure to add lemon juice after you remove soup from heat. It will help retain the vitamin C and also prevent the flavor from turning bitter.
Vegetable Recipes
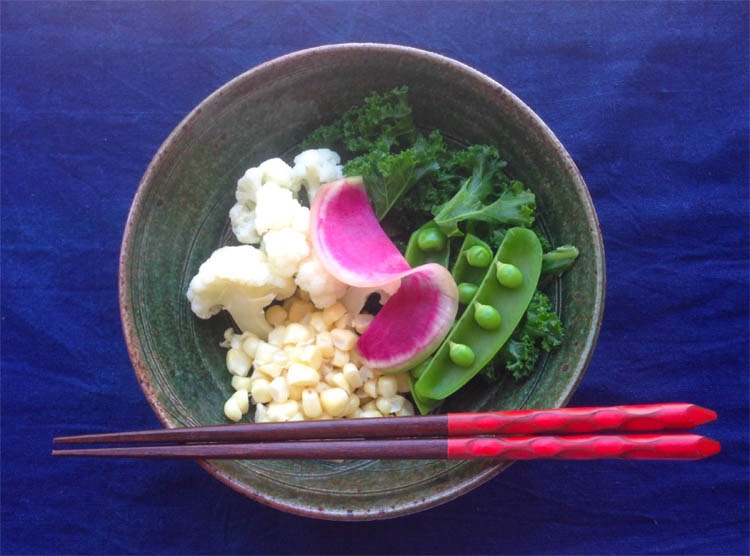
Blanched Vegetables
Blanched Vegetables
Serves 4
Ingredients:
2 cups cauliflower florets
3 leaves of kale, stems removed and torn into bite size pieces
1 cup fresh or frozen corn
1 cup pea pods, ends trimmed and center vein removed
Pinch of sea salt
Instructions:
- Place 2-3 cups water in a deep pot with a pinch of sea salt.
- Cover and bring to a boil.
- Add corn and boil until bright yellow, approximately 2 minutes. Remove and let cool.
- Add cauliflower and boil until tender, but slightly crunchy, approximately 2-3 minutes. Remove and let cool.
- Add pea pods and cook for 15-30 seconds until bright green. Remove and let cool.
- Add kale and cook for 1 ½ – 2 minutes. Remove and let cool.
- Mix ingredients together and serve.
- It’s best to let the water to come a rolling boil between each vegetable. You can make many vegetables this way including broccoli, carrots, daikon, onions, leeks, collard greens, mustard greens and celery.
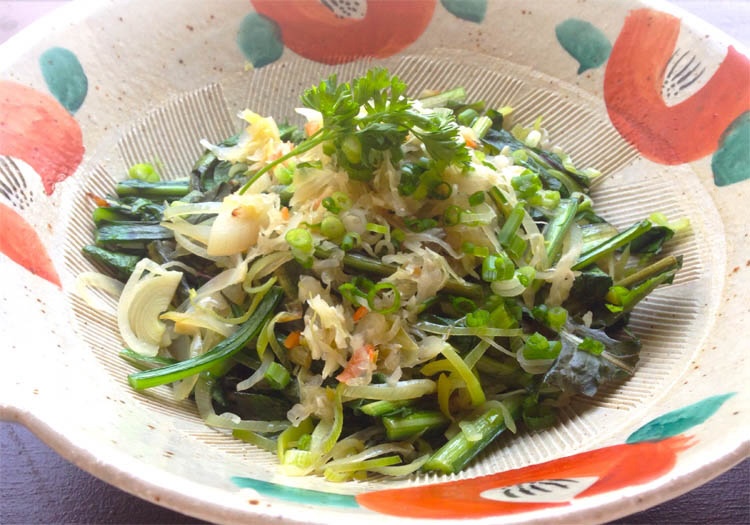
Sautéed Dandelions With Leeks
Sautéed Dandelions With Leeks
Serves 2-4
Ingredients:
1 bunch dandelion greens, chopped in 2 inch pieces*
¼ of a large or ½ of a small red onion, sliced in thin half moons
1 cup thinly sliced leeks
Sesame or olive oil
Sea salt
2 T sauerkraut
Instructions:
- Heat 1 T oil in a skillet on medium-high heat.
- Add red onions, a pinch of sea salt and sauté onions until soft, approximately 2 minutes.
- Add leek, sauté 1 minute.
- Add dandelions and sauté until wilted, approximately 30 seconds to 1 minute.
- Remove from the heat and stir in the sauerkraut.
* To chop the dandelion greens, first cut off the end of the stems, then cut up from the stems in 2 inch increments.
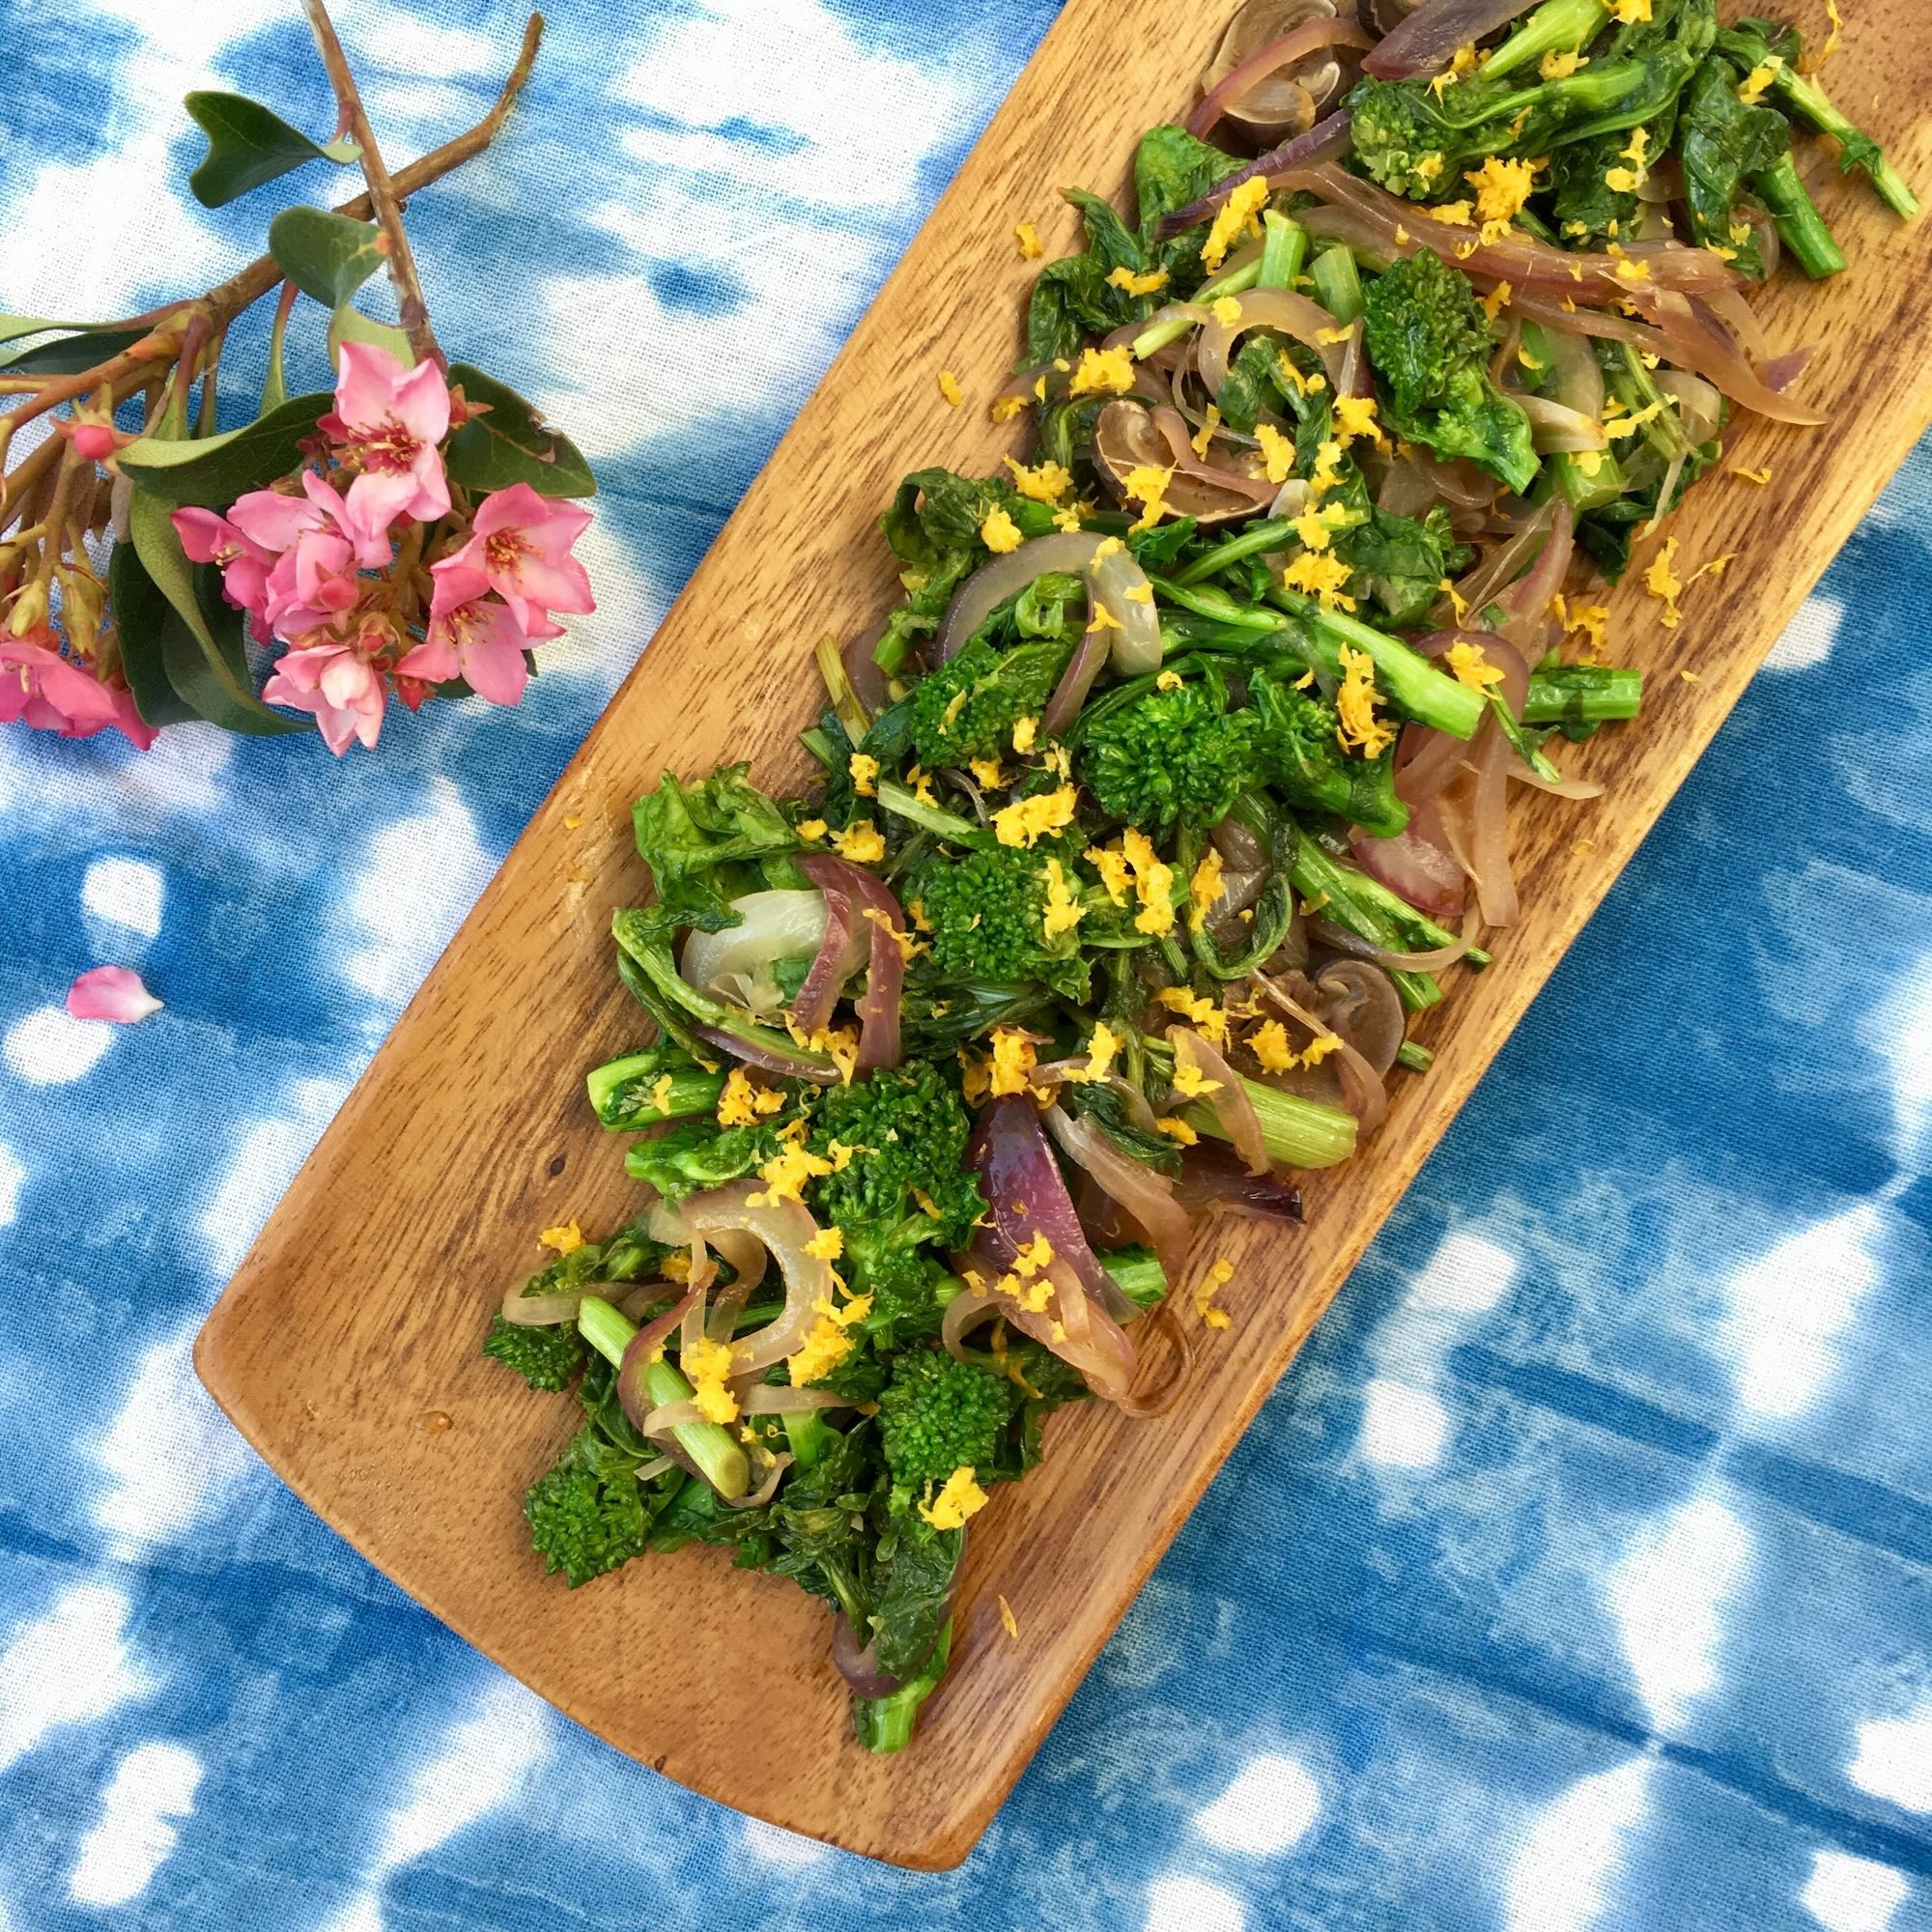
Spring Sautéed Broccoli Rabe With Mushrooms
Spring Sautéed Broccoli Rabe With Mushrooms
Serves 3-4
Ingredients:
1 ½ tablespoons olive oil
1 medium onion, sliced into thin half moons
1 clove garlic, minced
Few pinches of sea salt, or to taste
½ cup thinly sliced mushrooms
1 bunch broccoli rabe, chopped into 1 inch lengths, stems and leaves divided (about 3 cups total)
2 teaspoons tamari
1 tablespoon lemon juice (½ lemon)
Zest of one lemon for garnish
Instructions:
- In a skillet, heat oil over medium flame. Sauté onion and garlic with a few pinches of sea salt until onion becomes translucent.
- Add mushrooms and continue sautéing for a couple of minutes until mushrooms are fully cooked.
- Layer broccoli rabe, first stems, then leaves on top, with a little water added to the vegetables. Cover the skillet and steam for 1 minute until
- broccoli rabe turns bright green.
- In a meantime, combine shoyu and lemon juice in small bowl.
- Remove cover of skillet, add the seasoning mixture, stir to incorporate well. Taste, adjusting flavor if necessary.
- Serve immediately with a sprinkle of lemon zest on top for garnish.
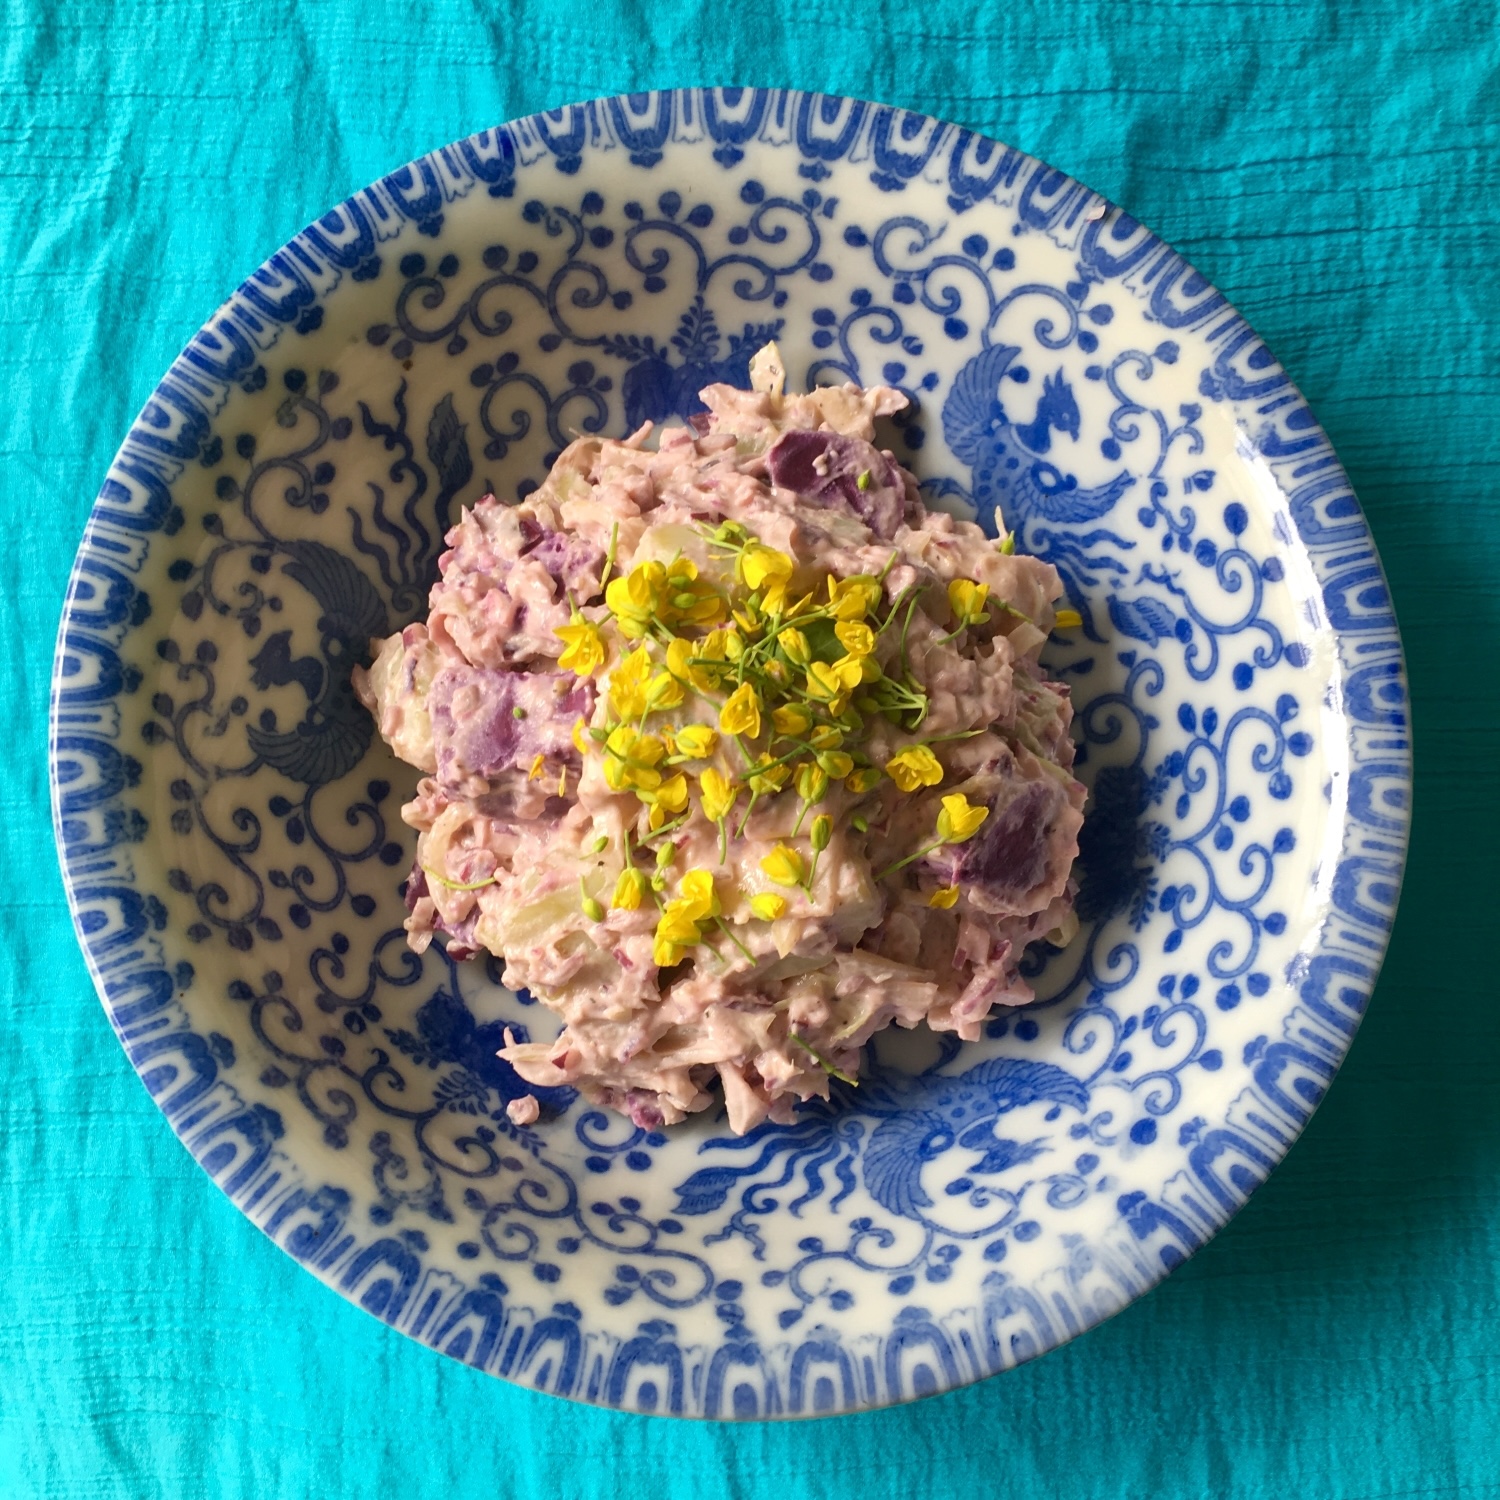
Sweet Potato Salad With Aioli Sauce
Sweet Potato Salad With Aioli Sauce
Serves 3-4
Ingredients:
1 medium Japanese sweet potato (or sweet potato of your choice), diced into bite sized pieces
1 medium purple sweet potato (or sweet potato of your choice), diced into bite sized pieces
1 small red onion, finely diced (½ cup)
2 teaspoons umeboshi vinegar
½ medium fennel bulb or 2 stems celery, sliced thin (1 cup)
a few pinches sea salt
½ cup Aioli (recipe below) or store bought, plant-based aioli
Black pepper to taste
Chopped parsley or Asian mustard flowers for garnish
Tofu Sour Cream:
(Makes about 2 cups)
1 package (14 ounces) tofu, steamed for 10 minutes
4 tablespoons lemon juice (1 lemon)
1 tablespoon umeboshi vinegar
1 tablespoon brown rice syrup
1 tablespoon safflower oil
Aioli:
(Makes about 1 ¼ cups)
1 cup Tofu Sour Cream
2 cloves garlic, not peeled
1 tablespoon mustard
1 tablespoon rice syrup
⅛ teaspoon sea salt or to taste
1 tablespoon extra-virgin olive oil
Instructions:
- Steam sweet potatoes (each one separately) until tender, about 10 minutes each and set aside to cool.
- In the meantime, in small bowl, marinate red onion with umeboshi vinegar for 15 minutes.
- In another small bowl, massage fennel with a few pinches of sea salt and set aside for 10 minutes. Squeeze out the water. Set aside.
- In a large mixing bowl, combine sweet potatoes, red onion, fennel, Aioli and black pepper. Mix gently. Serve with garnish.
Chef’s tip: You can make this dish 1-3 hours ahead of time since the flavor settles after sitting for a while. Store in the refrigerator.
Tofu Sour Cream:
- Combine all the ingredients except olive oil in food processor. Process until smooth. With processor running, slowly add oil until incorporated.
Chef’s note: sour cream keeps well in the fridge for 3 – 4 days.
Aioli:
- In small skillet over medium heat, toast garlic for about five minutes, until brown spots appear on skin, shaking the skillet occasionally. Set aside.
- When it cools enough to handle, peel the skin.
- Combine all ingredients except olive oil in food processor. Process until smooth. With processor running, slowly add oil until incorporated.
Chef’s note: keeps well in the fridge for 3 – 4 days.
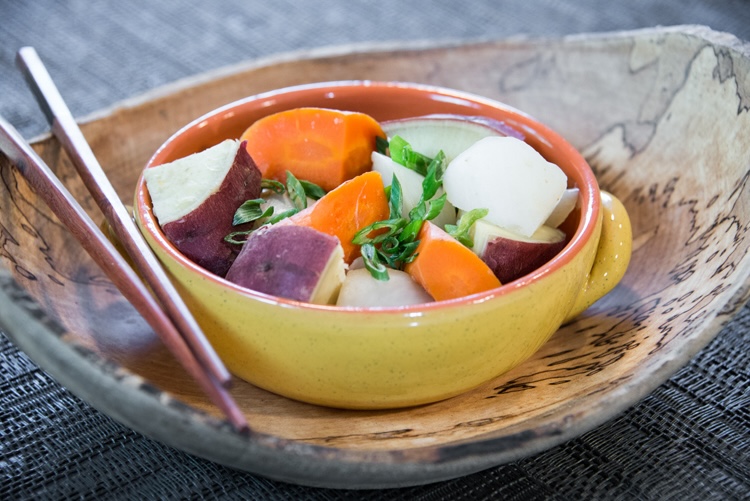
Vegetable Nishime
Vegetable Nishime
Serves 4-6
Ingredients:
2 inches strip kombu, soaked and cut into smaller squares
1 cup daikon, sliced in 1-inch thick rounds
½ cup carrots, sliced in chunks
1 cup winter squash
1 onion, cut into 6 large pieces
Instructions:
- Place the kombu on the bottom of the pot and add approximately 1 inch water.
- Place the vegetables in sections in the pot.
- Add a pinch of salt, cover and bring to a boil.
- Reduce flame to low and simmer for 30-35 minutes or until the vegetables are soft and sweet.
- Add several drops of shoyu or tamari, cover and simmer for another 5 minutes until almost all of the remaining liquid has evaporated.
- Mix the vegetables so all the liquid and seasoning and remaining liquid is evenly dispersed.
OTHER DELICIOUS COMBINATIONS:
- Daikon
- Winter squash, Japanese sweet potato, daikon, carrot
- Winter squash, parsnips, cabbage, onion
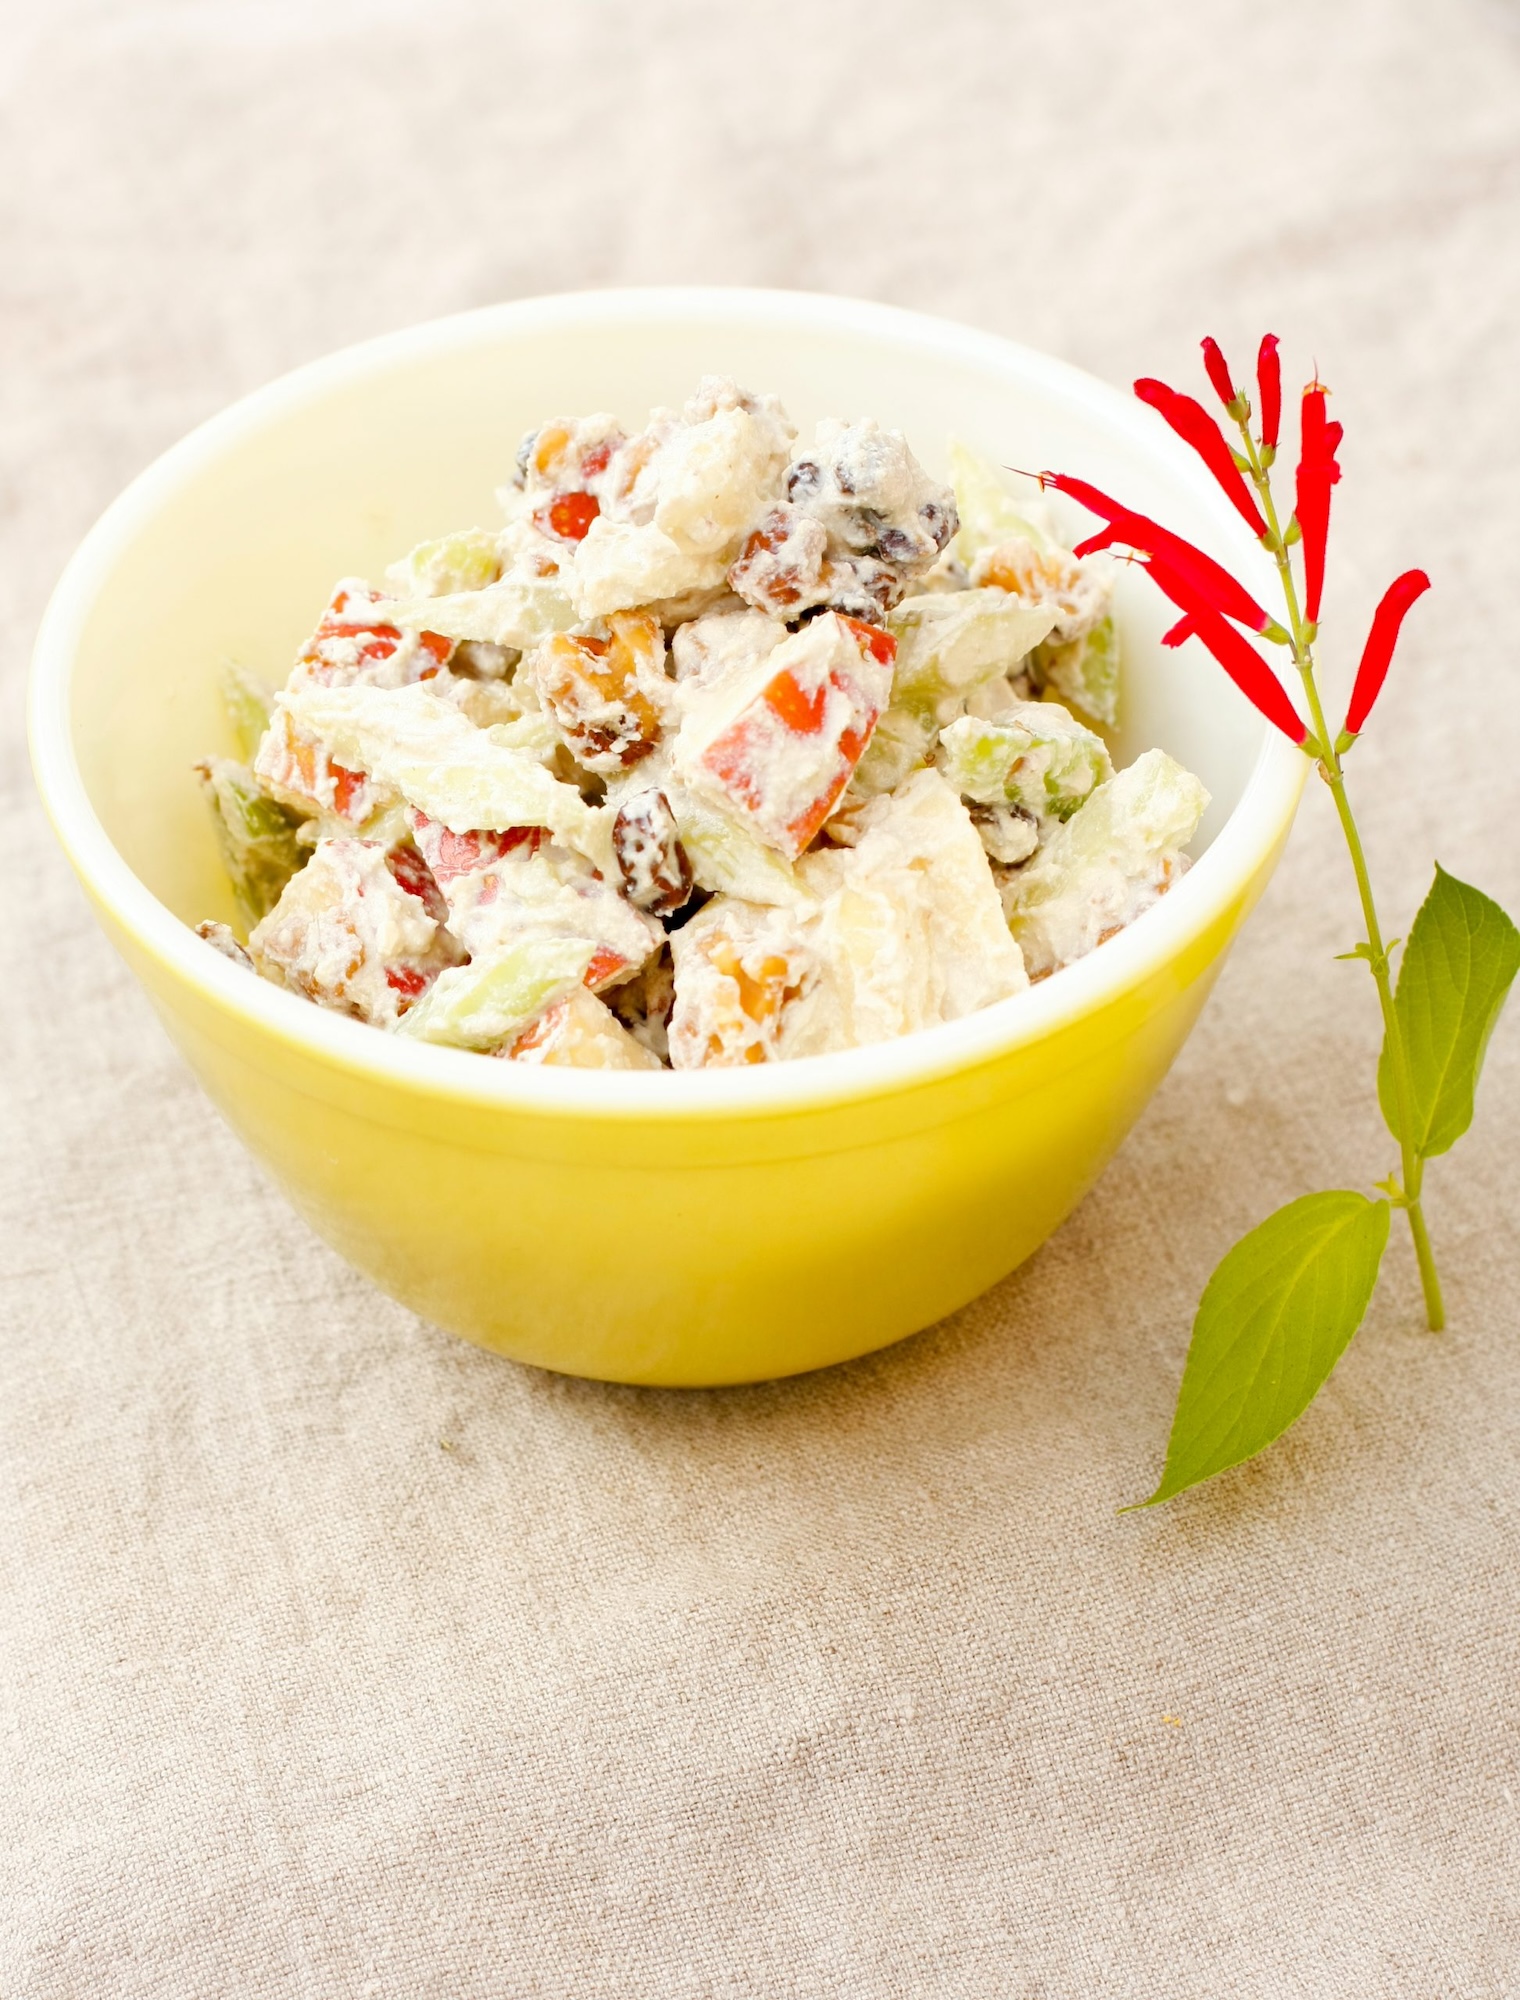
Waldorf Salad
Waldorf Salad
Serves 4-5
Ingredients:
Dressing:
1 (14 ounce) package firm tofu
2 teaspoons umeboshi vinegar
¼ cup lemon juice (1 lemon)
1 tablespoon olive oil
Salad:
2 cups apples, chopped into bite size pieces
2 cups celery, chopped into bite size pieces
1 cup walnuts, roasted and chopped coarsely
½ cup raisins, boiled for 5 minutes and drained
2 pinches sea salt
dash of umeboshi vinegar
Instructions:
- To make dressing, boil tofu for 10 minutes, drain using strainer and set aside to cool. This process will pull excess water from the tofu.
- In food processor, place tofu, umeboshi vinegar, and lemon juice. Process until smooth. Add olive oil while spinning.
- In mixing bowl, toss apples, celery, walnuts, raisins, sea salt, and umeboshi vinegar.
- Add dressing to taste and mix until well combined.
Chef’s note: Leftover dressing can be utilized as a dipping sauce for vegetable sticks, or as a spread on toast. Keeps in refrigerator for 3 – 4 days.
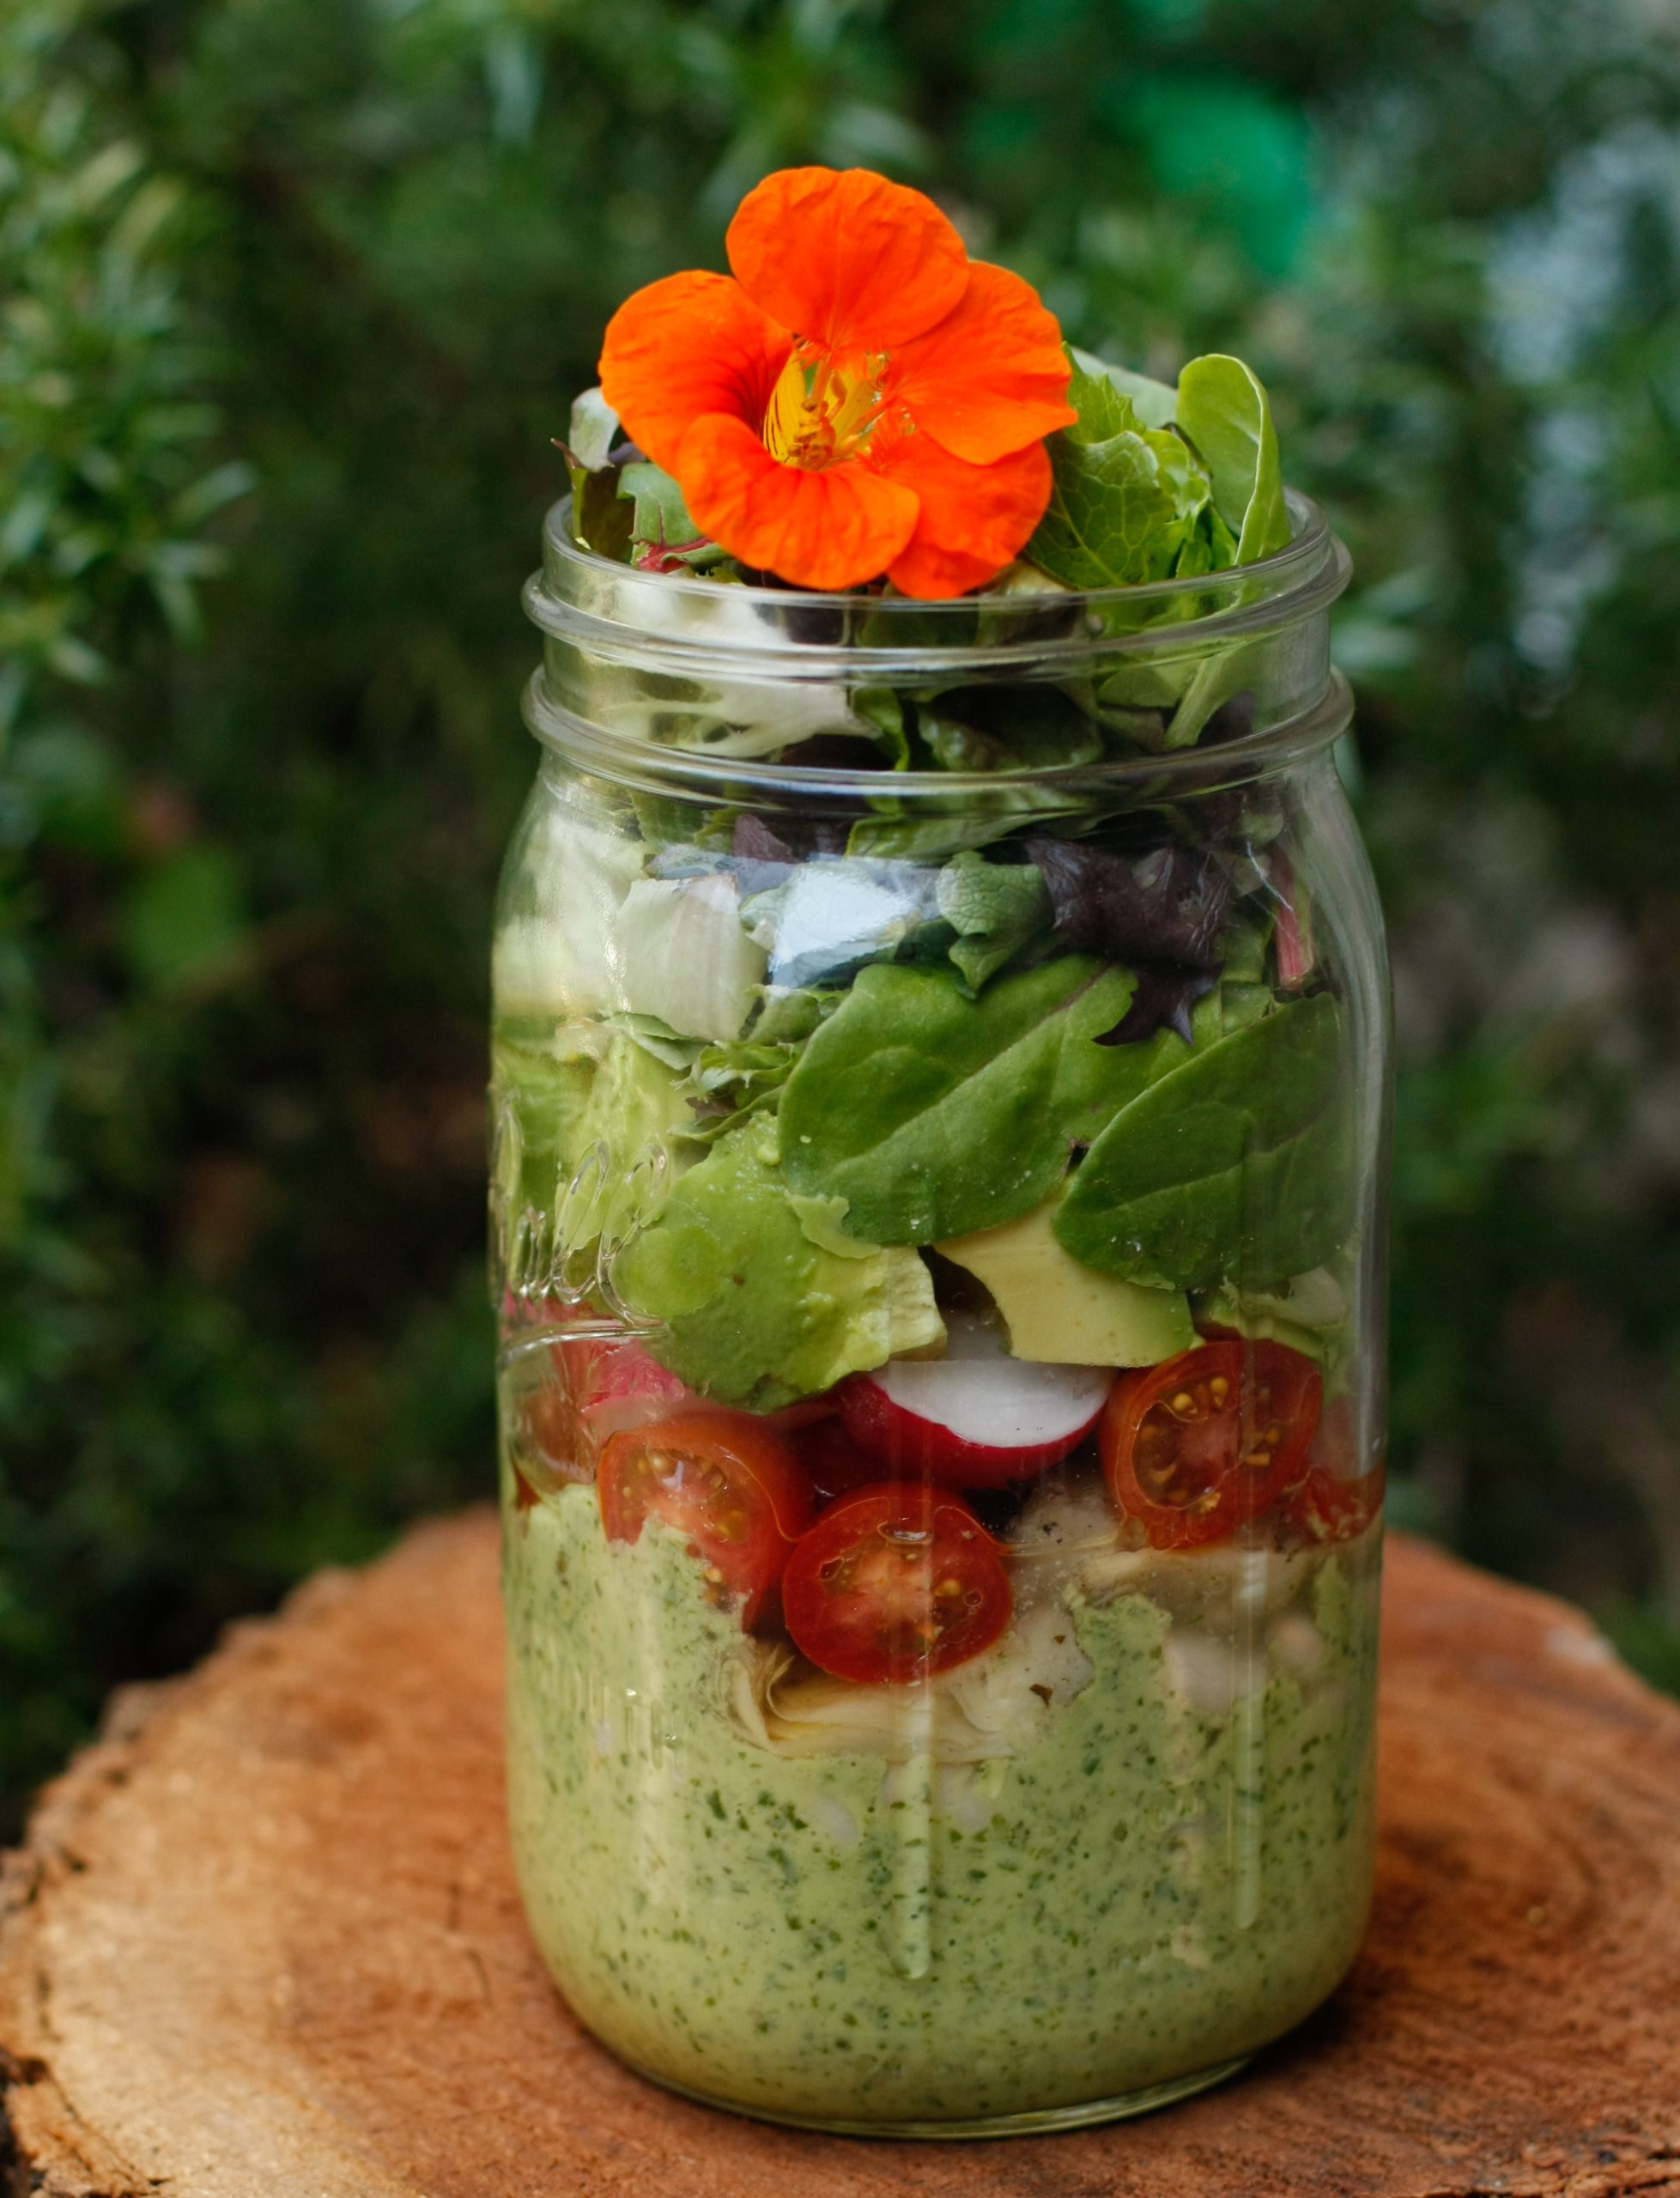
Jar Salad: Californian Style
Jar Salad: Californian Style
Serves Makes 32 ounce mason jar salad
Ingredients:
This Californian Style Salad features Green Goddess Dressing. Both rich and
refreshing, this salad on the go will provide you with culinary joy.
Green Goddess Dressing: (makes about 1 cup)
1⁄2 cup vegan yogurt, unsweetened
2 teaspoons lemon juice
1⁄4 cup green part of scallions
1⁄2 cup packed green herbs such as dill, cilantro and parsley
1 tablespoon capers
1⁄2 teaspoon garlic powder
1⁄2 teaspoon umeboshi vinegar
1⁄2 teaspoon sea salt or to taste
black pepper to taste, optional
Jar salad:
1⁄2 cup Green Goddess Dressing
1⁄2 – 1 cup cooked white beans or your choice of beans
1⁄4 cup marinated artichoke hearts (from a jar)
2 – 3 radishes, sliced
1⁄4 cup sliced avocado
4 – 5 cherry tomatoes, sliced into halves
1 – 1 1⁄2 cup packed baby lettuce mix
Instructions:
To make Green Goddess Dressing dressing:
- Add all dressing ingredients to food processor in the order listed. Blend until smooth and uniformly green. Dressing will keep in refrigerator for up to 5 days.
To construct jar salad:
- Place dressing on the bottom, next add cooked white beans.
- Layer marinated artichokes, cherry tomatoes, avocado and lettuce mix.
- Place the lid on jar and keep it in refrigerator for a longer lasting result. If weather is warm or hot, make sure to bring jar salad in a cooler with ice pack.
Chef’s tip:
Make sure to choose good quality unsweetened plant based yogurt. My recommendation is either Forager project’s “organic cashew milk yogurt” or Trader Joe’s “organic cashew milk cultured yogurt alternative”. They are both high quality and rich and creamy to make nice vegan creamy dressings.
For variations, you can add grains such as quinoa, also chopped nuts such as almonds.
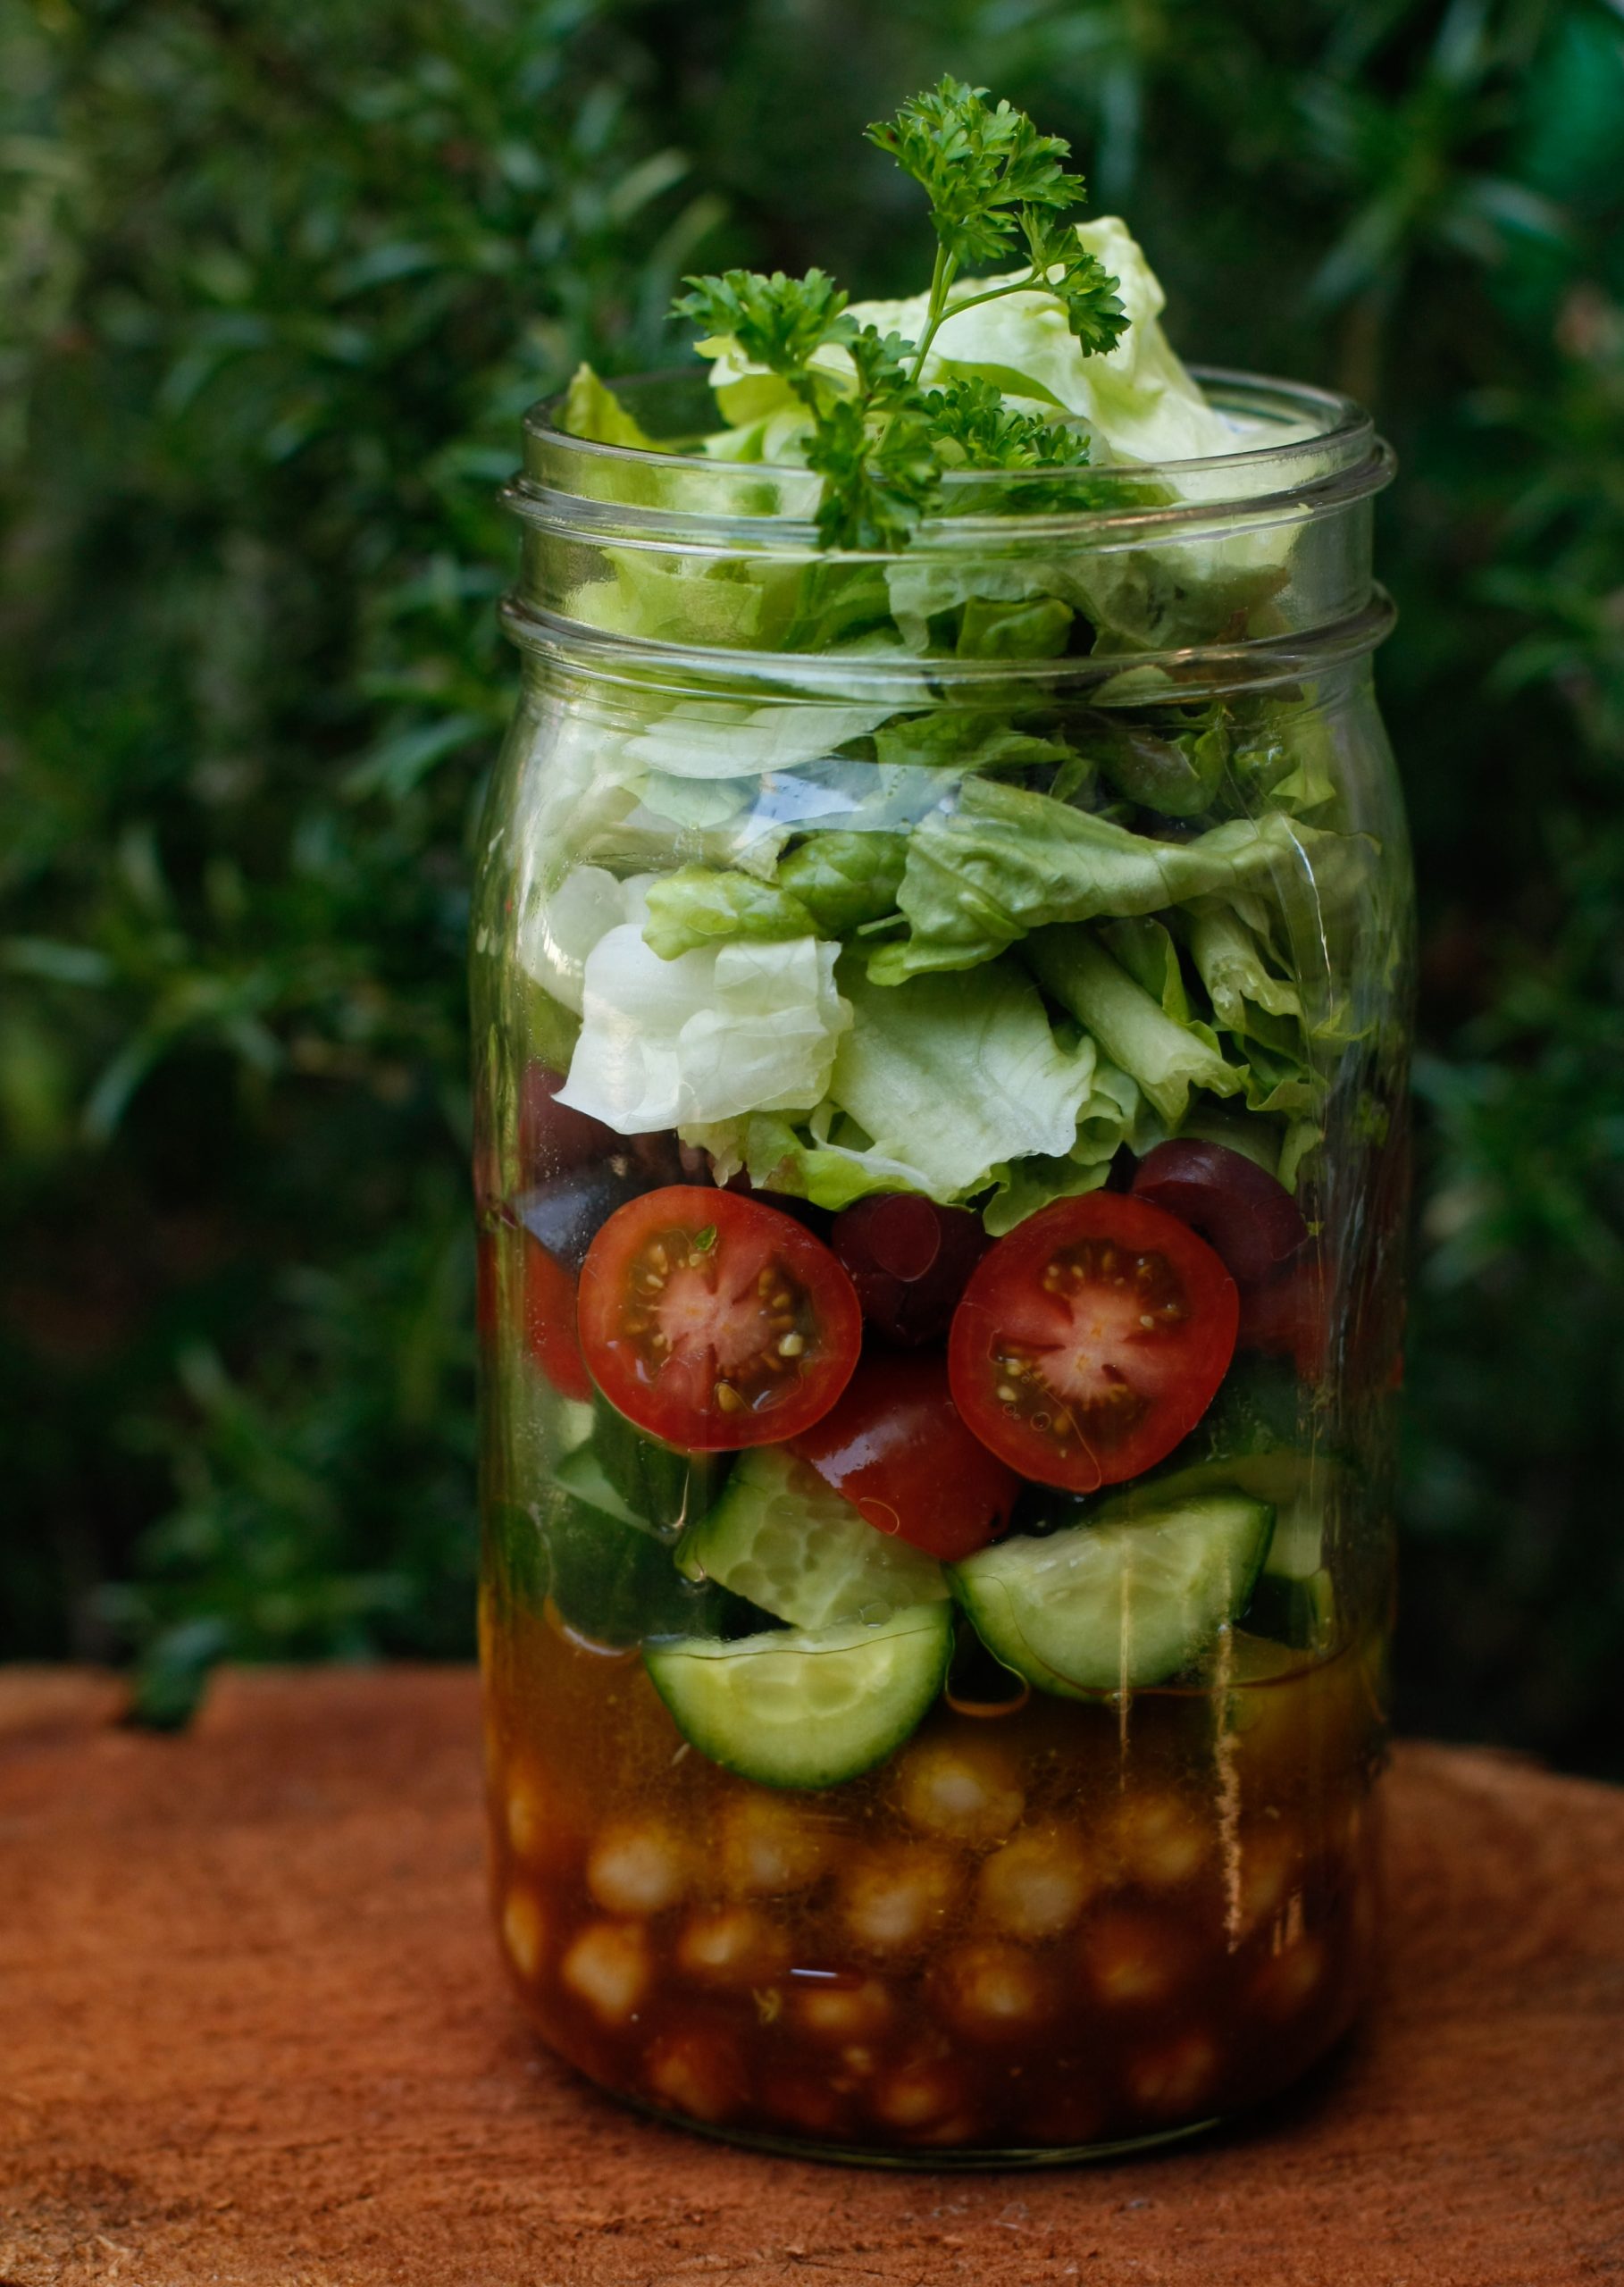
Jar Salad: Mediterranean Style
Jar Salad: Mediterranean Style
Serves Makes 32 ounce mason jar salad
Ingredients:
Simple yet satisfying, this Mediterranean Style salad is one of the best healthy meals on the go.
Balsamic Vinaigrette (makes 3⁄4 cup)
1⁄2 cup olive oil
1⁄4 cup balsamic vinegar
1 clove garlic, pressed or minced
1 teaspoon Dijon mustard
1 teaspoon maple syrup
1 teaspoon tamari
1 teaspoon sea salt and more to taste
black pepper to taste, optional
Jar salad:
1⁄2 cup Balsamic Vinaigrette
1⁄2 – 1 cup cooked garbanzo beans
1⁄4 cup cucumber, chopped
4 – 5 cherry tomatoes, sliced into halves
5 – 6 pitted Kalamata olives, sliced
Romaine lettuce or butter lettuce, torn into bite sizes
Instructions:
To make Balsamic Vinaigrette:
- Combine all dressing ingredients in a glass jar with a tight-fitting lid.
- Place the lid on the jar. Shake well until thoroughly combined. Dressing will keep in refrigerator for up to 5 days.
To construct jar salad:
- Place dressing on the bottom, next add cooked garbanzo beans.
- Layer cucumber, cherry tomatoes, Kalamata olives with lettuce on top.
- Place the lid and keep in refrigerator. It is best to store it in refrigerator. If weather is warm or hot, make sure to bring jar salad in a cooler with ice pack.
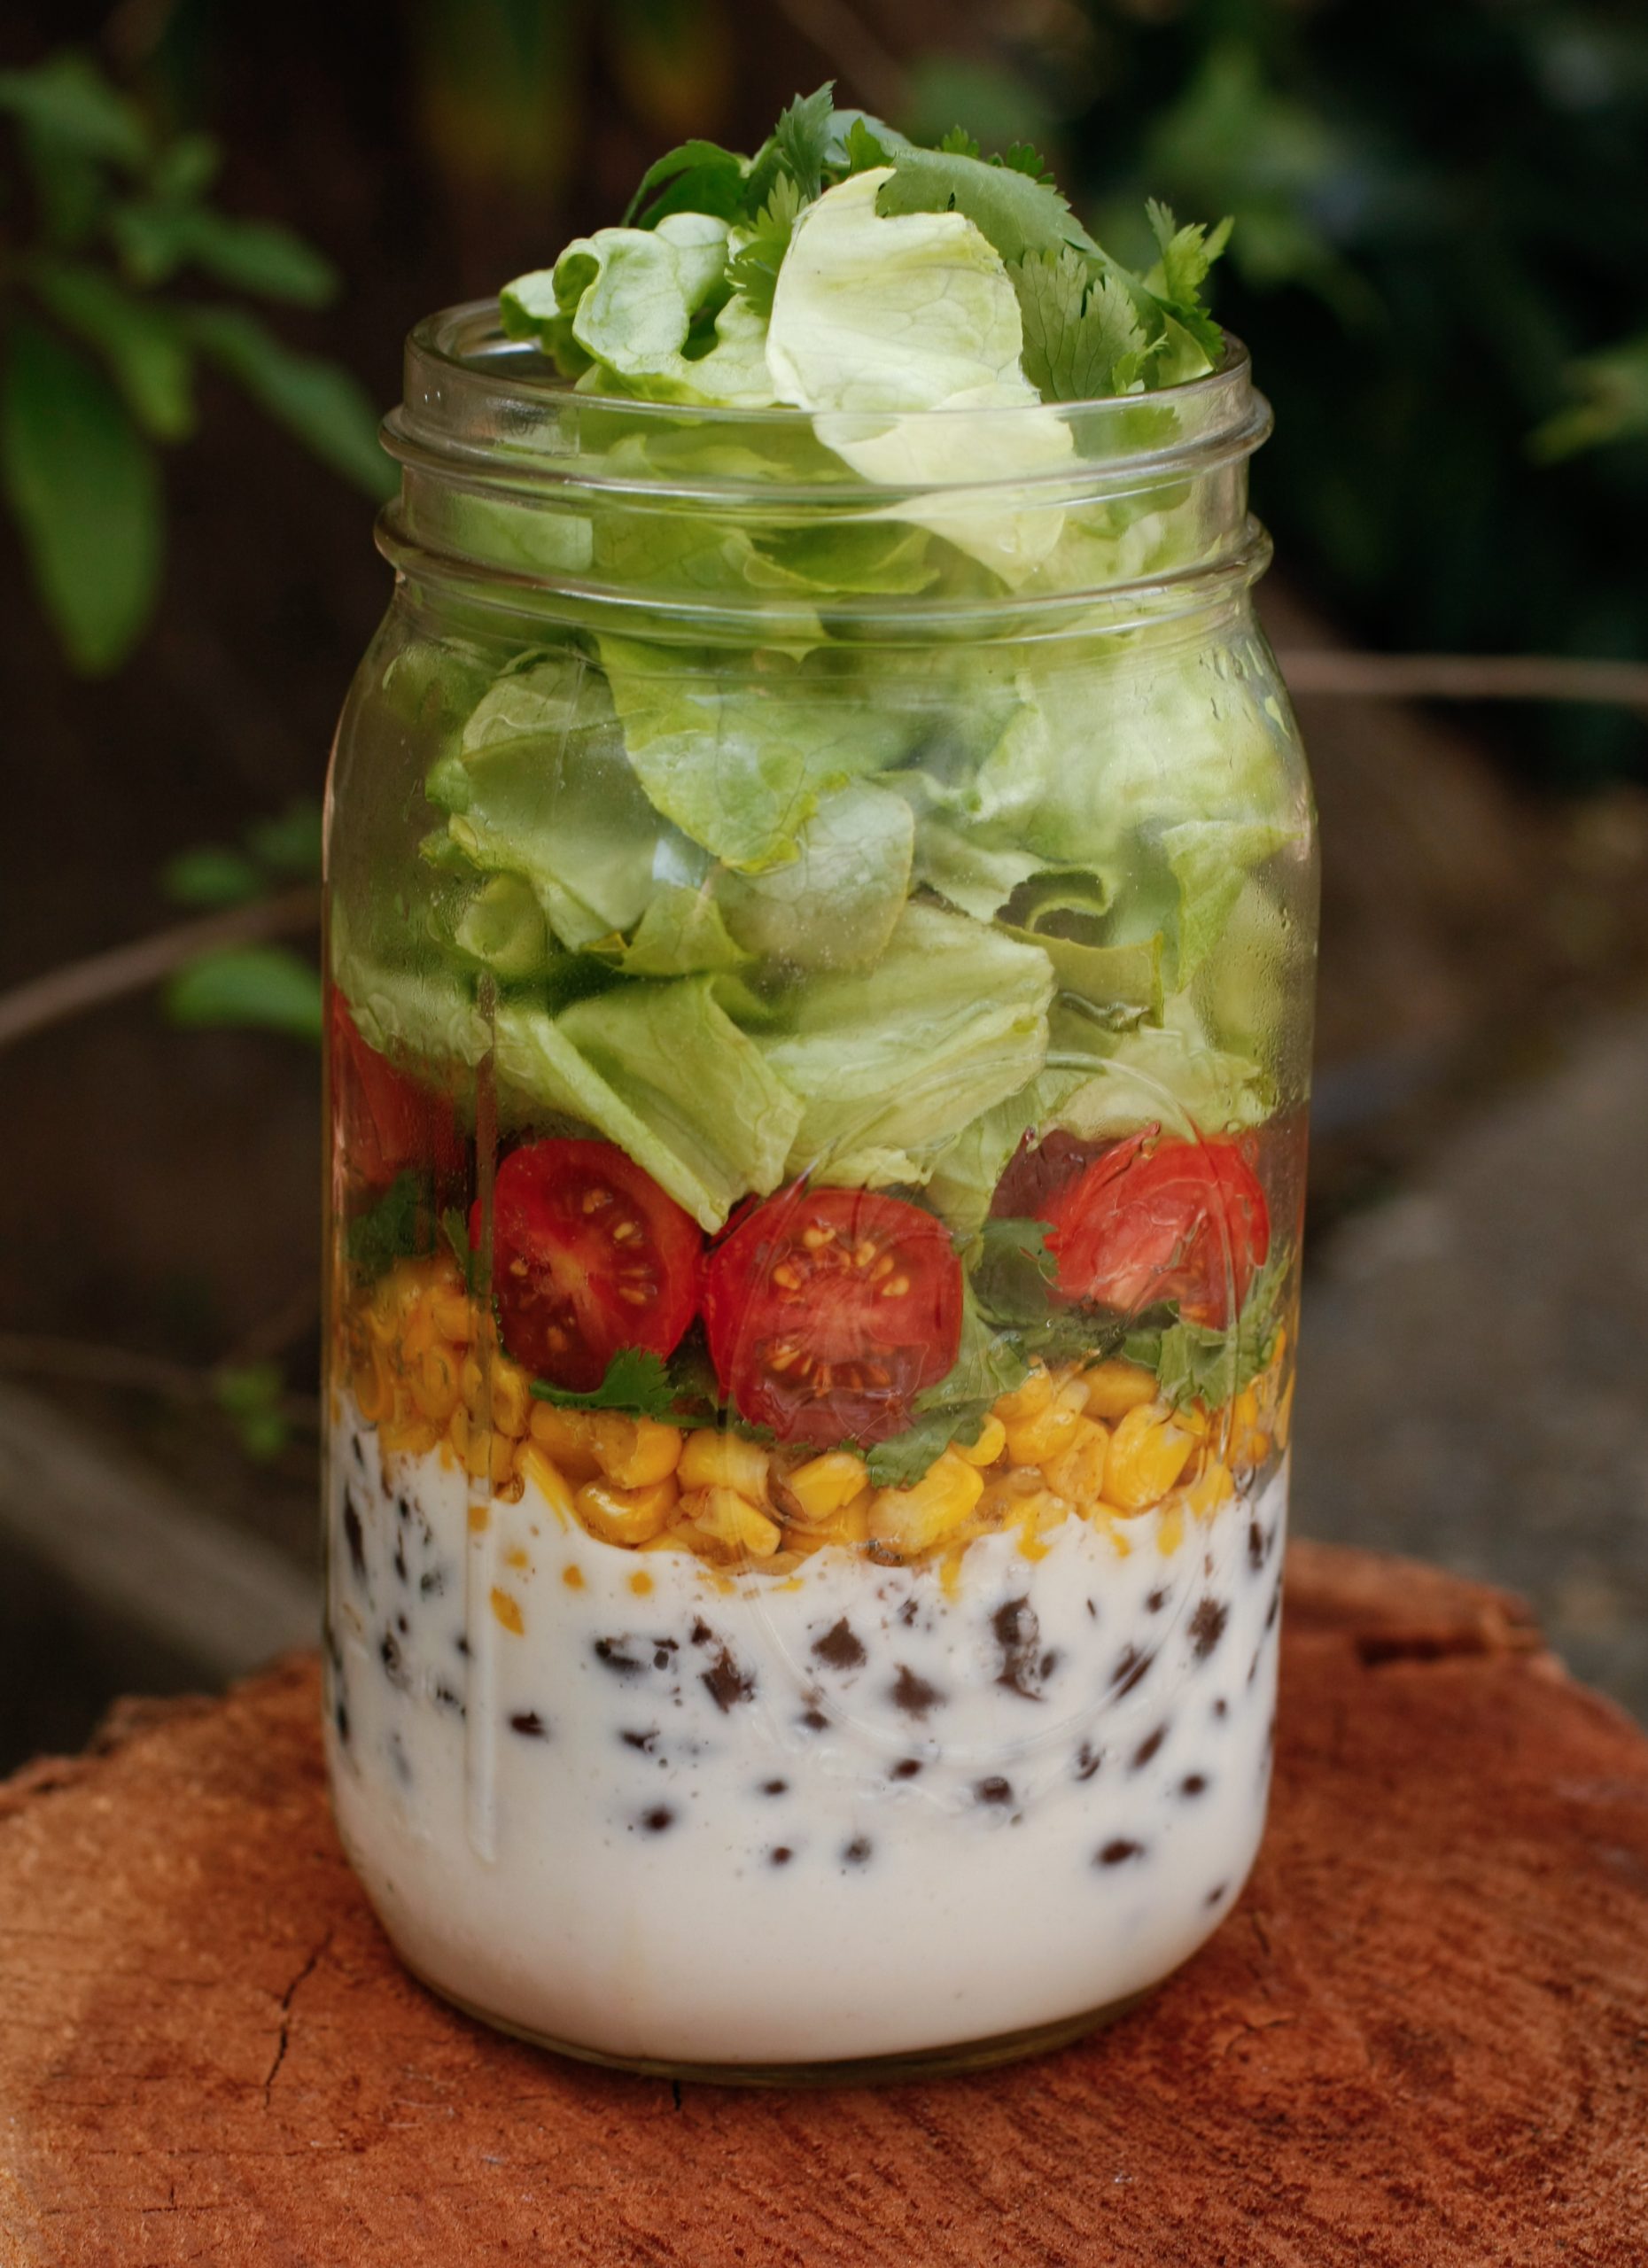
Jar Salad: Southwest Style
Jar Salad: Southwest Style
Serves Makes 32 ounce mason jar salad
Ingredients:
A healthy meal on the go, this Southwest Style salad provides you fresh and full
energy packed in one jar. A perfect meal on a summery day.
Vegan Ranch Dressing: (makes about 2⁄3 cup)
1⁄2 cup vegan yogurt, plain
1 tablespoon lime or lemon juice
1 teaspoon apple cider vinegar
1⁄2 teaspoon garlic powder
1⁄2 teaspoon umeboshi vinegar
1⁄2 teaspoon sea salt or to taste
1 tablespoon olive oil
black pepper to taste, optional
Southwest Style Sautéed Corn:
1 tablespoon olive oil
3 cups frozen corn
1⁄2 teaspoon sea salt, more to taste
1 teaspoon cumin
1⁄4 teaspoon smoked paprika
Jar salad:
1⁄2 cup Vegan Ranch Dressing
1⁄2 – 1 cup cooked black beans
1⁄4 cup Southwest Style Sautéed Corn
4 – 5 cherry tomatoes, sliced into halves
Romaine lettuce or butter lettuce, torn into bite sizes
1⁄4 cup packed, cilantro leaves
Instructions:
To make dressing:
- In medium bowl, whisk all ingredients until combined and smooth.
- Adjust flavor by adding a little more sea salt if desired. Store dressing in refrigerator for 4-5 days.
To make Southwest Style Sautéed Corn:
- Heat skillet over medium flame, add olive oil, corn and sea salt. Sauté until corn becomes tender.
- Turn flame to low, add cumin and smoked paprika, stir gently for about 3 minutes. Set aside to cool.
To construct Jar Salad:
- Place dressing on the bottom, next add cooked black beans, then sautéed corn.
- Place cherry tomatoes, lettuce and cilantro on top.
- Place the lid on jar and keep in refrigerator. If weather is warm or hot, make sure to bring jar salad in a cooler with ice pack.
Chef’s tip: Make sure to choose good quality unsweetened plant based yogurt. My recommendation is either Forager project’s “organic cashew milk yogurt” or Trader Joe’s “organic cashew milk cultured yogurt alternative”. They are both high quality and rich and creamy to make nice vegan creamy dressings. For variation, you can add almonds or other chopped nut and seeds to the salad as topping.
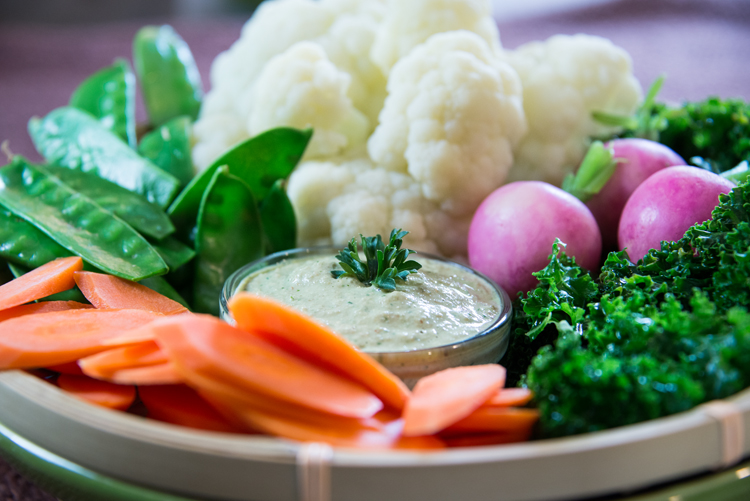
Quick Blanched Vegetables
Quick Blanched Vegetables
Serves 4
Ingredients:
1 carrot, cut into matchsticks or diagonals
2 radishes, cut into slices
4 leaves of kale, torn into bite size pieces
½ leek, cut into thin slices
Water
Sea salt
Instructions:
- Place several inches of spring water and a pinch of sea salt in a pot and bring to a boil.
- Drop cut carrots into the water until they become bright in color, usually 20-30 seconds. Remove and let cool.
- Add radish and boil until it becomes bright but still crunch, usually just a few seconds. Remove and let cool.
- Repeat with the kale, then the leek.
- Mix all the vegetables together and eat plain, with fresh squeezed lemon juice or with a dressing.
Tips:
- Vegetables should be bright and crispy, but not raw. The goal is to remove the vegetables from the water when their color is the brightest.
- Cook the mildest tasting vegetable first, so that it retains its distinctive flavor and color.
- Most vegetables can be cooked in this manner including summer squash, bok choy, broccoli, collard greens, onions, turnips, radishes, cabbage, cauliflower, collard greens, snow peas, celery, and beets.
- Make fresh daily and eat within 12 hours.
- This is a great way to cook vegetables for breakfast, and take the leftover to work for lunch.
Savory Vegan Gluten Free Pancake
Savory Vegan Gluten Free Pancake
Serves 5-6 pancakes
Ingredients:
This is inspired from a Korean vegetable pancake called, Yachaejeon. It is adapted into a gluten free version, so it’s much easier on your digestion. It is topped with a savory Tamari vinaigrette sauce, and will be a treat for the whole family. You can top with vegan mayo if you desire.
Batter:
1 cup chopped scallions
2 cups matchsticks zucchini (1 medium zucchini)
1 cup onion (1 medium onion)
2⁄3 cup carrot (1 small carrot)
1⁄2 cup matchsticks sweet potatoes (1 small sweet potato)
4 brown mushrooms, thinly sliced
13⁄4 cup superfine rice flour *
1⁄4 cup arrowroot flour
2 cups water
1⁄4 teaspoon sea salt
Sunflower or Safflower oil to pan fry
Sauce:
4 tablespoons tamari
2 tablespoons rice vinegar
1 tablespoon toasted sesame seeds
2 tablespoons chopped scallions, optional
Instructions:
To make batter:
- Place all the ingredients from the batter list in a mixing bowl. Mix well until well combined.
To fry pancakes:
- Heat a well seasoned cast-iron skillet (or a natural non stick frying pan) over medium heat, spread about 1 tablespoon oil, then place about 1 1⁄2 cup batter, spreading into about 6 inch round shape.
- Panfry over medium to medium-low heat about 4 minutes until crispy and golden brown, flip with spatula, add 1⁄2 tablespoon oil, panfry the other side about 3-4 minutes until golden.
- Serve immediately with the dipping sauce.
*Chef’s Tip: It is important to use superfine rice flour for a crispy and fluffy texture for the pancakes. Regular grainy rice flour produces a much more dense texture. Usually you can find superfine rice flour online or in Asian grocery stores.
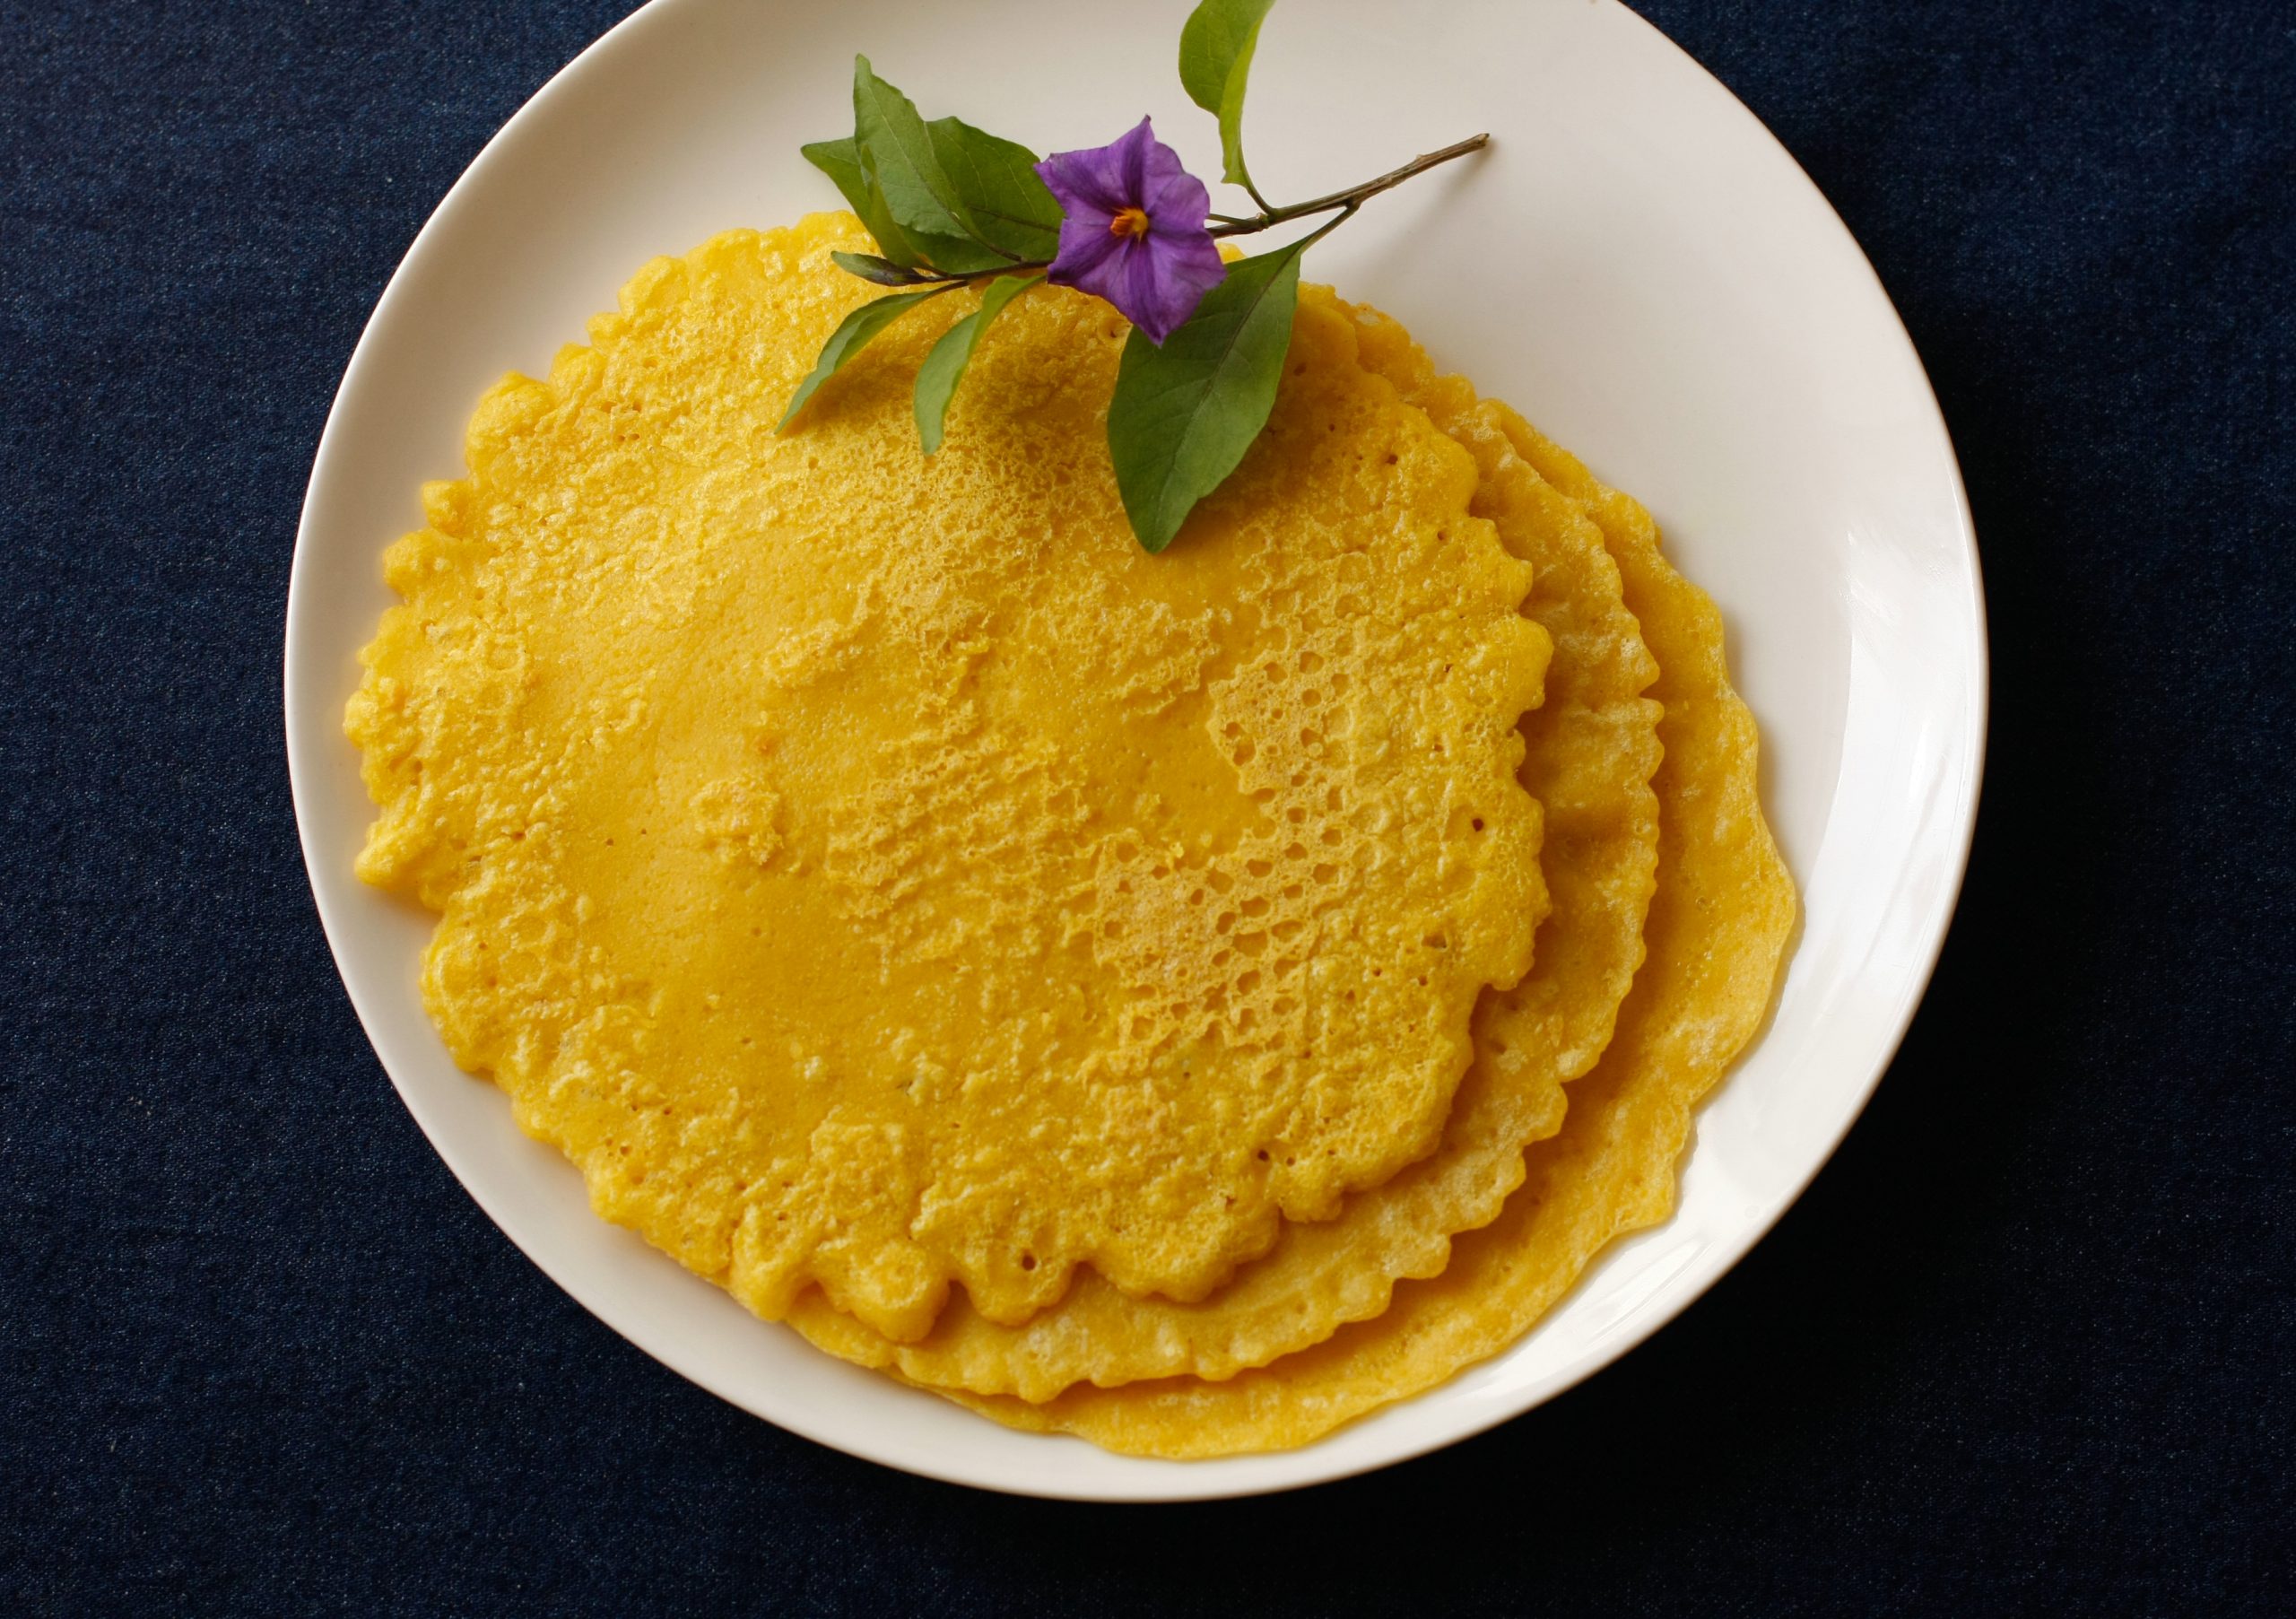
Socca: Chickpea Flour Crepe (Gluten-Free)
Socca: Chickpea Flour Crepe (Gluten-Free)
Serves About 5 Socca
Ingredients:
Made with chickpea flour, Socca is a savory crepe that is popular in southern France. Simple to prepare, this gluten free treat can provide a great cooking activity for parents and children, and can also be a quick fix for busy families. You can use Socca to make a wrap, or pile it high with your favorite toppings, like stir fry vegetables, to make it a part of satisfying meal.
Socca batter:
1 1⁄2 cup chickpea flour
1⁄4 teaspoon sea salt
1⁄4 teaspoon turmeric
1 1⁄2 cup water
3 tablespoons olive oil
more olive oil for panfrying
Instructions:
- In medium bowl, whisk chickpea flour, sea salt and turmeric. Add water and olive oil, whisk well until combined and smooth.
- Prepare cast iron or ceramic based non-stick skillet by heating over medium heat.
- Add about 2 teaspoons olive oil, spread evenly on the surface of the pan. Add about 1⁄2 cup batter to skillet, tilting skillet to coat bottom evenly. Reduce heat to medium-low, cook until crisp at the edges and golden brown on the bottom for about 3-5 minutes.
- Flip Socca and continue to cook until second side is golden brown, about 2 minutes.
- Transfer to a plate and repeat steps 3 and 4 to make more Socca, working with 2 teaspoons olive oil and 1⁄2 cup batter at a time.
Chef’s tip: You can jazz up Socca with adding spices or herbs in batter. I recommend trying with cumin powder and a little black pepper, and also with provincial herbs.
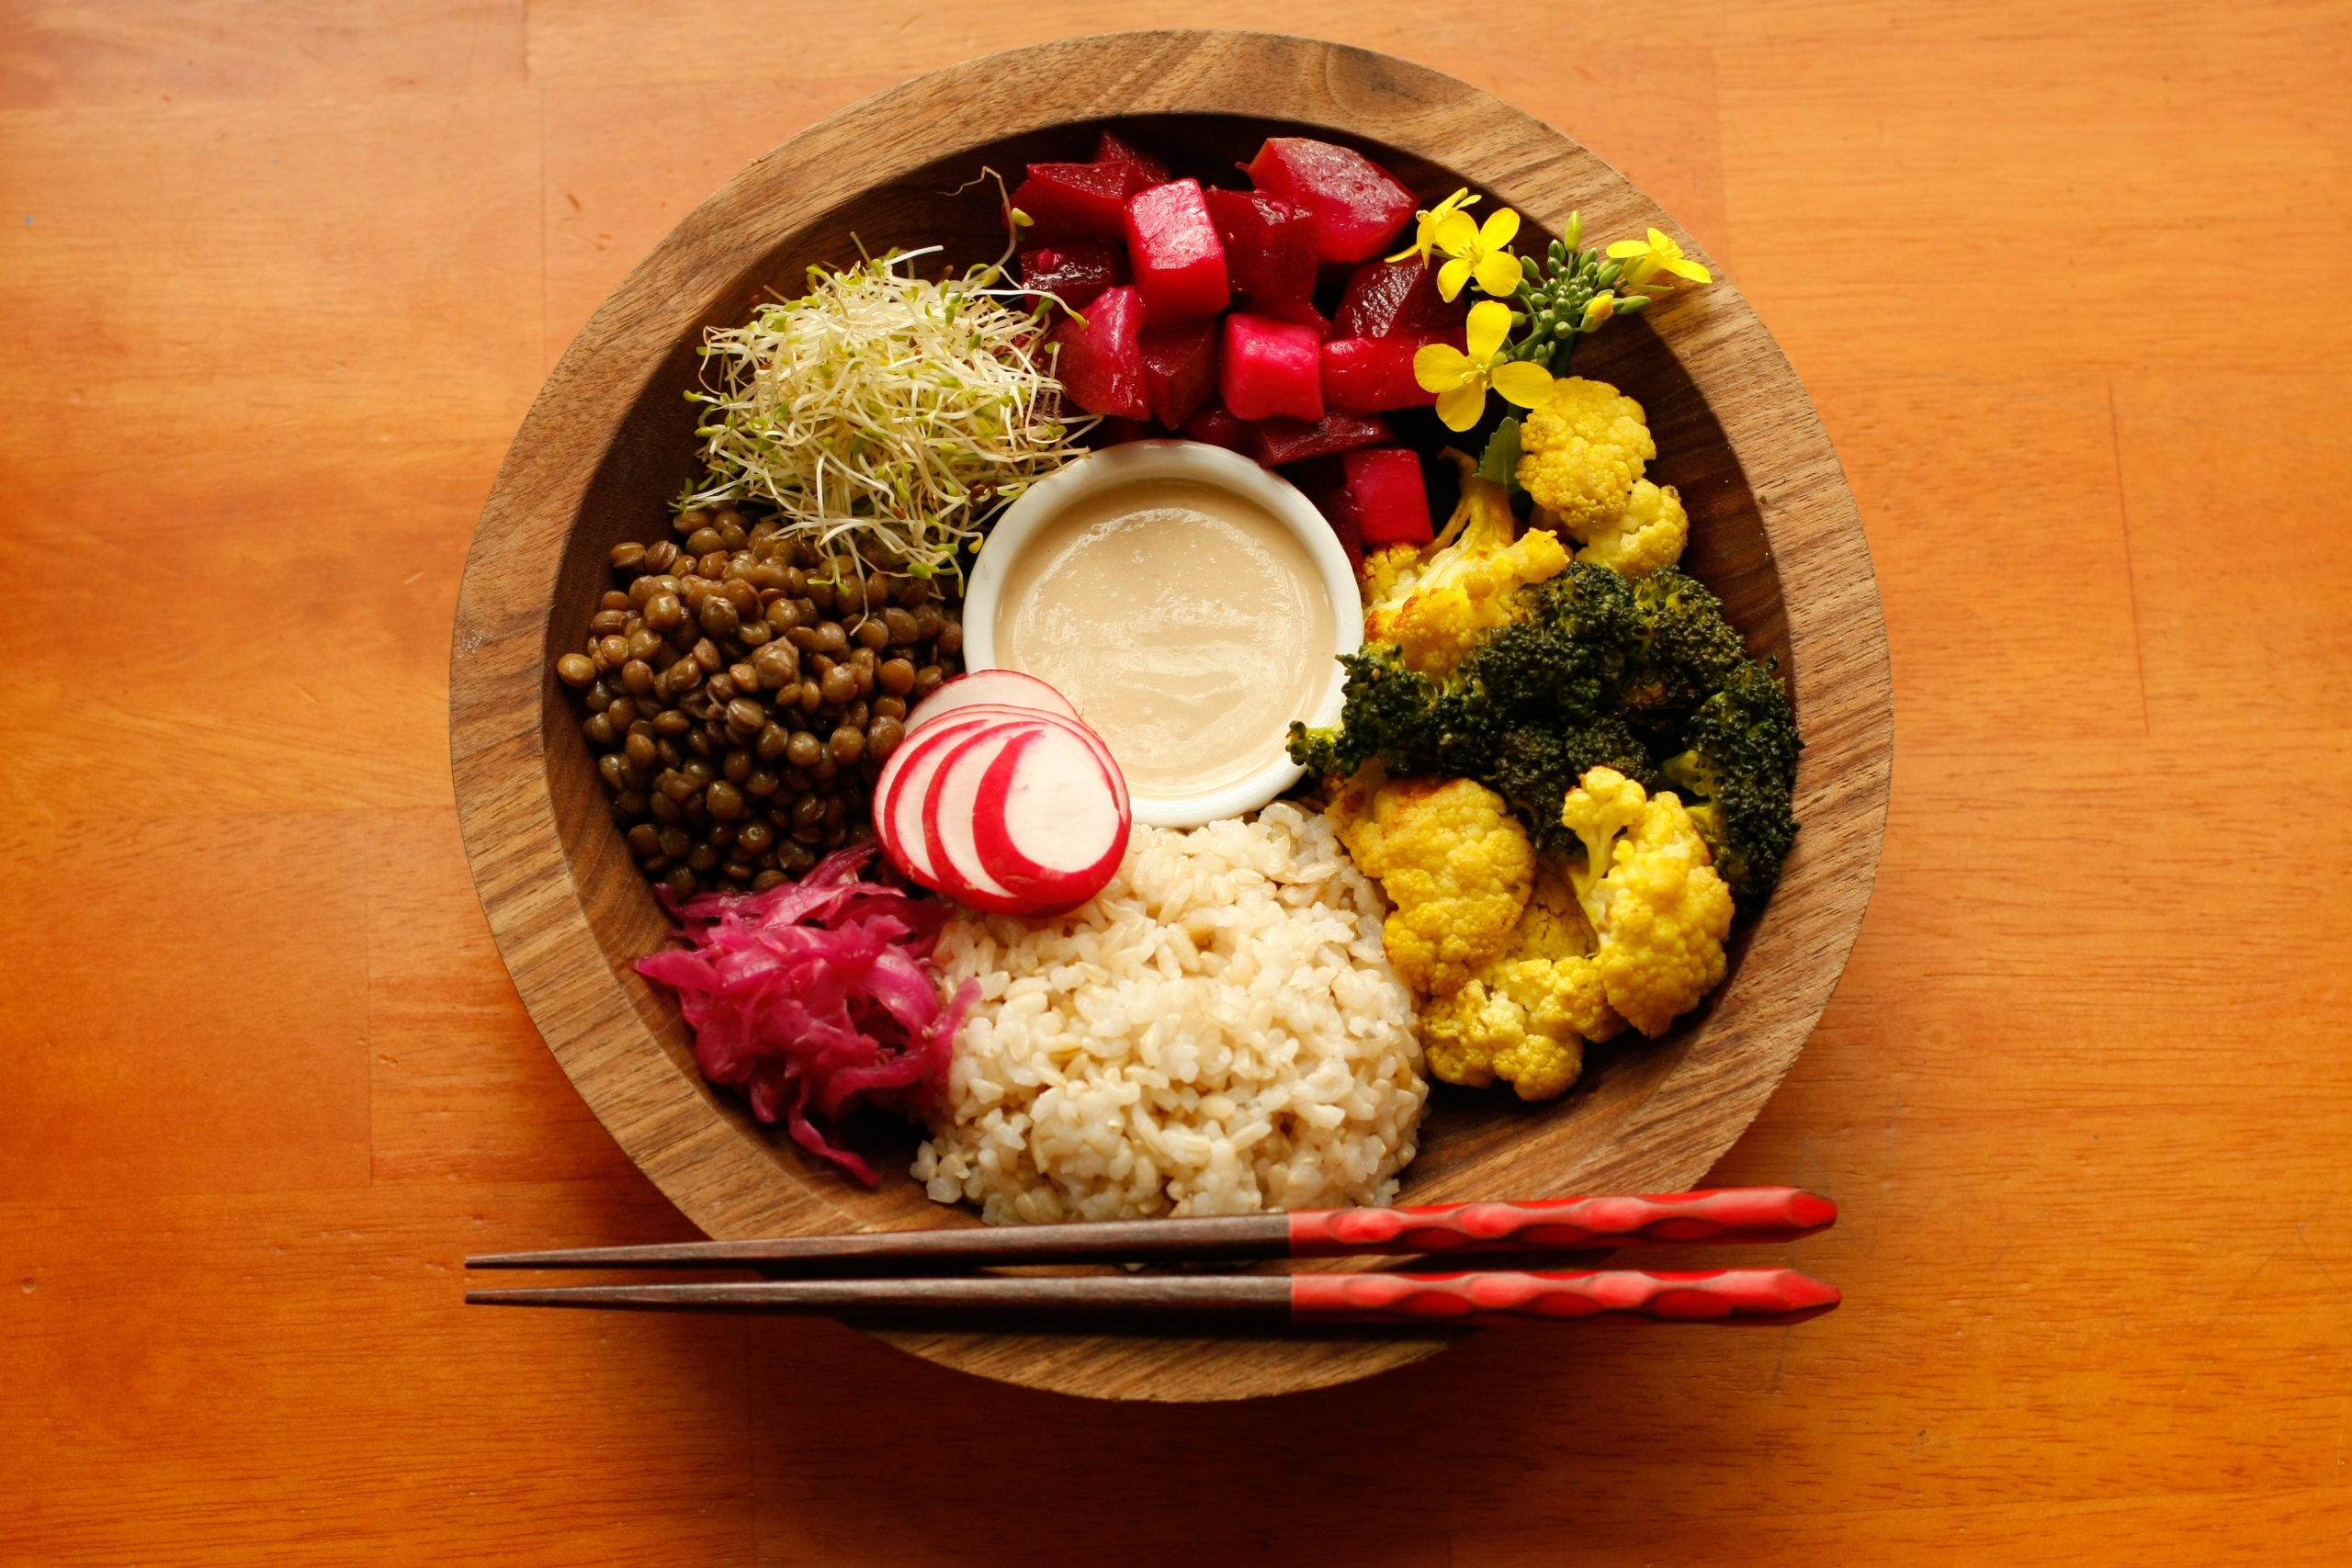
Spring Buddha Bowl
Spring Buddha Bowl
Serves 4 to 5
Ingredients:
The pastels and vibrant colors of these antioxidant rich, deli-style dishes combine with brown rice to make an appetizing buddha bowl. Nutritious and delicious, this bowl is perfect for a springtime luncheon celebration.
Bowl: (construct bowl with following ingredients)
- cooked brown rice (recipe follows)
- beet vinaigrette salad (recipe follows)
- spiced baked cauliflower (recipe follows)
- tahini miso dressing (recipe follows)
- cooked beans of your choice
- sprouts and other fresh vegetables, such as radishes, chopped
- Sauerkraut
Brown Rice
1 cup brown rice
2 cups water
2 pinches sea salt
Beet “Vinaigrette” Salad
3 medium beets, peeled, cubed into about 1⁄2 inch cubes (2 cups)
1 medium sweet potato, peeled, cubed into about 1⁄2 inch cubes (1 cup)
1 cup chopped dill pickles
1⁄2 cup chopped dill or parsley for garnish
Vinaigrette Dressing
1 tablespoon umeboshi vinegar
1 tablespoon apple cider vinegar
2 tablespoons lemon juice
2 tablespoons dill pickle brine
2 tablespoons olive oil
Spiced Baked Cauliflower (you can also use broccoli)
1 medium head cauliflower, cut into bite size florets (about 1 pound)
1⁄4 teaspoon sea salt
1⁄4 teaspoon cumin
1⁄4 teaspoon turmeric
3 – 4 tablespoons safflower oil
a little lemon juice for topping, optional
Tahini-Miso Dressing
1⁄4 cup tahini butter
2 tablespoons sweet white miso
1⁄4 cup lemon juice (juice of 1 medium lemon)
1⁄4 cup water
a little sea salt to taste
Instructions:
Brown Rice
- Soak washed brown rice with water overnight.
- Place rice, soaking water and sea salt in saucepan, bring to a boil.
- Cover, lower heat to low, simmer for 45 minutes. Remove from heat, let the pot sit for 5 minutes to steam before using in bowl.
Beet “Vinaigrette” Salad
- Steam beets until tender, for about 8 – 10 minutes. Set aside to cool.
- Steam sweet potatoes until tender, for about 6 – 8 minutes. Set aside to cool.
- Make vinaigrette dressing by mixing the ingredients well.
- In medium bowl, place steamed beets, sweet potatoes, chopped dill pickles, and parsley. Add vinaigrette dressing to your taste and marinate the salad for a couple of hours or overnight before using.
- Serve with garnish.
Spiced Baked Cauliflower (you can also use broccoli)
- Set oven at 350°F. Prepare an oven tray by lining a parchment sheet.
- In large bowl, place cauliflower florets and sprinkle with sea salt, cumin, turmeric and safflower oil. Massage to combine well.
- Spread the cauliflower florets onto oven tray. Bake them for about 20 – 30 minutes, until golden. Flip the cauliflower florets and rotate the pan half way through cooking time.
- Drizzle a little lemon juice if desired and serve.
Tahini-Miso Dressing
- Place tahini, miso, and lemon juice in mixing bowl. Using a whisk or spatula to mix until well combined.
- Add water and mix until smooth. You may need to add more or less water to reach a desired consistency.
- Adjust flavor by adding a little sea salt if desired
- Keep in the refrigerator for 3-5 days.
Constructing a bowl:
- Place a serving of cooked brown rice into a bowl.
- Arrange beans, vegetables and sauerkraut in smaller portions around the edges of the bowl, forming a colorful wheel.
- Drizzle the tahini dressing over the rice and vegetables, or serve the dressing in a small dipping cup in the center of the bowl.
Spring Stir Fry with Vegan Oyster Sauce
Spring Stir Fry with Vegan Oyster Sauce
Serves 3 -4
Ingredients:
This quick stir fry has a sweet and savory sauce that will make your vegetables sing! It’s
a fabulous side dish that will satisfy your palate.
1 1⁄2 -2 tablespoons sesame or safflower oil
1 tablespoons minced ginger
1 medium leek, slice in middle, cleaned well and thinly sliced
1 medium carrot, thinly sliced
4 – 5 cups chopped bok choy, separate white and green parts
vegan oyster sauce:
1 tablespoon coconut amino
1 tablespoon tamari
1 teaspoon toasted sesame oil
1 teaspoon rice vinegar
Instructions:
- Over medium heat, heat large skillet until hot, place sesame oil and minced ginger into the skillet. Sizzle ginger for about 20 seconds until aromatic. Be careful not to burn minced ginger. Lower heat, if it turns brown quickly.
- Over medium heat, place leek and carrot into the skillet until leek becomes translucent, for a couple of minutes.
- Add white parts of bok choy and sauté for 1-2 minutes until white parts become translucent. Then add green parts of bok choy; keep sautéing for about 1 -2 minutes until green parts of bok choy become tender.
- Pour vegan oyster sauce into vegetable mixture to your taste, lower heat and gently mix the stir fry.
- Serve immediately.
Chef’s tip:
Using toasted sesame oil in sauces and dressing makes great Asian style sauces. However, they can go bad rancid easily, so keep them in refrigerator. For sautéing dishes, I recommend using regular tan sesame oil or good quality plant-based oils such as safflower oil.
Tempeh “Tuna” Salad
Tempeh “Tuna” Salad
Serves 3 to 4
Ingredients:
This dish is great for summer and is quick, easy and gives you a complete protein when made with soy-based tempeh. I like to eat it over a bed of quinoa and lettuce and then topped with avocado slices.
Tempeh is a traditional fermented soy product originating from Indonesia. The fermentation of the beans allows for easy digestion as well as access to a high content of protein, dietary fiber and B vitamins. It has a firm texture and is usually formed into square or rectangle cakes.
When cooking tempeh it’s always best to boil it with a small piece of kombu prior to adding it to dishes. Boiling ensures that the tempeh is full cooked and will best support our bodies with easily accessible and assimilated minerals. It can then be added to other dishes or sautéed, seasoned and eaten.
Tempeh Tuna Salad
1 8-ounce package tempeh
1 inch piece of kombu
¾ T umeboshi vinegar
⅓ cup tofu mayonnaise* or veganaise
Black pepper to taste
Cumin or paprika to taste (optional)
1 celery stalk, diced
¼ red onion, finely diced
1 T capers (optional)
1-2 T toasted walnuts (optional)
2 T chopped red or green grapes (optional)
Tofu Mayonnaise
8 ounces soft tofu
4 t umeboshi vinegar
¼ t sea salt
Juice of 1 lemon
1 T organic mustard
1 T brown rice vinegar
Instructions:
Tempeh Tuna Salad
- Boil the tempeh with a 1-inch piece of kombu for 20 minutes to make it more digestible.
- Transfer to a bowl and break apart with a fork until you get smaller-than-bite-sized pieces.
- Sprinkle the umeboshi vinegar onto the tempeh, mashing it with a fork.
- Mix mayonnaise/vegainase, pepper and any other spices. Add vegetables, nuts, capers and grapes and mix everything together.
- Serve or refrigerate-it tastes even better the next day.
Tofu Mayonnaise
- Place the tofu in boiling water and let simmer for 5 minutes. Allow it to slightly cool. Place all ingredients in a food processor and blend until very smooth. Chill and use. Will last in the refrigerator in a sealed glass container for approximately 1 week.

Tofu Quiche with Gluten Free Crust
Tofu Quiche with Gluten Free Crust
Serves 8 (9.5 inch pie plate)
Ingredients:
You won’t believe this rich and hearty quiche is vegan. Perfect for a special party
menu or a Sunday brunch.
Crust:
1⁄2 cup brown rice flour
1⁄2 cup gluten free oat flour
1⁄2 cup gluten free rolled oats
1⁄4 teaspoon sea salt
1⁄4 cup olive oil
3 – 4 tablespoons water (adjust dough by adding less or more water for doughy consistency)
Sautéed vegetables:
1 tablespoon olive oil
2 cloves garlic, minced
1 medium onion, diced
few pinches sea salt, plus more to taste
2 cups mushrooms, sliced
1⁄2 cup broccoli, blanched
1⁄4 cup green peas, frozen
1⁄4 teaspoon thyme
Tofu mixture:
1⁄2 cup broccoli
1 (14 ounce) package tofu, pressed for 30 minutes, drained
1 tablespoon white miso
1 tablespoon umeboshi vinegar
1 tablespoon arrowroot powder
1⁄4 teaspoon turmeric
Instructions:
To make crust:
- Preheat oven to 350°F. In a mixing bowl, place flour, rolled oats and sea salt. Mix well with spatula.
- Slowly add olive oil and mix with a fork. Mix with your hands to form crumbles.
- Slowly add water one tablespoon at a time, checking after each tablespoon to see if it’s enough water to make it a doughy consistency. If the dough is still dry after 3 tablespoons of water, add a little more water. Mix with hands to make a round dough. Spread the dough in an oiled pie dish.
- Puncture with a fork to make many small holes for air to circulate during baking.
- Bake for 10 minutes. Set aside to cool.
Sautéing vegetables for tofu mixture:
- Heat oil in skillet, add onions, garlic and a couple pinches of sea salt. Sauté until color turns translucent.
- Add mushrooms, a couple more pinches of sea salt, and continue to sauté until mushrooms are tender.
- Add green peas and thyme, sauté for a few more minutes. Set aside to cool.
To make tofu mixture:
- Blanch broccoli and set aside in separate bowl.
- In a food processor, place all of the tofu mixture ingredients except the broccoli. Blend until texture turns smooth. Adjust seasoning if necessary.
- In a large mixing bowl, place tofu mixture, blanched broccoli and sautéed vegetables. Mix thoroughly by using a spatula.
To bake tofu quiche:
- Heat oven to 350°F. Place tofu filling in the quiche crust and spread evenly.
- Bake the quiche for 30 to 40 minutes, until the tofu filling becomes set and the surface turns golden.
- Using a pastry brush, spread a little olive oil on the top to give a shine to the surface.
- Cool for about 30 minutes to allow the quiche to fully set before slicing and eating.
Veggie Nori Rolls — A Great Travel Food
Veggie Nori Rolls — A Great Travel Food
Ingredients:
Nori rolls are easy, tasty, and a great food for travel. I’ve made them the night before travel and taken them on airplanes, long car trips, and for picnics on the beach. They keep for a few hours outside of refrigeration, or longer in a cooler with some ice. If you are looking for a travel food that can keep for a few days without refrigeration, try my backpacker’s energy rice balls recipe.
My favorite veggie nori roll combination is fried tofu, avocado, carrots and mustard, but you can do a variety of foods including green onions, tempeh, asparagus, cucumber and sauerkraut. For a different seasoning, try umeboshi paste or tahini.
1 ½ cups short grain brown rice
1 ½ cups sweet brown rice (if you can’t find this, just use regular short grain brown rice)
6 cups water
¼ t sea salt
½ block firm tofu, cut into 1-inch thick strips
2 T safflower or avocado oil
1 carrot, cut into matchsticks
½ avocado, cut into strips
Nori sheets
Mustard or umeboshi paste
Toasted sesame seeds
Instructions:
- Rinse rice and soak in 6 cups water for 3-5 hours or overnight.
- Measure the discarded soaking water, and place the same amount of fresh water in a pot with the rice.
- Bring to a gentle boil over medium heat and add salt.
- Cover and simmer 45 minutes. Then remove from heat, keeping the lid on, and let sit for 10 minutes.
- Remove lid and stir with a wooden spoon to aerate. Transfer to a bowl to cool.
- Meanwhile, heat oil in a heavy skillet. Once it is warm (it will lightly sizzle when you add a piece of tofu), add the tofu pieces one at a time.
- Cook the tofu on each side 4-6 minutes until golden brown.
- Remove and place on a paper towel to cool and drain.
- While the tofu is cooking, bring a pot of water to a boil. Once it is at a rolling boil, add the carrots until bright in color, approximately 15 seconds. Remove and place on a plate to cool.
- To assemble the rolls, have the nori sheets, vegetables, tofu, seeds, mustard all easily accessible.
- Lay your sushi mat in front of you and place a sheet of nori on the mat, horizontally and shiny side down onto the mat.
- Wet your fingers, take ½ cup of rice and place it onto the sheet of nori, spreading it about ½ inch think. Make sure to place it all the way to the sides, but leave a ½-inch margin along the edge closest to you and 1-2 inch margin along the edge farthest from you.
- Sprinkle 1-2 teaspoons of toasted seeds on the rice, then layer with a line of mustard or umeboshi paste.
- Layer the fried tofu, avocado and carrot on the rice.
- Using your thumbs on the outside of the sushi mat while your fingers curl over and steady the filling, gently roll the mat away from you – bringing the sheet of nori and contents with it.
- Continue to roll and release the sushi, while releasing the mat, so the mat doesn’t get caught up in the food.
- When you get to the edge of the nori, wet your finger and drag it along the exposed edge of nori. Continue rolling to seal the sushi.
- While the mat is over the sushi, gently press around to tighten the circular roll.Remove the mat and slice the roll in half with a wet vegetable knife. Then slice each half again, and again, to make pieces. It’s helpful to wet the edge of the knife prior to cutting each piece and to make sure you have a nice sharp knife.

Start Your Journey to Wellness
Our online tool matches you with personalized treatment recommendations based on your unique concerns.